Advanced rules
Advanced rules let you combine trigger conditions with AND/OR logic to control exactly which orders require ID verification.
Basic triggers are non-exclusive — if any enabled trigger matches, an ID check is sent. That works well for simple policies, but it can't express requirements like:
"Require ID verification only when the order ships to Connecticut and contains ammunition."
With basic triggers, enabling U.S. shipping states and Specific products separately would send checks for every Connecticut order and every ammunition order. An advanced rule combines them into a single condition group, so only orders matching both are verified.
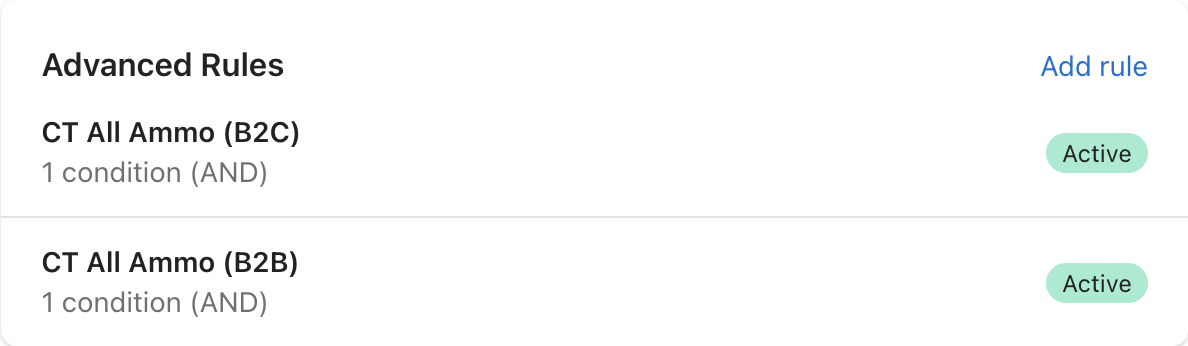
Advanced rules are available on the Automate and Protect plans, on Shopify. If you're on another plan, the Advanced rules tab shows a lock — clicking it opens the plans page.
Where to find it
Advanced rules live in the Settings page, in the trigger section of your verification flow:
- After checkout — the trigger settings show a Basic triggers / Advanced rules switcher at the top. All conditions are available here, since the full order (payment, delivery method, risk analysis) is known after checkout.
- During checkout — the same switcher appears in the checkout extension's filter settings. Conditions that depend on data that doesn't exist yet before the order is placed aren't offered here — see Conditions.

Switching between basic and advanced
The two modes are mutually exclusive, but both configurations are always preserved:
- Switching to Advanced rules deactivates your basic triggers. Your basic trigger settings are saved and restored if you switch back.
- Switching to Basic triggers deactivates your advanced rules. Your rules are saved and restored if you switch back.
You have one set of advanced rules, and it applies wherever ID checks are triggered — before, during, and after checkout. Enabling, disabling, or editing a rule affects every flow at once. If a rule uses conditions that can only be evaluated after checkout and you switch to an earlier flow, Real ID disables that rule for you — see flow compatibility.
Anatomy of a rule
Each rule has a name and a condition group. A group matches either ALL of its conditions (AND) or ANY of them (OR), and groups can be nested up to two levels deep for logic like (A AND (B OR C)).
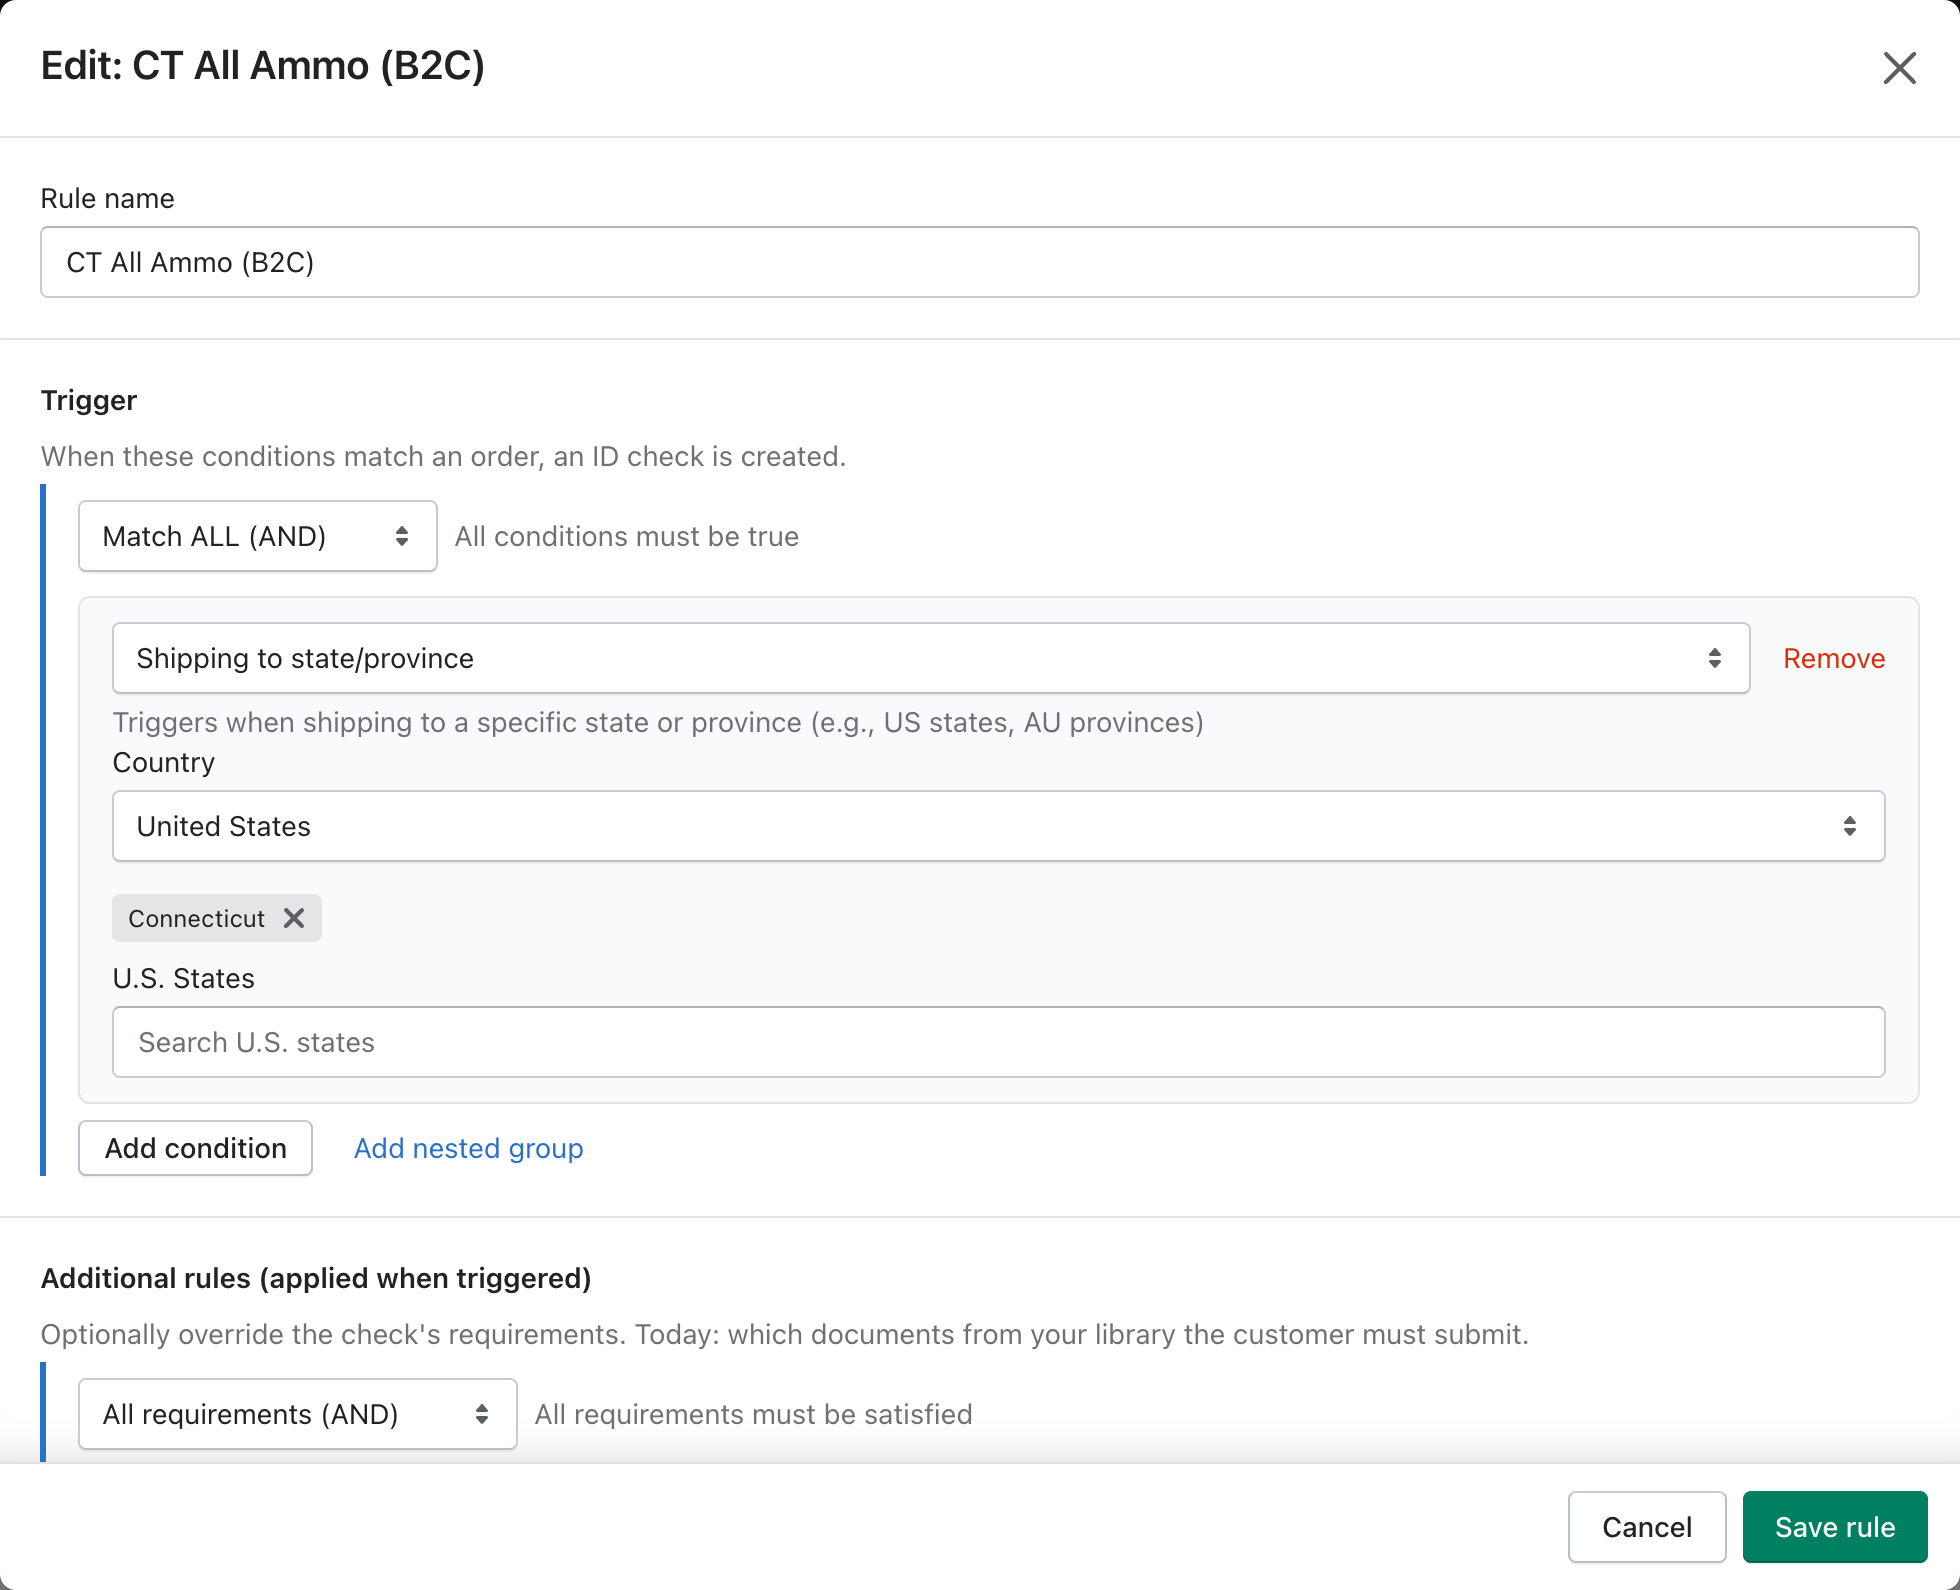
To create a rule:
- Open the Advanced rules tab and click Add rule
- Name the rule — the name appears in your rules list and helps your staff understand the policy
- Choose Match ALL (AND) or Match ANY (OR) for the group
- Click Add condition and configure each condition; use Add nested group for mixed AND/OR logic
- Click Save rule, then Save the settings page
A few things to know:
- Rules combine with OR. If any enabled rule matches an order, the customer is sent an ID check. Use multiple rules for independent policies (e.g., one rule per restricted state).
- Rules can be disabled without deleting them. Use the Disable action in the rules list to pause a policy while keeping its configuration.
- You can have up to 50 rules.
- Exceptions still apply. Orders from already-verified customers, in-store pickups, and your other configured exceptions are skipped before rules are evaluated.
Next steps
- Conditions — every available condition, and which flows support it
- Examples — recipes for common policies