Release holds after ID verification with Shopify Flow (free template)

To save time, automate the process with Shopify Flow. It's free, and you don’t need any coding skills to set it up. Let’s dive in!
Getting Started
This guide assumes you have already set up holding of high risk orders with another Shopify Flow workflow. If you don't already have this process automated, please see our short guide here. Once you have that workflow in place, risky orders that require additional verification will be held.
Then you're ready to automate the next process, which is releasing the hold after the customer has verified their ID with Real ID. You can watch this short screencast to learn how it works, or continue on to download the template and use it yourself.
Install Shopify Flow
Start by downloading and installing Shopify Flow. It’s available for free on all Shopify plans.
Then after you install the app you'll be able to build powerful workflows to automate tasks in your Shopify store.
Download the Workflow Template
You can download your template to save yourself time from building it by hand. This link below will download the workflow file to your device. Then we'll show you how to import it into your Shopify store.
Import the Flow
Now you're ready to open Shopify Flow, and import the template.
Within Shopify Flow, click Import and upload the release-order-hold-after-id-verification.flow file you just downloaded.

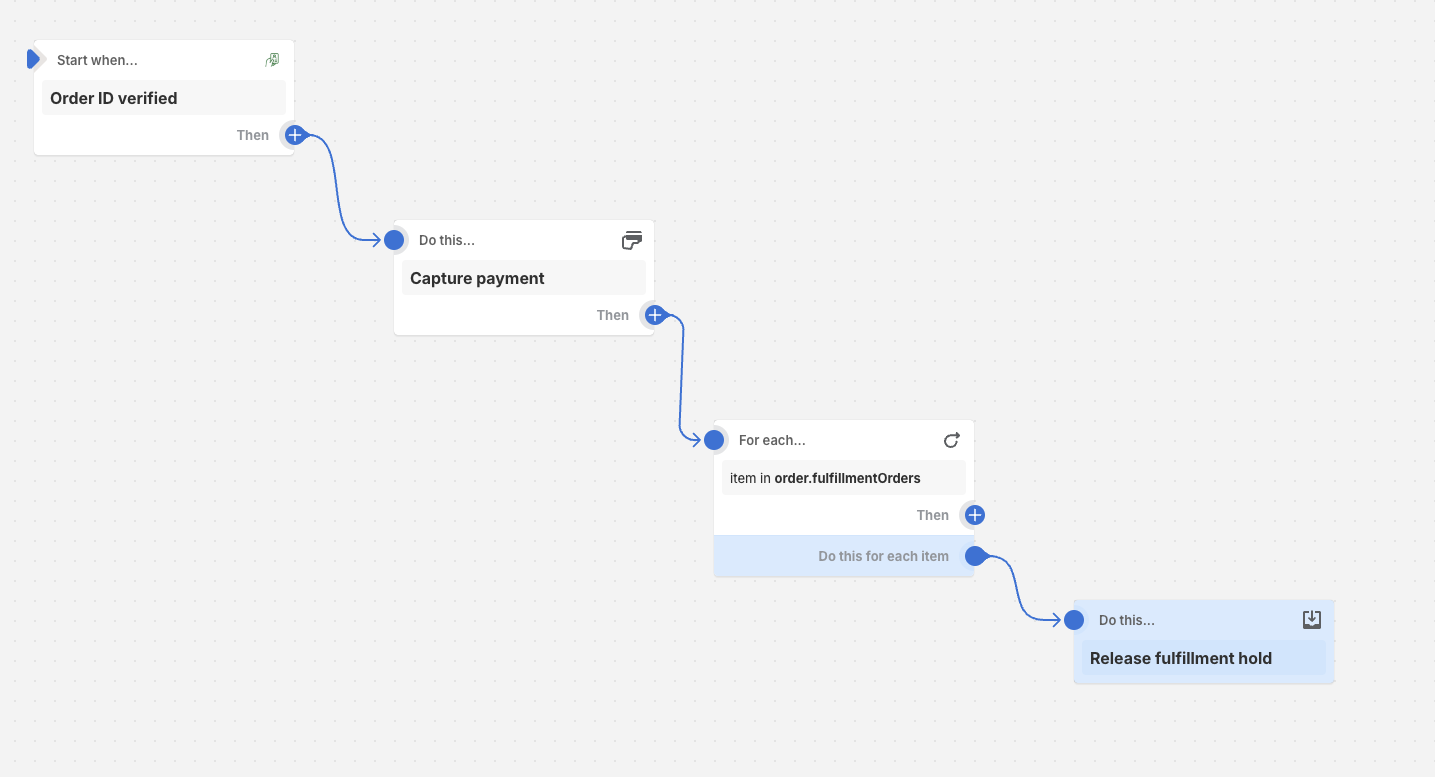
After importing, you should see a new workflow added called Release order hold when the customer's ID has been verified:

Activate the Flow
To enable the workflow, open it, and then click Turn on to enable the workflow. Your store will now automatically release fulfillment holds on orders after customers verify their IDs.

Customizing the Flow
You can easily customize this workflow. For example, if you're not using manual payment capture, you can remove the Capture Payment step in the workflow and reconnect the order fulfillment releasing steps to the Order ID verified step.
If you want to add additional steps, such as tagging the order, you can simply chain on more actions after the fulfillment hold release.
If you need help customizing your flow based on your needs, please contact us.