How to set up manual payment capture in Shopify

In this short guide, we'll show you how to set up your Shopify store's checkout process to manually capture payments. It just takes a few clicks and doesn't require a developer's help.
By default, your Shopify store will have automatic payment capture enabled. But it's easy to change it to manual and back. You can even use Shopify Flow to automate payment capture on non-risky orders or after you've verified the order with the customer through an ID check or another method.
What's the Difference Between Automatic and Manual Payment Capture?
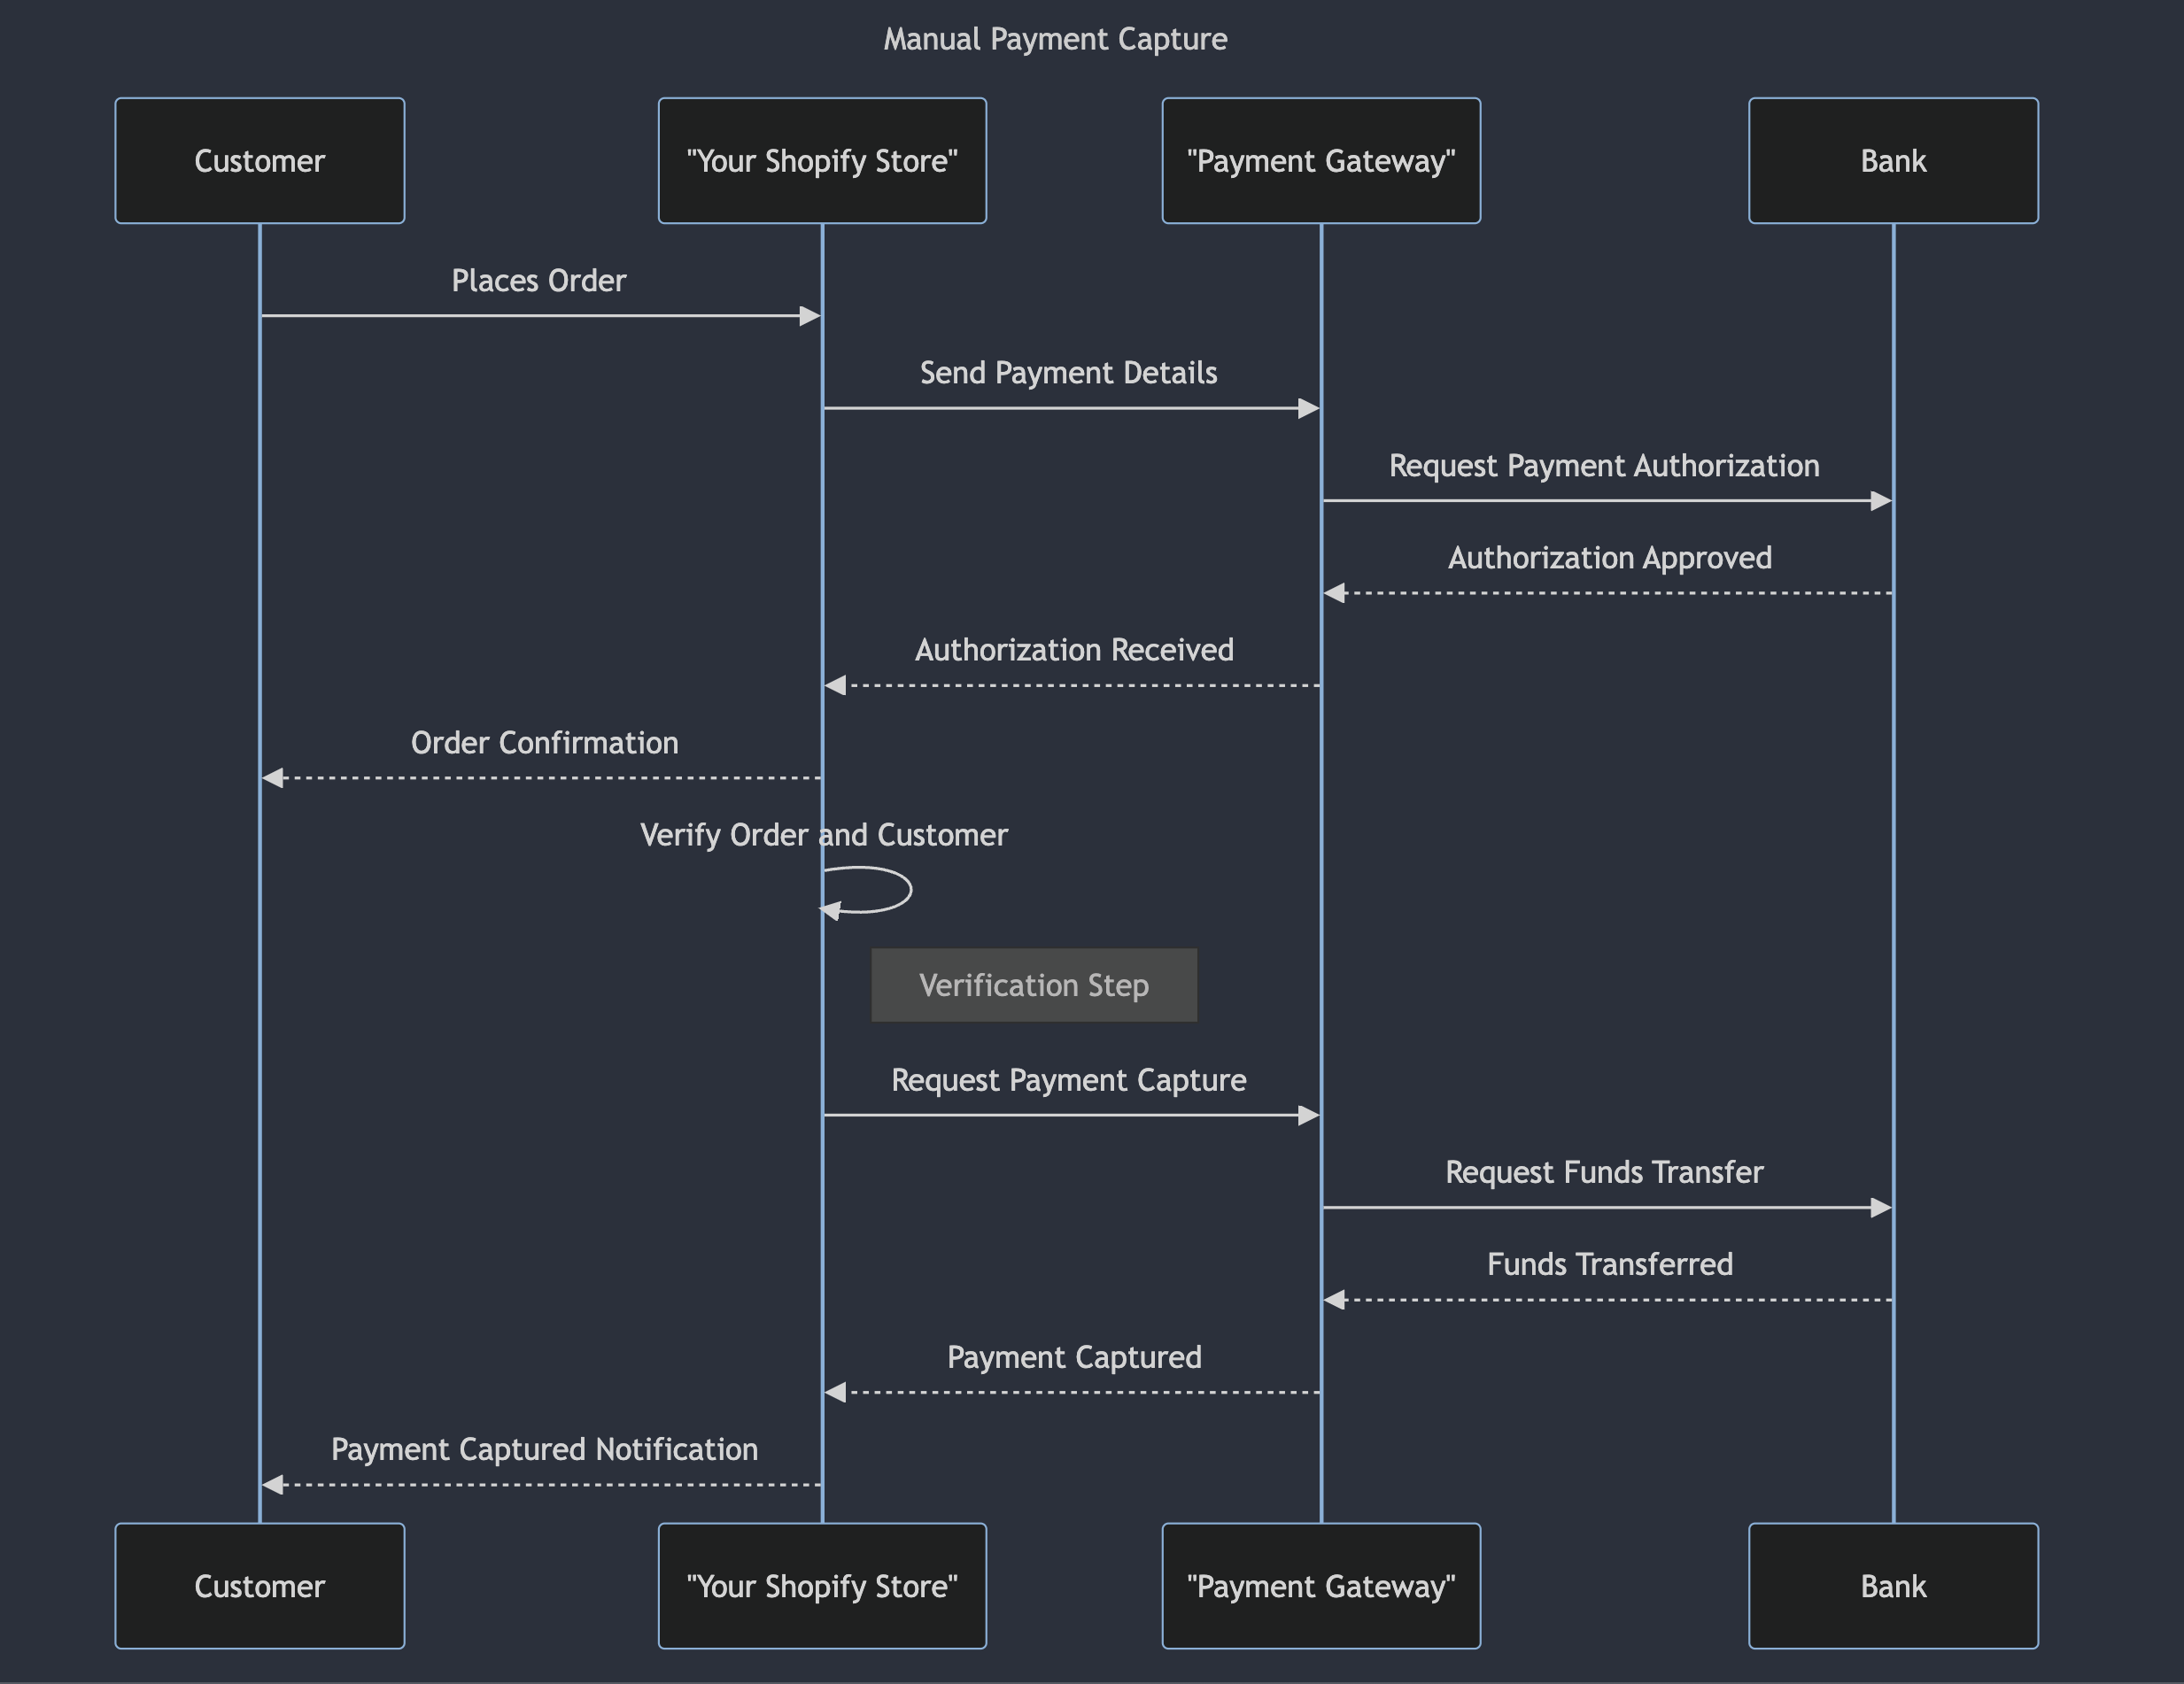
Automatic payment capture is mostly self-explanatory. When a customer places an order on your Shopify store via the checkout, the credit card the customer provides is immediately charged.

With manual payment capture, an authorization is placed on the card. This means that the funds aren't immediately pulled from the credit card, but you have the option to do so in the future for the full order amount.
You can think of manual capture as placing a temporary hold on the customer's credit card for a short period. This gives you some breathing room to verify the customer and order details before capturing or actually charging the customer's credit card for the order.
What Are the Benefits of Switching to Manual Payment Capture?
The main benefit of switching to manual payments is reducing your chargeback risk. For example, with automatic payment capture, even if you cancel and refund an order, you're still liable for a chargeback. This is because the order amount is charged to the customer's credit card instantly. As soon as the payment gateway charges for the transaction, the customer can issue a chargeback on the transaction.
Consider that credit card refunds are not instant; it can take up to 7-10 business days depending on the issuing bank for refunds to appear on the customer's statement. That window leaves you open to chargebacks if the customer doesn't recognize the charge or if the order is from a stolen credit card.
By switching to manual capture, you have the breathing room to take your time to reach out to customers flagged by Shopify Fraud Analysis. Remember, Shopify Fraud Analysis isn't infallible. It can falsely flag orders if they're abnormally large, if the customer is traveling far from their billing address, or if they're purchasing a gift for a family member or friend and the billing and shipping addresses don't match. There are many reasons why Shopify Fraud Analysis might incorrectly flag an order.
Automating Manual Payment Capturing with Shopify Flow
Shopify Flow is a free workflow app provided by Shopify. This powerful tool is a perfect pairing with manual payment capture, allowing you to automatically capture non-risky orders and even automatically capture payments after customer verification.
In a future tutorial, we'll show you how to use Shopify Flow to capture payments automatically on non-risky orders so you can scale this process.
How to Enable Manual Payment Capture on Shopify
Switching to manual payment capture from the Shopify dashboard is simple. First, log in to your Shopify account.
Opening Your Store's Payment Settings
After logging in, open your store's settings by clicking the Settings menu at the bottom left of the page:

This will open your store's settings. You should see a variety of setting sections, but we're interested in the Payment settings. Click that to open your store's payment settings:

Enabling Manual Payment Capture
Now you should see the payment settings for your Shopify store. Here you can change your payment gateway, add additional payment methods, and change your payment capture settings.
Scroll down to the Payment capture method section:
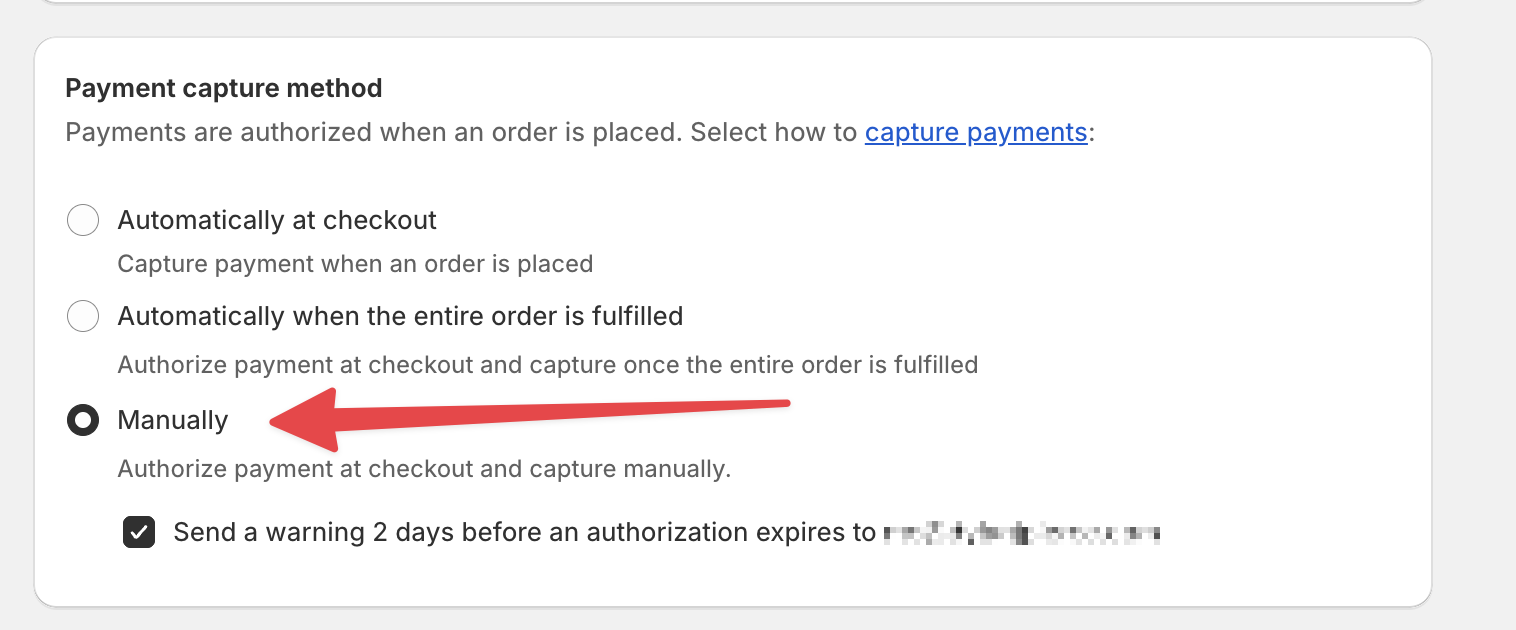
In the screenshot above, we've switched capturing from immediately when the order is placed to after the order is fulfilled. This gives us the most control over when to capture the payment on the customer's credit card.
Also, Shopify will email you two days before the authorization on the customer's credit card expires. This is a nice reminder to capture the payment before it's too late.
Don't forget to click Save in the top right-hand corner of the settings pop-up to apply this change:

After Switching to Manual Payment Capture, How Do I Capture Payments on Orders?
After switching to manual payment capture, new orders will have a special Capture payment button in the payment details section of the order.
When you click this button, it will open a pop-up to capture the payment on the customer's credit card:

You can even split the authorized payment into multiple charges, giving you the flexibility to charge for a portion of the order upfront as a deposit or charge as specific items are fulfilled:

What's the "Automatically When the Entire Order Is Fulfilled" Payment Capture Option?

This option is more automated compared to the fully manual option. It will automatically capture the payment on the customer's credit card only after all line items in the customer's order are fulfilled. This might be a good option if you have an automation in place to hold fulfillment on risky orders.
However, consider the time to fulfill orders. If there are delays, the order might not be fulfilled until after the authorization expires, causing the charge to fail. You'll then need to ask the customer to authorize the charge again.
The good news is even with this option enabled, you can still capture payment at any time from within the Shopify dashboard. So you can charge for the order even if it's not completely fulfilled.
Does This Process Scale?
Yes, you can use the Shopify Flow Capture payment action to automate this process. For example, you can trigger a Shopify Flow workflow to capture the payment after the customer's driver’s license matches the billing and/or shipping details. Or, you can have your staff tag orders after verifying them by phone, text, or email.
Can I Switch Back to Automatic Payment Capture Easily?
Yes, it's the same process, and you can switch between them at any time. However, changes don't apply retroactively. If an order's payment is captured automatically, you can't switch it back to manual payment capture and vice versa. Changing the payment capture settings only applies to new orders.
That's a wrap
Great, you made it to the end. Good job! You've learned the pros and cons of the different payment capture methods in Shopify as well as how to switch between them at any time.
Do you have any questions about setting this up on your Shopify store, or automating payment capture after customer verification with Shopify Flow workflow? Contact us for help.