// File: api/authentication
import Tabs from "@theme/Tabs";
import TabItem from "@theme/TabItem";
# Authentication
## Host
The base domain for the Real ID API is `https://real-id.getverdict.com/api/v1`.
All endpoints use this as the base URL.
## API keys
Real ID's REST API uses `Bearer` tokens for authentication.
You can find your token within the Real ID dashboard, under **Settings > DevTools**.
Your license key is also your Real ID API token. You can find your live license keys by logging into the [billing dashboard](https://dashboard.getverdict.com), or opening the settings of the plugin and opening the **Billing** section.
API access is included on the **Automate** plan. Once you're on Automate, contact support to have a token issued for your store — BigCommerce stores aren't given one automatically. Your token then appears in the Real ID app under **Settings > Dev Tools > API**.
You can find your live and test API keys in the Real ID dashboard under **Developers**.
Once you have your API key, pass it into the `Authorization` header, and prefix the token with `Bearer {{yourApiKey}}`.
```javascript
import axios from "axios";
// Send an ID check to John Smith at johnsmith@gmail.com
await axios.post(
"https://real-id.getverdict.com/api/v1/checks",
{
firstName: "John",
lastName: "Smith",
email: "johnsmith@gmail.com",
},
{
headers: {
Authorization: `Bearer ${yourApiKey}`,
},
}
);
```
---
// File: api/checks
import Tabs from "@theme/Tabs";
import TabItem from "@theme/TabItem";
# Checks
Interact with the Real ID checks API to retrieve and create ID checks for customers.
## Create an ID check
To create an ID check via the API, you need to pass at minimum an **email address** or **phone number**.
But the more details the better, so the system can properly personalize the email and SMS message to the customer according to your templates.
```
POST https://real-id.getverdict.com/api/v1/checks
```
### Parameters
In the body of the request, define the `customer` and the `order` if possible.
We recommend providing as much details as possible for the best synchonization of ID verification to Shopify tags on the customer and order.
However, the only required fields are at least an `customer.email` or a `customer.phone` to at minimum be able to deliver the ID check to the customer.
:::tip
If present, the `order.shopify_admin_graphql_id` and `customer.shopify_admin_graphql_id` will be used to sync the ID check changes to the corresponding order and customer.
For example, when the customer completes the ID check their order will be tagged with `ID verification completed`.
For WooCommerce, the same behavior applies when the `order.wc_id` or `customer.wc_id` parameters are given.
For BigCommerce, pass `order.bigcommerce_id` and `customer.bigcommerce_id` to link the check to the order and customer in your store.
For Custom integrations, use the `order.name` field. The check results are available in the Real ID dashboard and via the API either way.
:::
```json
{
"customer": {
"first_name": "John",
"last_name": "Smith",
"email": "johnsmith@gmail.com",
"phone": "+1224225555",
"shopify_admin_graphql_id": "gid://shopify/Customer/1234"
},
"order": {
"shopify_admin_graphql_id": "gid://shopify/Order/1234",
"name": "#1234"
}
}
```
```json
{
"customer": {
"first_name": "John",
"last_name": "Smith",
"email": "johnsmith@gmail.com",
"phone": "+1224225555",
"wc_id": 1234
},
"order": {
"wc_id": 5678
}
}
```
```json
{
"customer": {
"first_name": "John",
"last_name": "Smith",
"email": "johnsmith@gmail.com",
"phone": "+1224225555",
"bigcommerce_id": 1234
},
"order": {
"name": "#1234",
"bigcommerce_id": 5678
}
}
```
```json
{
"customer": {
"first_name": "John",
"last_name": "Smith",
"email": "johnsmith@gmail.com",
"phone": "+1224225555"
},
"order": {
"name": "#1234"
}
}
```
:::info
Please note that any settings you provide in the ID check will override your settings defined in the Real ID app. So if you only provide the customer and order details for example, then your [custom content](../theming/customize-content.md), [branding](../theming/branding.md), [rules like selfie capture](../rules/face-match.md), [automatic reminders](../for-merchants/automatic-id-check-reminders.md) etc. defined in the app will be applied to these API created checks.
:::
#### Customizing Check Theme & Content
By default, the ID check will use the content defined in the **Settings** area of the Real ID app. But you can control the content per ID check using the API instead.
You can pass a custom message to the `check.intro_content` parameter, as well as customize the theme using the `check.theme` parameter:
```json
{
"customer": {
"first_name": "John",
"last_name": "Smith",
"email": "johnsmith@gmail.com",
"phone": "+1224225555",
"shopify_admin_graphql_id": "gid://shopify/Customer/1234"
},
"order": {
"shopify_admin_graphql_id": "gid://shopify/Order/1234",
"name": "#1234"
},
"check": {
"intro_content": "Hi [firstName], \n Your order [orderId] requires ID verification because it has been flagged as high risk by Shopify. \n Your order will process as soon as you complete ID verification, this is just an extra security measure to prevent misuse of your credit card."
"theme": {
"primary_color": "#FFFFFF",
"button_color: "#000000",
"logo_url": "https://example.com/logo.png"
}
}
}
```
The `check.intro_content` parameter supports [short codes](../theming/customize-content.md#shortcodes) to reference data from the order and customer details.
The `check.theme.primary_color` and `check.theme.button_color` support color HEX codes.
:::tip Custom logo images must be publicly available
Please provide a publicly available URL for the `check.theme.logo_url`, this URL will be used for both the email to customers as well as in the online ID verification flow.
:::
#### Customizing ID check requirements
You can control if the ID check should require just an ID photo or both the ID photo and a matching headshot for additional verification with the `check.images_required` parameter.
```json
{
"customer": {
"first_name": "John",
"last_name": "Smith",
"email": "johnsmith@gmail.com",
"phone": "+1224225555",
"shopify_admin_graphql_id": "gid://shopify/Customer/1234"
},
"order": {
"shopify_admin_graphql_id": "gid://shopify/Order/1234",
"name": "#1234"
},
"check": {
"images_required": "id"
}
}
```
The `check.images_required` accepts two different options:
- `"id"` - only the ID photo is required for verification
- `"idv"` - both the ID photo and a matching headshot are required for verification
#### Requiring an additional document
You can require the customer to upload an additional document as part of their ID check — such as a hunting license, professional certification, or any custom document.
Use the `check.additional_document` parameter to define the document requirement per check:
```json
{
"customer": {
"first_name": "John",
"last_name": "Smith",
"email": "johnsmith@gmail.com",
"phone": "+1224225555"
},
"order": {
"name": "#1234"
},
"check": {
"additional_document": {
"required": true,
"type": "hunting_license",
"title": "Hunting License",
"description": "Please upload a photo of your valid state hunting license."
}
}
}
```
The `additional_document` object accepts the following fields:
| Field | Type | Required | Description |
|-------|------|----------|-------------|
| `required` | boolean | Yes | When `true`, the customer will be asked to upload the document during the ID check flow. |
| `type` | string | No | A machine-readable slug identifying the document type (e.g. `"hunting_license"`, `"professional_cert"`). Useful for programmatic tracking and webhook consumers. |
| `title` | string | Yes | The heading shown to the customer on the document upload step. |
| `description` | string | Yes | Body text explaining what the customer should upload. |
:::tip
This is different from the shop-level [Proof of Address](../rules/proof-of-address.md) setting, which applies to all checks. The `additional_document` parameter lets you dynamically control the requirement and customize the content per check via the API.
When both are configured, the per-check `additional_document` title and description take priority over the shop-level proof of address content.
:::
The `additional_document` is also returned in the response when retrieving a check:
```json
{
"check": {
"id": "7TWFOC-auPI",
"step": "delivered",
"additional_document": {
"type": "hunting_license",
"title": "Hunting License",
"description": "Please upload a photo of your valid state hunting license."
}
}
}
```
#### Multiple additional documents
If you're using advanced rules with the **multi-additional-documents** experiment enabled, a single check can require multiple documents. The `additional_documents` array (plural) exposes every document the customer **engaged with** — uploaded, had AI extraction run against, etc. OR-group alternatives the customer never touched are filtered out so the response only carries meaningful evaluation results. If no document has been engaged with yet, the `additional_documents` key is omitted entirely.
```json
{
"check": {
"id": "7TWFOC-auPI",
"step": "completed",
"additional_documents": [
{
"id": "ct-ammo-cert",
"type": "custom",
"title": "Connecticut Ammunition Certificate",
"description": "Please upload a clear photo of your active Connecticut Ammunition Certificate.",
"verdict": true,
"detected_document_type": "Connecticut Ammunition Certificate",
"field_errors": [],
"extracted_fields": {
"holder_name": "Jane Doe",
"document_number": "CT-AMMO-12345",
"issue_date": "2024-03-15",
"expiration_date": "2029-03-15"
}
},
{
"id": "ffl",
"type": "custom",
"title": "Federal Firearms License (FFL)",
"description": "Please upload a clear photo of your active Federal Firearms License.",
"verdict": false,
"detected_document_type": "Federal Firearms License",
"field_errors": [
{
"field": "expiration_date",
"ruleType": "date_in_future",
"message": "The expiration date on your document is expired.",
"severity": "hard_fail"
}
],
"extracted_fields": {
"license_holder": "Jane Doe FFL LLC",
"license_number": "1-23-456-78-9A-12345",
"license_type_code": "01",
"expiration_date": "2024-01-31",
"premises_address": "100 Main St, Hartford, CT 06103"
}
}
]
}
}
```
Each entry includes:
| Field | Type | Description |
|---|---|---|
| `id` | string | Stable id referenced by rule configurations. |
| `type` | string | Document type (e.g. `custom`, `proofOfAddress`, `firearmLicense`). |
| `title` | string | Customer-facing heading for the capture step. |
| `description` | string | Customer-facing body text. |
| `verdict` | boolean \| null | `true` if the capture passed automated document verification and field validation, `false` on a hard fail. (`null` is theoretically possible if a prediction was recorded without a verdict, but in practice every entry returned here is engaged so `verdict` is always `true` or `false`.) |
| `detected_document_type` | string \| null | The document type Real ID identified from the upload. Useful for diagnosing type mismatches. |
| `field_errors` | array | Per-field validation failures. Empty when the capture is clean. Each entry has `field`, `ruleType`, `message`, `severity` (`retake` or `hard_fail`). |
| `extracted_fields` | object | Values Real ID's AI extracted from the document, keyed by the field's machine name (matches the `key` in your document's `fields[]` configuration). Empty `{}` when the customer hasn't uploaded yet or the document type was rejected. Values are strings or `null`. Use these alongside `verdict` and `field_errors` for downstream logic — e.g. branching on `extracted_fields.license_type_code` to set merchant-side metafields. |
The singular `additional_document` (above) is still returned for backward compatibility and reflects the first entry in `additional_documents`.
:::tip Sandbox / Test mode
When the check is in [Test Mode](../getting-started/test-mode.md) (`testing: true`), Real ID skips real AI extraction and auto-fills `extracted_fields` with deterministic placeholder values keyed off your document's field configuration. Each value is picked to satisfy that field's `validations` so the response always comes back as `verdict: true`. Use sandbox checks to wire and verify your integration (metafield flips, branching logic, etc.) end-to-end before going live.
Examples:
| Field config | Sandbox value |
|---|---|
| `valueType: "date"`, `validations: [{ type: "date_in_future" }]` | `"2030-12-31"` |
| `valueType: "date"`, `validations: [{ type: "date_in_past" }]` (key contains `dob` or `birth`) | `"1985-06-15"` |
| `valueType: "date"`, `validations: [{ type: "date_in_past" }]` (other keys) | `"2020-01-01"` |
| `valueType: "string"`, `validations: [{ type: "regex", pattern: "^03$" }]` | `"03"` |
| `valueType: "string"`, `validations: [{ type: "regex", pattern: "^(01\|02\|06)$" }]` | `"01"` (first alternative) |
| `valueType: "string"` with no regex | `"Sandbox {label}"` |
| `valueType: "image"` | `null` |
:::
#### Skip emails and SMS messages
By default, the API will automatically send an email and text message to the customer with the ID check link. However, this may be an issue for testing, since you may want to use testing email addresses, or perhaps you want to better control messaging to your customers.
You can disable the email and SMS message by passing the `deliver_checks` option to the `options` in the request:
```json
{
"customer": {
"email": "example@test.com"
},
"options": {
"deliver_check": false
}
}
```
This will simply create and return the ID check, but not deliver the ID check to the customer.
### Response
After creating the ID check, the API will respond with a format like this:
```json
{
"message": "Delivered ID check",
"check": {
"order": {
"id": "gid://shopify/Order/1234",
"name": "#1234"
},
"customer": {
"first_name": "John",
"last_name": "Smith",
"id": "gid://shopify/Customer/1234",
"phone": "+1224225555",
"email": "johnsmith@gmail.com"
},
"rules": {
"testing": true,
"signature_required": false,
"id_check_type": "idv",
"include_back_of_id": false,
"selfie_liveness": "straight"
},
"result": {
"scores": {},
"document": {}
},
"id": "7TWFOC-auPI",
"step": "delivered",
"shop_name": "real-id-dev.myshopify.com",
"created_at": "2023-03-14T03:22:00.219Z",
"platform": "shopify"
}
}
```
```json
{
"message": "Delivered ID check",
"check": {
"order": {
"id": 5678
},
"customer": {
"first_name": "John",
"last_name": "Smith",
"id": 1234,
"phone": "+1224225555",
"email": "johnsmith@gmail.com"
},
"rules": {
"testing": true,
"signature_required": false,
"id_check_type": "idv",
"include_back_of_id": false,
"selfie_liveness": "straight"
},
"result": {
"scores": {},
"document": {}
},
"id": "7TWFOC-auPI",
"step": "delivered",
"shop_name": "real-id-dev.myshopify.com",
"created_at": "2023-03-14T03:22:00.219Z",
"platform": "wc"
}
}
```
```json
{
"message": "Delivered ID check",
"check": {
"order": {
"name": "#1234"
},
"customer": {
"first_name": "John",
"last_name": "Smith",
"phone": "+1224225555",
"email": "johnsmith@gmail.com"
},
"rules": {
"testing": true,
"signature_required": false,
"id_check_type": "idv",
"include_back_of_id": false,
"selfie_liveness": "straight"
},
"result": {
"scores": {},
"document": {}
},
"id": "7TWFOC-auPI",
"step": "delivered",
"created_at": "2023-03-14T03:22:00.219Z",
"platform": "bc"
}
}
```
```json
{
"message": "Delivered ID check",
"check": {
"order": {
"name": "#1234"
},
"customer": {
"first_name": "John",
"last_name": "Smith",
"phone": "+1224225555",
"email": "johnsmith@gmail.com"
},
"rules": {
"testing": true,
"signature_required": false,
"id_check_type": "idv",
"include_back_of_id": false,
"selfie_liveness": "straight"
},
"result": {
"scores": {},
"document": {}
},
"id": "7TWFOC-auPI",
"step": "delivered",
"created_at": "2023-03-14T03:22:00.219Z",
"platform": "standalone"
}
}
```
:::note
There are fields automatically added to the ID check based on your settings within the app.
To change the liveness rules, or minimum age rules, open the **Rules** area in the **Settings** of the dashboard.
:::
## Retrieve an ID check
To retrieve an ID check, provide the unique ID of the check as a route parameter.
```
GET https://real-id.getverdict.com/api/v1/checks/{{checkId}}
```
### Finding the check ID for a customer or order
Real ID writes the most recent check ID to the customer and order on your store, so you can look it up without storing it yourself. The field name and access pattern depends on your platform.
On Shopify, the check ID is stored in the `real_id.check_id` [metafield](../shopify/metafields.md#real_idcheck_id-metafield) on both the customer and the order.
Read it in a Liquid template:
```liquid
{{ customer.metafields.real_id.check_id }}
{{ order.metafields.real_id.check_id }}
```
Or read it with the Shopify Admin GraphQL API:
```gql
query getOrderCheckId($orderId: ID!) {
order(id: $orderId) {
metafield(namespace: "real_id", key: "check_id") {
value
}
}
}
```
```gql
query getCustomerCheckId($customerId: ID!) {
customer(id: $customerId) {
metafield(namespace: "real_id", key: "check_id") {
value
}
}
}
```
On WooCommerce, the check ID is stored as [custom metadata](../woocommerce/metadata.md) under the `real_id_check_id` key on both the order and the user.
Read it in PHP with `get_user_meta` for the customer, or `$order->get_meta` for the order:
```php
get_meta( 'real_id_check_id' );
```
You can also view the order's `real_id_check_id` in the **Custom Fields** section of the order edit screen in WordPress admin.
On BigCommerce, the check ID is stored in the `realid.check_id` [metafield](../bigcommerce/metadata.md#realidcheck_id-metafield) on both the order and the customer.
Read it with the BigCommerce Metafields API:
```
GET /stores/{store_hash}/v3/orders/{order_id}/metafields
GET /stores/{store_hash}/v3/customers/{customer_id}/metafields
```
Filter by the `realid` namespace to get the check ID:
```json
{
"data": [
{
"namespace": "realid",
"key": "check_id",
"value": "abc123def456",
"permission_set": "read"
}
]
}
```
For custom integrations, store the `check.id` returned from the [create check response](#response) in your own database, associated with the customer or order record.
```javascript
const response = await axios.post(
"https://real-id.getverdict.com/api/v1/checks",
{ customer: { email: "customer@example.com" } },
{ headers: { Authorization: `Bearer ${yourApiKey}` } }
);
// Store this ID in your database for later retrieval
const checkId = response.data.check.id;
```
You can also listen for [webhook events](./webhooks.mdx) to be notified when the check status changes, and use the included `check.id` to update your records.
:::note
These fields are only present on customers and orders that have had an ID check created. If your trigger rules only require verification under specific conditions, customers or orders that don't match won't have a check ID to look up.
Creating a new ID check for the same customer or order will overwrite the stored check ID with the most recent one.
:::
### Parameters
Include additional data using query parameters. By default this endpoint returns all text based data. To access the photos submitted for the ID check, pass the `withPhotos` query parameter:
```
GET https://real-id.getverdict.com/api/v1/checks/{{checkId}}?withPhotos=true
```
The legacy 4 photos (`id`, `selfie`, `proofOfAddress`, `signature`) are returned as short-lived URLs under the `photos` key.
If the check carries multi-additional-documents (see [Multiple additional documents](#multiple-additional-documents) above), every entry in `additional_documents` is additionally decorated with a short-lived `photo_url` pointing at that doc's S3 object:
```json
{
"check": {
"additional_documents": [
{
"id": "ct-ammo-cert",
"title": "Connecticut Ammunition Certificate",
"photo_url": "https://real-id-uploads.s3.amazonaws.com/...",
"verdict": true
}
],
"photos": {
"id": "https://...",
"selfie": "https://...",
"proofOfAddress": null,
"signature": null
}
}
}
```
`photo_url` is `null` when the customer hasn't uploaded that doc yet.
### Example Response
```json
{
"check": {
"order": {
"id": null,
"name": null
},
"customer": {
"id": null,
"phone": null,
"email": "johnsmith@gmail.com"
},
"rules": {
"testing": true,
"signature_required": false,
"id_check_type": "idv",
"include_back_of_id": false
},
"result": {
"errors": [],
"signals": [],
"scores": {
"id": 0.9965,
"selfie": 0.9891,
"face_match": 0.8198
},
"document": {
"first_name": "TESTFIRSTNAME",
"last_name": "TESTFIRSTNAME",
"middle_name": null,
"verified_address": {
"unit": null,
"streetNumber": 1234,
"street": "Test St",
"country": "US",
"state": "OH",
"city": "Cleveland",
"postalCode": "44107"
},
"document_number": "15-239-1250",
"expiration_date": "04/24/2018",
"issue_date": "08/27/2015",
"birth_date": "06/14/1946",
"birth_date_iso": "1946-06-14T00:00:00.000Z",
"issuing_state": "CO",
"issuing_country": "US",
"type": "drivers-license"
}
},
"id": "abcedef123",
"step": "completed",
"shop_name": "real-id-dev.myshopify.com",
"created_at": "2022-12-09T15:20:35.136Z",
"platform": "shopify"
}
}
```
:::tip Birth Date Formats
The API response includes two formats for the birth date:
- `birth_date` - Original MM/DD/YYYY format (e.g., "06/14/1946")
- `birth_date_iso` - ISO 8601 format (e.g., "1946-06-14T00:00:00.000Z")
The `birth_date_iso` field provides a standardized date format for easier integration with modern systems. This field may be `null` if the birth date could not be extracted or for older checks that haven't been reprocessed.
:::
#### Using the response
With this response, you can craft the customer's ID check link for use within your own app to link the customer to their ID check.
The response's `check.id` field is the unique token for this ID check. You can append it to our hosting link to start the customer's ID check session:
```
https://verify.getverdict.com/{{checkId}}
```
In our example response above, the unique check ID is `abcedef123`, so the link for this ID check sesison would be: `https://verify.getverdict.com/abcedef123`.
:::danger Downloading not recommended
Real ID securely stores customer PII data on your behalf. While you can access this data over the REST API securely, we highly recommend _not_ downloading photos or customer data.
You will be responsible for maintaining secure access to this data, as well as fulfilling all legal retrieval and data deletion requests on the downloaded copies.
:::
## Delete ID check data
Real ID gives you the control to delete a customer's ID check data completely.
```
DELETE https://real-id.getverdict.com/api/v1/checks/{{checkId}}
```
:::danger
**This is an irreversible action.**
The ID check records and corresponding images will be deleted immediately.
:::
### Parameters
No parameters are required.
### Example Response
```json
{
"message": "Check deleted.",
"check": {
"id": "abcedef"
}
}
```
:::info
Not all customer data can be deleted synchronously. All traces of customer data will be deleted within 30 days.
:::
---
// File: api/webhooks
import Tabs from "@theme/Tabs";
import TabItem from "@theme/TabItem";
# Webhooks
Real ID will emit webhooks in real time throughout the ID verification lifecycle.
Use these webhooks to synchronize your customer data with their current ID check status, or to hold and release orders by verified customers.
:::note
This feature is for **Protect** and above subscribers only.
:::
## ID check events
Real ID will emit HTTP webhooks during the following events:
- `check.delivered` - the ID check is initially created.
- `check.opened` - the customer opens the ID check.
- `check.submitted-photo` - the ID check receives a photo from the customer.
- `check.completed` - the customer successfully completes the ID check.
- `check.failed` - the customer fails the ID check.
### Check Event Data
Webhooks are sent as `POST` requests and include a JSON body. Below is an example of a `check.created` event:
```json
{
"event": "check.created",
"created_at": "2022-12-09T15:20:35.136Z",
"check": {
"id": "abcdef",
"step": "delivered",
"testing": true
}
}
```
### Status changes
Below is a state diagram that illustrates how the ID check statuses change through the ID check lifecycle:
```mermaid
flowchart TD
triggered(Automatic ID check triggered or manually sent) -- ID check delivered to the customer --> delivered
delivered([check.delivered]) -- Customer opens ID check --> opened([check.opened])
opened -. Customer submits one or more photos .-> submitted_photos([check.submitted_photos])
submitted_photos -. Customer submits selfie .-> submitted_photos
submitted_photos -. All required photos captured .-> id_check_processed{ID verification}
id_check_processed -. Customer fails ID check .-> id_check_failed([check.failed])
id_check_processed -. Customer passed ID check .-> id_check_passed([check.passed])
id_check_failed -. Staff member overrides results .-> id_check_passed
id_check_passed -. Staff member overrides results .-> id_check_failed
```
:::note
Some steps will affect with overall verdict even though more photos might be required and the check is in progress.
For example, if the customer's ID photo is missing required fields or is unreadable, then even if the face match passes, the overall ID check would be a failure.
:::
## Privacy events
Customers can contact Real ID directly regarding their ID checks. Real ID is a processor of your customer data, it does not act on these requests directly.
As a controller, you can subscribe to these webhooks for notifications on the following privacy related events:
- `customer.data_request` - A customer has requested a copy of all of their data.
- `customer.manual_review_requested` - A customer has requested a manual review of their ID check results.
- `customer.data_deletion_request` - A customer has requested to have their data deleted.
### Privacy Event Data
Webhooks are sent as `POST` requests and include a JSON body. Below is an example of a `customer.data_request` event:
```json
{
"event": "customer.data_request",
"created_at": "2022-12-09T15:20:35.136Z",
"check": {
"id": "abcdef",
"testing": true
}
}
```
:::tip
Use the included `check.id` in the response to query the full check data with the [retrieve a check API endpoint](/docs/api/checks#retrieve-an-id-check).
:::
## Defining Webhook URLs
Add the URL that should receive these events, then copy the signing secret you'll use to verify them. Both live in your store admin.
In the Real ID Shopify app, go to **Settings > DevTools > Webhooks**. Enter your webhook URL, turn webhooks on, and copy the **Signing secret**.
In the Real ID plugin, open **Settings > DevTools > Webhooks**. Enter your webhook URL, turn webhooks on, and copy the **Signing secret**.
In the Real ID app, go to **Settings > Dev Tools > Webhooks**. Enter your webhook URL, turn webhooks on, and copy the **Signing secret**.
You can send a test webhook from this section to confirm your endpoint is set up correctly.
All events contain the unique check ID, the event name, and the check data.
## Verifying Webhooks
The webhook HTTP request contains a `X-Real-ID-Signature` header that will need to be verified for authenticity.
Use your **Signing secret** from your store admin (**Settings > DevTools > Webhooks**) to sign the request's body to ensure that the request is originating from Real ID.
```js
const crypto = require("crypto");
function verifyWebhookSignature(payload, headers) {
// The signature included in the request headers
signature = headers["x-real-id-signature"];
// The webhook private signing key you can find within the Real ID app settings
secret_key = process.env.REAL_ID_SIGNING_KEY;
// Compute the HMAC signature using the provided secret key and payload
const computedSignature = crypto
.createHmac("sha256", secretKey)
.update(JSON.stringify(payload))
.digest("hex");
// Compare the computed signature with the one included in the request headers
if (computedSignature === signature) {
console.log("Webhook signature is valid");
} else {
console.log("Webhook signature is invalid");
}
}
```
```py
import os
import hmac
import hashlib
import json
def verify_webhook(body, headers):
# NOTE: by default, Python's json.dumps returns additional pretty printing that will introduce whitespace not included during generation
# Remove extra whitespace if using json.dumps as the payload body
# If you're using Flask, use the `request.get_data()` method to retrieve the raw body
payload = json.dumps(body, separators=(',', ':'))
# The signature included in the request headers
signature = headers["x-real-id-signature"]
# The webhook private signing key you can find within the Real ID app settings
secret_key = os.environ.get('REAL_ID_SIGNING_KEY')
# Compute the HMAC signature using the provided secret key and payload
computed_signature = hmac.new(
key=bytes(secret_key, 'utf-8'),
msg=bytes(payload, 'utf-8'),
digestmod=hashlib.sha256
).hexdigest()
# Compare the computed signature with the one included in the request headers
if computed_signature == signature:
return True
else:
return False
```
The shape of data is the same across the other events, only the `event` and the `check.step` will change from event type to event type.
:::warning
For security purposes, not all data associated with the ID check is included in the webhook.
To retrieve all details, [make a request to the `GET check` API endpoint](/docs/api/checks#retrieve-an-id-check) with the unique check ID included.
:::
## Allowlisting Real ID's IP address
Real ID sends all webhooks from a single, dedicated static IP address:
```
100.51.45.70
```
If your endpoint sits behind a firewall, WAF, or security plugin that filters inbound traffic by IP, add `100.51.45.70` to its allowlist so our webhooks aren't blocked.
:::info
This one IP covers every webhook Real ID sends — the `check.*` and `customer.*` events described above, as well as the order and customer metadata updates Real ID sends back to WooCommerce stores. You only need to allowlist this single address.
:::
All requests originate from the AWS `us-east-1` region. The address is stable and is not expected to change; we'll notify subscribers in advance if it ever does.
### Identifying Real ID's requests by User-Agent
Every request Real ID sends to your store also carries a branded `User-Agent` header:
```
RealID-Webhook/1.0 (+https://getverdict.com/help/docs/api/webhooks/)
```
Many firewalls, WAFs, and security plugins can allowlist by `User-Agent` in addition to (or instead of) IP. If yours does, permit any request whose `User-Agent` starts with `RealID-Webhook`. Together with the dedicated IP above, this gives you two independent ways to make sure Real ID's verification updates always reach your store.
:::tip
If a security plugin or host firewall is challenging our requests (for example, returning a CAPTCHA or block page instead of a normal response), allowlisting **both** the IP `100.51.45.70` and the `RealID-Webhook` User-Agent is the most reliable fix. A blocked request typically shows up in your host's firewall log as a denied `POST` to `/wp-json/real-id/v1/…`.
:::
---
// File: bigcommerce/after-checkout
# After Checkout Verification
After checkout verification allows customers to complete their order first, then verify their ID on the order confirmation page. This is the recommended approach for most stores.
## How it works
1. Customer shops and completes checkout normally
2. On the order confirmation page, they see the ID verification prompt
3. Customer uploads their ID and completes verification
4. Order is held until verification is complete
## Setup
### Step 1: Install the Real ID App
1. Visit the [Real ID app listing](https://www.bigcommerce.com/apps/real-id/) in the BigCommerce App Marketplace
2. Click **Install** and authorize the app for your store
3. You'll be redirected to the Real ID dashboard
### Step 2: Configure After Checkout Flow
1. In the Real ID dashboard, go to **Settings** > **Automations**
2. Enable **Automated ID checks**
3. Select **After checkout** as your verification flow (this is the default)
4. Configure your trigger rules (see Built-in Triggers below)
5. Click **Save**
That's it! The Real ID verification script is automatically installed on your order confirmation page.
## Built-in Triggers
Configure which orders should trigger ID verification. These options require no code - just toggle them on in the Real ID dashboard.
### Check all orders
Require ID verification for every order. When enabled, all other trigger rules are ignored.
### Order value threshold
Require ID verification only for orders above a certain amount. Set your minimum order value (e.g., $100) and only high-value orders will require verification.
### Address mismatch
Require ID verification when the shipping and billing addresses don't match. This is a common fraud indicator and helps verify the customer's identity when there's a discrepancy.
### Product categories
Require ID verification for orders containing products from specific categories. Select which product categories should trigger verification - useful for age-restricted items like alcohol, tobacco, or firearms.
### U.S. shipping states
Require ID verification only for orders shipping to the United States. You can further narrow this to specific states - useful for complying with state-specific regulations.
:::tip Combining Triggers
When multiple triggers are enabled, verification is required if **any** rule matches. For example, if you enable both "Order value threshold ($100)" and "Address mismatch", a $50 order with mismatched addresses OR a $150 order with matching addresses will both require verification.
:::
## Order status filtering
Before evaluating your trigger rules, Real ID automatically filters out orders based on their BigCommerce order status. This ensures ID verification is only triggered for orders that are actually going to be fulfilled.
### Unpaid orders
Orders in these statuses are skipped because payment hasn't been completed yet:
| Status | Status ID | Why it's skipped |
|--------|-----------|------------------|
| **Incomplete** | 0 | Customer started checkout but hasn't completed payment |
| **Awaiting Payment** | 7 | Order placed but payment is still pending |
When an order transitions from an unpaid status to a paid status (e.g., from "Incomplete" to "Awaiting Fulfillment"), Real ID will automatically evaluate your triggers and create an ID check if needed.
### Terminal orders
Orders in these statuses are skipped because they will never be fulfilled:
| Status | Status ID | Why it's skipped |
|--------|-----------|------------------|
| **Cancelled** | 5 | Order was cancelled by merchant or customer |
| **Declined** | 6 | Payment was declined or order was rejected for fraud |
| **Completed** | 10 | Order has already been fulfilled and delivered |
:::info This filtering is automatic
These status filters are built into Real ID and cannot be customized. They run before your trigger rules are evaluated, ensuring you don't waste ID checks on orders that won't be shipped.
:::
## Customer experience
When after checkout verification is enabled:
- Customers complete their purchase normally
- The verification prompt appears on the order confirmation page
- Customers can verify immediately or return later via email link
- Already-verified customers are recognized automatically
## Frequently Asked Questions
### What happens if a customer doesn't complete verification?
The order remains in your system but is flagged as pending verification. You can configure automatic reminder emails to prompt customers to complete their verification.
### Can I customize when verification is required?
Yes! Use the built-in triggers above to configure rules based on order value, address mismatch, specific product categories, or customer location. For more complex conditions, see the Custom Trigger Scripts section below.
### What if a customer closes the page before verifying?
Real ID automatically sends an email with a link to complete verification. You can also configure automatic reminders.
### Do returning customers need to verify again?
No. Real ID remembers verified customers. When they return and place another order, they're automatically recognized and won't need to verify again.
## Custom Trigger Scripts
For merchants who need custom trigger logic beyond the built-in options, you can create scripts that conditionally trigger ID verification using the Real ID JS SDK based on order details.
:::info SDK and Order Data Already Loaded
The Real ID SDK and order data are automatically loaded on your order confirmation page when you enable after checkout verification. You only need to add a custom script with your trigger logic - no need to add the SDK or modify your theme.
:::
### How Custom Triggers Work
1. Your custom script fetches order details using the BigCommerce Storefront API
2. If conditions are met, your script calls `RealID.createFlow()` to trigger verification
3. The SDK handles the rest - displaying the verification UI and processing the result
### Adding a Custom Trigger Script
1. In BigCommerce admin, go to **Storefront** > **Script Manager**
2. Click **Create a Script**
3. Fill in the following:
- **Name**: Real ID Custom Trigger
- **Description**: Custom ID verification trigger
- **Location on page**: Footer
- **Select pages where script will be added**: Order Confirmation
- **Script category**: Essential
- **Script type**: Script
4. Paste one of the example scripts below
5. Click **Save**
:::tip Using the Store Hash
The order confirmation page already has the store hash available via `window.realIdOrderData.store_hash` (set automatically by the Real ID app). The examples below use this value directly.
:::
### Example 1: Specific State AND Product Category (Combined)
Trigger verification only when BOTH conditions are met: shipped to California AND order contains products from specific categories.
```html
```
:::tip Finding Category IDs
To find your category IDs, go to **Products** > **Product Categories** in your BigCommerce admin. Click on a category - the ID is shown in the URL (e.g., `/manage/categories/23` means the ID is `23`).
:::
### Example 2: Specific State AND Custom Field (Combined)
Trigger verification only when BOTH conditions are met: shipped to California AND order contains products with the `id_verification_required` custom field.
```html
```
:::tip Creating Custom Fields
To add a custom field to a product:
1. Go to **Products** > **View** in BigCommerce admin
2. Edit the product
3. Scroll to **Custom Fields**
4. Add a field with name `id_verification_required` and value `true`
5. Save the product
:::
:::tip Combining Conditions
These examples demonstrate AND logic - both conditions must be true. You can adapt this pattern to combine any conditions:
- Change `REQUIRED_STATE` to any US state code (e.g., 'NY', 'TX')
- Add multiple states by changing the check to `['CA', 'NY'].includes(stateCode)`
- Combine with order total checks by adding `order.orderAmount >= MINIMUM_AMOUNT`
:::
### Learn More
For more information about the Real ID JS SDK, including theming options and prepopulating customer data, see our [JavaScript SDK documentation](../js).
---
// File: bigcommerce/before-checkout
# Before Checkout Verification
Before checkout verification requires customers to verify their ID before they can complete their purchase. This prevents orders from unverified customers entirely.
## How it works
1. Customer adds items to cart and proceeds to checkout
2. Before they can enter payment information, the ID verification prompt appears
3. Customer must complete verification to continue
4. Once verified, they can complete their purchase
## Setup
### Step 1: Install the Real ID App
1. Visit the [Real ID app listing](https://www.bigcommerce.com/apps/real-id/) in the BigCommerce App Marketplace
2. Click **Install** and authorize the app for your store
3. You'll be redirected to the Real ID dashboard
### Step 2: Configure Before Checkout Flow
1. In the Real ID dashboard, go to **Settings** > **Automations**
2. Enable **Automated ID checks**
3. Select **Before checkout** as your verification flow
4. Configure your trigger rules (see Built-in Triggers below)
5. Click **Save**
That's it! The Real ID verification script is automatically installed on your checkout page.
## Built-in Triggers
Configure which customers should be prompted for ID verification. These options require no code - just toggle them on in the Real ID dashboard.
### Verify all orders
Require ID verification for every checkout. When enabled, all other trigger rules are ignored.
### Cart value threshold
Require ID verification only for carts above a certain amount. Set your minimum cart value (e.g., $100) and only high-value orders will require verification.
### Product categories
Require ID verification for carts containing products from specific categories. Select which product categories should trigger verification - useful for age-restricted items like alcohol, tobacco, or firearms.
### U.S. shipping states
Require ID verification only for orders shipping to the United States. You can further narrow this to specific states - useful for complying with state-specific regulations.
:::tip Combining Triggers
When multiple triggers are enabled, verification is required if **any** rule matches. For example, if you enable both "Cart value threshold ($100)" and "Product categories (Alcohol)", a $50 order with alcohol OR a $150 order without alcohol will both require verification.
:::
## Customer experience
When before checkout verification is enabled:
- Customers shop and add items to cart normally
- When they proceed to checkout, the verification prompt appears
- They must complete ID verification before entering payment details
- Already-verified customers skip the verification step automatically
## Frequently Asked Questions
### Will this slow down checkout for all customers?
No. Real ID remembers verified customers. Returning customers who have already verified their ID will proceed directly to checkout without seeing the verification prompt again.
### Can I require verification only for certain products or orders?
Yes! Use the built-in triggers above to configure rules based on order value, specific product categories, or customer location. For more complex conditions, see the Custom Trigger Scripts section below.
### What if a customer can't complete verification?
If a customer is unable to verify their ID, they won't be able to complete checkout. You can review failed verification attempts in your Real ID dashboard and contact the customer if needed.
### Is this compatible with all BigCommerce themes?
Before checkout verification works with most BigCommerce themes. If you experience any display issues, please [contact our support team](https://getverdict.com/contact).
### Can customers save their cart and verify later?
Yes. If a customer leaves during verification, their cart is preserved. When they return and try to checkout again, they'll be prompted to complete verification.
## Custom Trigger Scripts
For merchants who need custom trigger logic beyond the built-in options, you can create scripts that conditionally trigger ID verification using the Real ID JS SDK.
:::info SDK Already Loaded
The Real ID SDK is automatically loaded on your checkout page when you enable before checkout verification. You only need to add a custom script with your trigger logic - no need to add the SDK separately.
:::
### How Custom Triggers Work
1. Your custom script evaluates conditions using BigCommerce Storefront APIs
2. If conditions are met, your script calls `RealID.createFlow()` to trigger verification
3. The SDK handles the rest - displaying the verification UI and processing the result
### Adding a Custom Trigger Script
1. In BigCommerce admin, go to **Storefront** > **Script Manager**
2. Click **Create a Script**
3. Fill in the following:
- **Name**: Real ID Custom Trigger
- **Description**: Custom ID verification trigger
- **Location on page**: Footer
- **Select pages where script will be added**: Checkout
- **Script category**: Essential
- **Script type**: Script
4. Paste one of the example scripts below
5. Click **Save**
:::info Multi-step Checkout
BigCommerce uses a multi-step checkout where elements appear dynamically. The examples below include a `waitForSelector` helper function that waits for the "Place Order" button to appear before triggering verification.
:::
:::tip Finding Your Store Hash
Each example requires your BigCommerce **store hash** - a unique identifier for your store. You can find it in:
- Your BigCommerce admin URL: `https://store-{STORE_HASH}.mybigcommerce.com/manage/...`
- Example: If your URL is `store-abc123xyz.mybigcommerce.com`, your store hash is `abc123xyz`
Replace `YOUR_STORE_HASH` in the examples below with your actual store hash.
:::
### Example 1: Specific State AND Product Category (Combined)
Trigger verification only when BOTH conditions are met: shipping to California AND cart contains products from specific categories.
```html
```
:::tip Finding Category IDs
To find your category IDs, go to **Products** > **Product Categories** in your BigCommerce admin. Click on a category - the ID is shown in the URL (e.g., `/manage/categories/23` means the ID is `23`).
:::
### Example 2: Specific State AND Custom Field (Combined)
Trigger verification only when BOTH conditions are met: shipping to California AND cart contains products with the `id_verification_required` custom field.
```html
```
:::tip Creating Custom Fields
To add a custom field to a product:
1. Go to **Products** > **View** in BigCommerce admin
2. Edit the product
3. Scroll to **Custom Fields**
4. Add a field with name `id_verification_required` and value `true`
5. Save the product
:::
:::tip Combining Conditions
These examples demonstrate AND logic - both conditions must be true. You can adapt this pattern to combine any conditions:
- Change `REQUIRED_STATE` to any US state code (e.g., 'NY', 'TX')
- Add multiple states by changing the check to `['CA', 'NY'].includes(shippingAddress.stateOrProvinceCode)`
- Combine with cart total checks by adding `cart.cartAmount >= MINIMUM_AMOUNT`
:::
### Learn More
For more information about the Real ID JS SDK, including theming options and prepopulating customer data, see our [JavaScript SDK documentation](../js).
---
// File: bigcommerce/billing
# Billing & Subscription
Real ID for BigCommerce uses Stripe for billing, integrated directly within the app. You can manage your entire subscription from the Billing tab in the Real ID settings without needing a separate account.
## Subscribing to a Plan
To subscribe to Real ID:
1. Open the **Real ID** app in your BigCommerce admin
2. Go to **Settings** → **Billing** tab
3. Select a plan from the pricing options displayed
4. Complete the checkout process with your payment details
Once subscribed, you'll have immediate access to all Real ID features included in your plan.
For current pricing details, visit our [pricing page](https://getverdict.com/pricing).
## Viewing Your Current Plan
To view your subscription details:
1. Open the **Real ID** app in your BigCommerce admin
2. Go to **Settings** → **Billing** tab
Here you'll see:
- **Current plan** — Your active subscription plan and status
- **Billing cycle** — Whether you're on monthly or annual billing
- **Next billing date** — When your next payment will be processed
- **Usage this period** — Number of ID checks used in the current billing cycle
## Managing Your Subscription
All subscription management is handled through the Stripe customer portal. To access it:
1. Open the **Real ID** app in your BigCommerce admin
2. Go to **Settings** → **Billing** tab
3. Click the **Manage Subscription** button
This opens the Stripe customer portal where you can:
- **View invoices** — See your complete billing history
- **Update payment method** — Change your credit card or payment details
- **Change plan** — Upgrade or downgrade your subscription
- **Cancel subscription** — End your Real ID subscription
### Quick Actions
The Billing tab also provides quick action buttons for common tasks:
- **View Invoices** — Opens the Stripe portal to your invoice history
- **Update Payment Method** — Jump directly to payment settings
- **Change Plan** — Modify your current subscription
## Canceling Your Subscription
To cancel your Real ID subscription:
1. Open the **Real ID** app in your BigCommerce admin
2. Go to **Settings** → **Billing** tab
3. Click **Manage Subscription**
4. In the Stripe portal, click **Cancel plan** or **Cancel subscription**
5. Confirm the cancellation
:::warning Before You Cancel
Make sure to download any ID check photos or data you need before canceling. See [Downloading Customer Photos](../for-merchants/downloading-customer-photos.md) for instructions.
:::
### What Happens After Cancellation
When you cancel your subscription:
- **Access until period end** — You'll retain access to Real ID until your current billing period ends
- **No further charges** — You won't be charged after the current period
- **Data retention** — Your ID check data will be retained for 90 days after your subscription ends, then permanently deleted
If you see a message that your subscription will be canceled on a specific date, this confirms your cancellation is scheduled and you'll have access until that date.
### Resubscribing After Cancellation
If you want to use Real ID again after canceling:
1. Open the **Real ID** app in your BigCommerce admin
2. Go to **Settings** → **Billing** tab
3. Select a new plan and complete checkout
If you resubscribe within 90 days, your previous ID check data will still be available.
## Uninstalling the App
If you want to completely remove Real ID from your BigCommerce store:
1. Go to **Apps** → **My Apps** in your BigCommerce admin
2. Find **Real ID** in your installed apps
3. Click the **Uninstall** button
:::info Cancel First
We recommend canceling your subscription through the Billing tab before uninstalling. This ensures your subscription is properly terminated and you have a clear record of the cancellation.
:::
## Frequently Asked Questions
### How do I get a receipt or invoice?
1. Go to **Settings** → **Billing** in the Real ID app
2. Click **View Invoices** or **Manage Subscription**
3. Download invoices directly from the Stripe portal
### Can I switch between monthly and annual billing?
Yes. Click **Manage Subscription** in the Billing tab, then select a different billing interval in the Stripe portal.
### What payment methods are accepted?
Real ID accepts all major credit and debit cards through Stripe, including Visa, Mastercard, American Express, and Discover.
### Will canceling affect my existing orders?
No. Canceling Real ID will not modify, cancel, or refund any of your orders. ID verification will simply stop for new orders, and any existing ID check data will remain accessible until the 90-day retention period ends.
### Why am I seeing "No Active Subscription"?
If you see this message in the Billing tab, it means you don't currently have an active Real ID subscription. Select a plan to subscribe and start verifying IDs.
---
// File: bigcommerce/metadata
# Metafields
Real ID automatically syncs the status of your ID checks to BigCommerce orders and customers using metafields. It writes two metafields under the `realid` namespace:
- `realid.check_id` - the specific ID check associated with this customer or order
- `realid.verification_status` - the current status of the ID check
These metafields are updated automatically as customers progress through their ID verification.
## `realid.verification_status` Metafield
This metafield is present on both the order and the customer. It reflects the current state of the ID check and is kept in sync during the customer's ID verification lifecycle.
Here are all of the possible values:
- `pending` - the ID check has been created but the customer has not opened it yet
- `in_progress` - the customer has opened the ID check and is actively verifying
- `in_review` - the ID check has warnings (such as an expired ID) that require manual approval
- `failed` - the ID check failed conclusively
- `verified` - the customer successfully completed their ID check
- `manually_approved` - a staff member manually approved the ID check
- `manually_rejected` - a staff member manually rejected the ID check
:::note
These metafields will only be present on orders or customers that have an associated ID check. If you have trigger rules configured that only require ID verification under specific conditions, orders that don't match those conditions won't have these metafields.
:::
## `realid.check_id` Metafield
This metafield is present on both the order and the customer. It contains the unique token that references the customer's most recent ID check.
You can use this token as the ID parameter for [retrieving the details of the ID check with the Real ID REST API](../api/checks.mdx).
Manually creating new ID checks will overwrite the `realid.check_id` metafield. If the customer is already verified then a new ID check will replace the current value.
## Viewing Metafields
You can view the metafields for an order or customer through the BigCommerce API. Use the [BigCommerce Metafields API](https://developer.bigcommerce.com/docs/rest-management/customers/customer-metafields) to retrieve them programmatically.
### Order metafields
```
GET /stores/{store_hash}/v3/orders/{order_id}/metafields
```
### Customer metafields
```
GET /stores/{store_hash}/v3/customers/{customer_id}/metafields
```
### Example response
```json
{
"data": [
{
"namespace": "realid",
"key": "verification_status",
"value": "verified",
"permission_set": "read"
},
{
"namespace": "realid",
"key": "check_id",
"value": "abc123def456",
"permission_set": "read"
}
]
}
```
## How metafields are synchronized
Real ID sends updates to BigCommerce as customers progress through their ID check. Metafields are updated at each stage:
1. **Check created** - metafields are set to `pending`
2. **Customer opens the check** - status updates to `in_progress`
3. **Customer submits photos** - status remains `in_progress`
4. **Verification completes** - status updates to `verified` or `failed`
5. **Manual override** - status updates to `manually_approved` or `manually_rejected`
These updates are processed asynchronously, so there may be a brief delay between the customer's action and the metafield update appearing in BigCommerce.
---
// File: bigcommerce/order-statuses
# Order Status Syncing
Real ID can automatically update your BigCommerce order statuses based on the ID verification results. This helps you track which orders are waiting for verification, which have passed, and which have failed — all from your BigCommerce dashboard.
:::info Feature Must Be Enabled
Order status syncing is **disabled by default**. You'll need to enable it in your Real ID settings to start using this feature.
:::
## How it works
When a customer needs to verify their ID, Real ID can automatically update the order status at each step of the verification process:
```mermaid
flowchart TD
subgraph Your Store
A[Customer places order] --> B{ID verification required?}
B -- No --> C[Order proceeds normally]
B -- Yes --> D[Order status: Manual Verification Required]
end
subgraph ID Verification
D --> E[Customer receives ID check request]
E --> F{Customer completes verification}
F -- Passes --> G[Order status: Awaiting Fulfillment]
F -- Fails --> H[Order status: Declined]
end
subgraph Your Fulfillment
G --> I[Ship the order]
H --> J[Review & decide]
end
```
### Status flow explained
1. **Order placed** — Customer completes checkout
2. **Verification starts** — Order moves to your "in progress" status (default: Manual Verification Required)
3. **Customer submits ID** — Order stays in progress while being reviewed
4. **Verification completes**:
- ✅ **Passed** — Order moves to your "success" status (default: Awaiting Fulfillment)
- ❌ **Failed** — Order moves to your "failed" status (default: Declined)
## Setting up order status syncing
1. Open your Real ID app in BigCommerce
2. Go to **Settings**
3. Click the **Order Sync** tab
4. Toggle **Order status syncing** to enabled
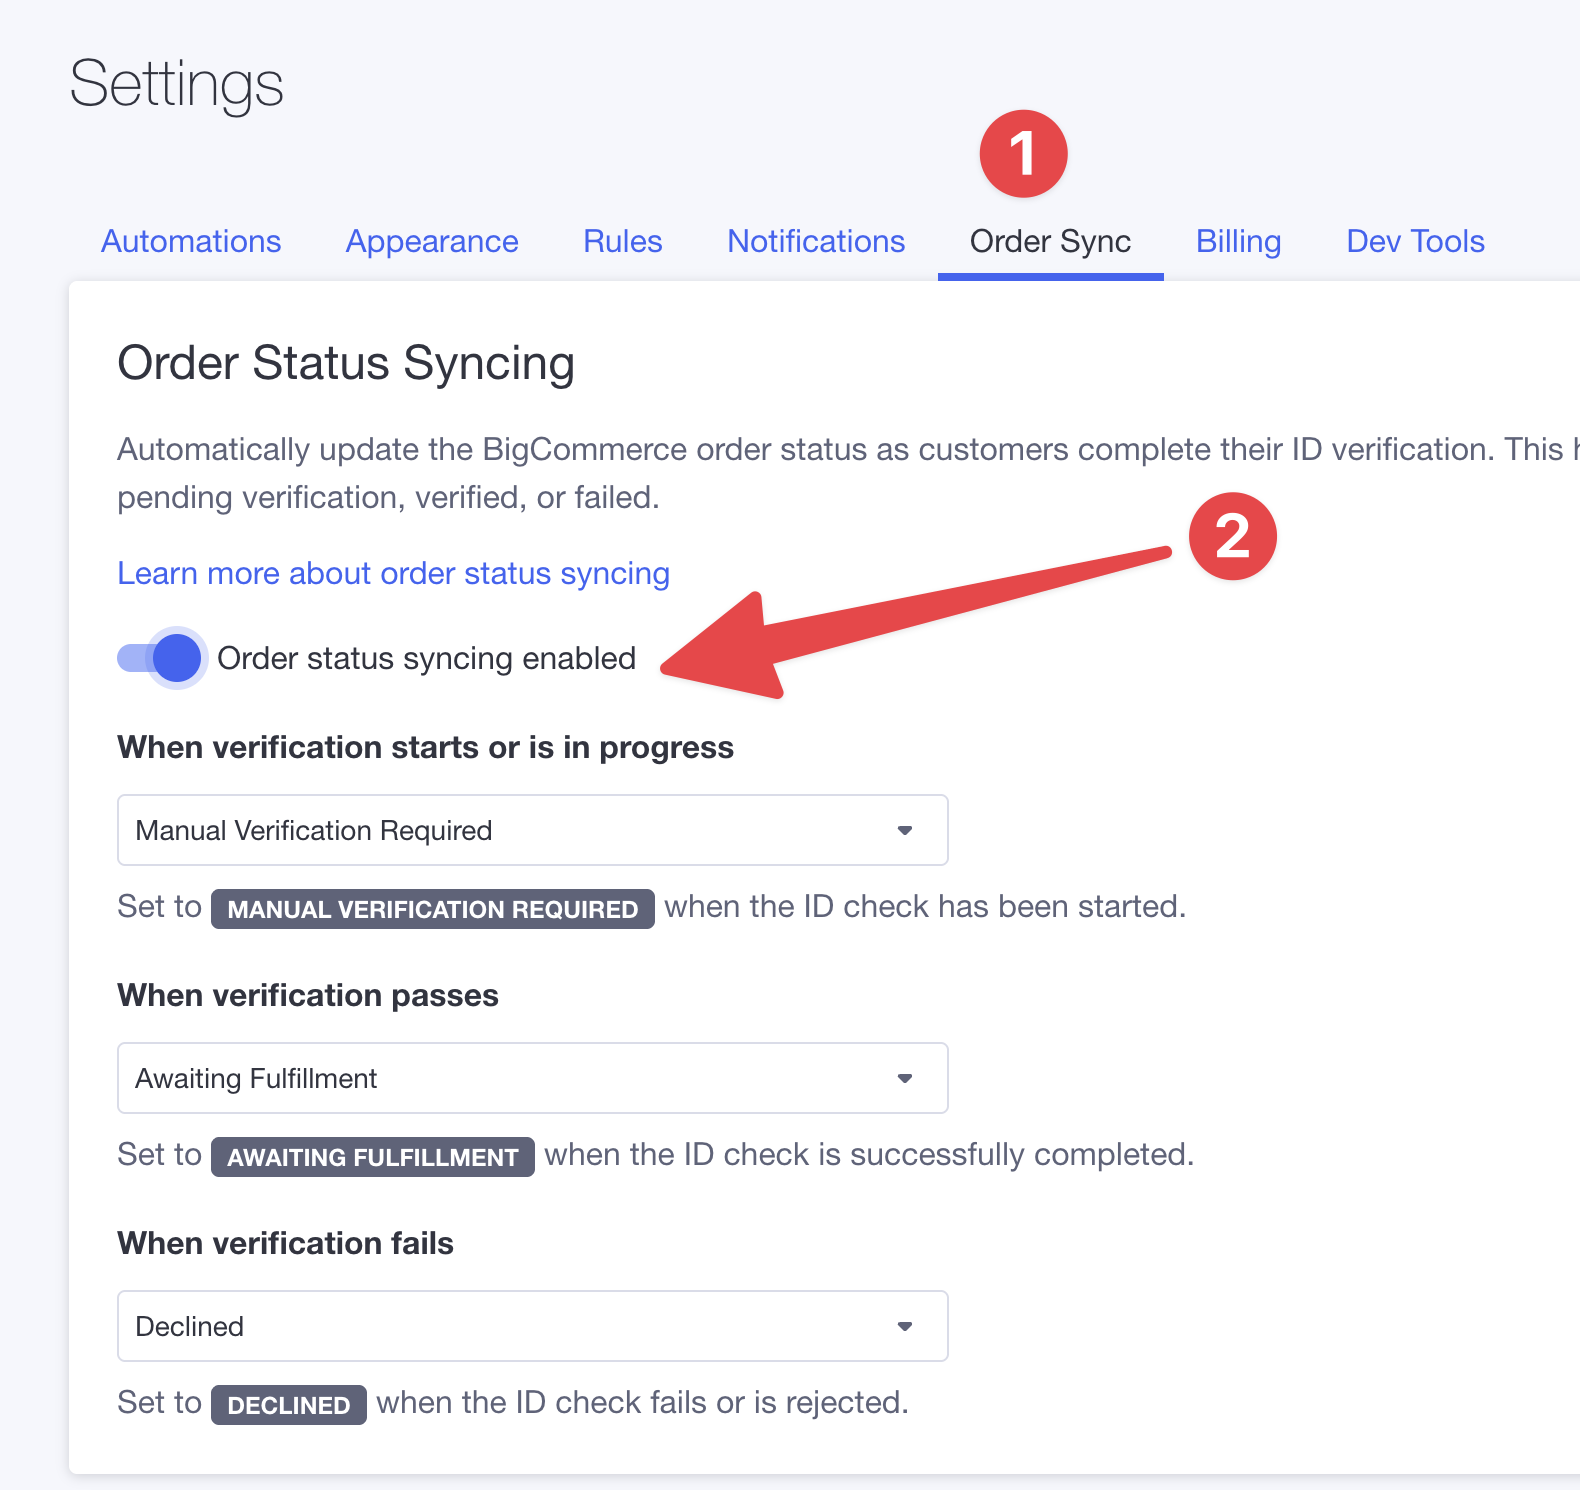
### Choosing your order statuses
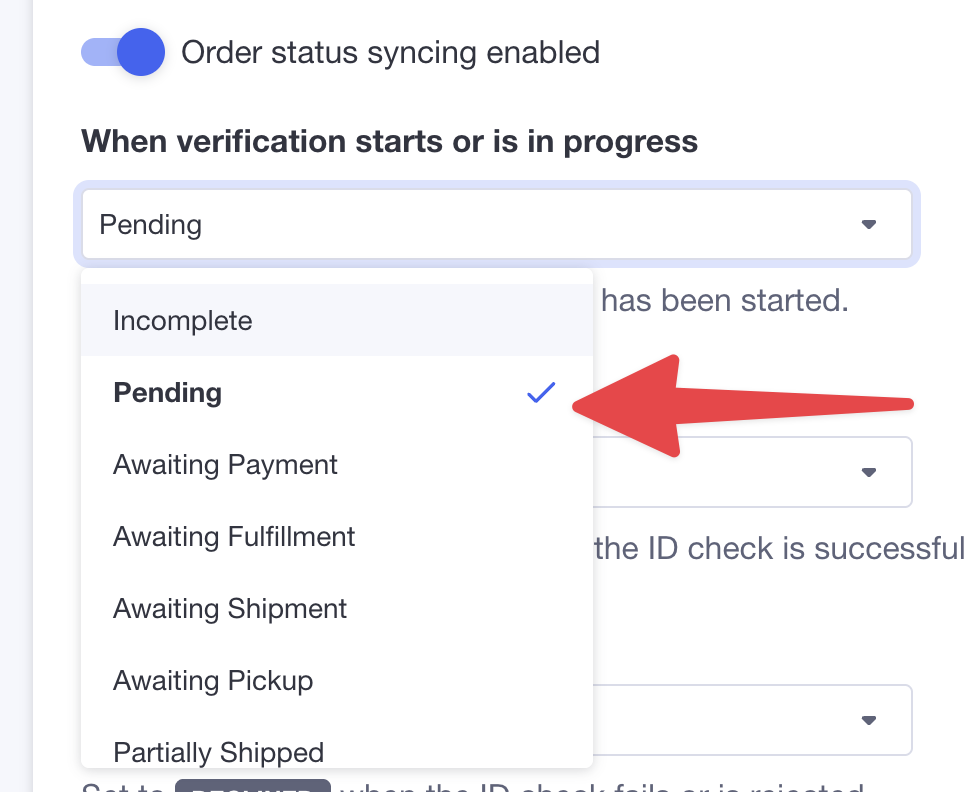
You can customize which BigCommerce order status is assigned at each stage:
| Verification Stage | Default Status | When it's applied |
| ------------------ | ---------------------------- | --------------------------------------------------------- |
| In Progress | Manual Verification Required | When the ID check starts or customer is submitting photos |
| Passed | Awaiting Fulfillment | When the customer successfully verifies their ID |
| Failed | Declined | When verification fails or is rejected |
:::tip Custom Order Statuses
If you've created custom order statuses in BigCommerce, they'll automatically appear in the dropdown options.
:::
## Order Protection
One of the most important features is **Order Protection**. This prevents Real ID from accidentally changing the status of orders that have already been processed.
### Why is this important?
Imagine this scenario:
1. Customer places an order and passes ID verification
2. You ship the order (status: **Shipped**)
3. Days later, something triggers the ID check to re-sync
4. Without protection, the order could move back to **Awaiting Fulfillment**
5. Your fulfillment team might accidentally ship it again! 📦📦
**Order Protection prevents this** by never changing orders that are already in certain "final" statuses.
```mermaid
flowchart LR
subgraph Protected Statuses
A[Shipped]
B[Cancelled]
C[Refunded]
D[Completed]
end
E[ID Verification Update] --> F{Is order in protected status?}
F -- Yes --> G[❌ Status NOT changed]
F -- No --> H[✅ Status updated]
```
### Default protected statuses
By default, Real ID will **not** change orders that are already:
- **Shipped** — Order has been shipped to the customer
- **Partially Shipped** — Some items have been shipped
- **Refunded** — Order has been refunded
- **Cancelled** — Order was cancelled
- **Completed** — Order is fully complete
- **Partially Refunded** — A partial refund was issued
### Customizing protected statuses
You can add or remove protected statuses in the **Order Protection** section of the Order Sync settings:
1. Go to **Settings** → **Order Sync**
2. Scroll to the **Order Protection** section
3. Check or uncheck statuses based on your workflow
:::caution Recommendation
We strongly recommend keeping **Shipped**, **Cancelled**, and **Refunded** as protected statuses to prevent fulfillment errors.
:::
## Understanding the status flow
Here's a complete picture of how order statuses flow through the ID verification process:
```mermaid
flowchart TD
A[New Order] --> B{Requires ID check?}
B -- No --> Z[Normal order flow]
B -- Yes --> C[Set to: In Progress status]
C --> D[Customer receives verification request]
D --> E[Customer opens link]
E --> F[Customer submits ID photos]
F --> G{Verification Result}
G -- Auto-approved --> H[Set to: Success status]
G -- Auto-rejected --> I[Set to: Failed status]
G -- Needs review --> J[Manual Review]
J --> K{Staff decision}
K -- Approve --> H
K -- Reject --> I
H --> L{Is order protected?}
I --> L
L -- Yes --> M[Status unchanged]
L -- No --> N[Status updated]
```
## Frequently Asked Questions
### Will enabling this feature cancel orders or issue refunds?
**No.** Real ID only changes the order status field. It does not cancel orders, issue refunds, or modify payment transactions in any way.
### What happens if I manually change an order's status?
Real ID will respect your manual changes. However, if the ID verification status changes later (for example, a staff member manually approves a failed check), Real ID may update the status again — unless the order is in a protected status.
### Can I use custom order statuses?
**Yes!** Any custom order statuses you've created in BigCommerce will automatically appear as options in the Real ID settings.
### What if an order is already shipped when verification completes?
If the order is in a **protected status** (like Shipped), Real ID will **not** change its status. The verification result will still be recorded in the order notes, but the status will remain unchanged.
### How do I know if an order's status was changed by Real ID?
Real ID adds a note to the order each time it processes an ID verification. You can view these notes in the order details within BigCommerce.
### Does this work with fulfillment apps like ShipStation?
Yes! The order status changes made by Real ID are standard BigCommerce status updates. Any app that reads order statuses (like ShipStation, ShipBob, etc.) will see the updated status.
:::tip Pro Tip
The default "Failed" status is **Declined**, which will prevent most fulfillment apps from shipping the order. If you prefer a different workflow, you can change this to **Manual Verification Required** or a custom "On Hold" status.
:::
## Troubleshooting
### Order status isn't changing
Check the following:
1. **Is order status syncing enabled?** Go to Settings → Order Sync and ensure the toggle is on.
2. **Is the order in a protected status?** Orders in protected statuses won't be updated.
3. **Is the order a BigCommerce order?** This feature only works with orders from your BigCommerce store.
### Order moved to wrong status
If an order was moved to an unexpected status:
1. Check if the ID verification result changed (view the check details in Real ID)
2. Review your status mapping in Settings → Order Sync
3. Consider adding that status to your protected list if needed
## Related Documentation
- [After Checkout Verification](./after-checkout.md) — Setting up ID verification after customers complete checkout
- [Before Checkout Verification](./before-checkout.md) — Requiring ID verification before customers can checkout
---
// File: bigcommerce/viewing-ids
# Viewing ID Checks
Real ID provides multiple ways to view and manage ID verification checks for your BigCommerce store.
- Inside the Real ID App
- From the BigCommerce orders dashboard
- From the BigCommerce customers dashboard
## From the Real ID App
The primary way to view all ID checks is through the Real ID app dashboard.
### Accessing the Dashboard
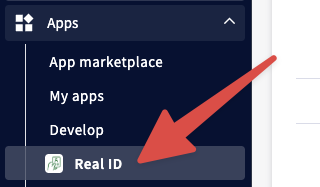
1. Log in to your BigCommerce admin panel
2. Navigate to **Apps** > **Real ID**
3. Click on **ID Checks** in the navigation
### Dashboard Features

The ID Checks dashboard provides:
- **List View**: See all ID checks with status, customer name, order number, and date
- **Filtering**: Filter by status (Verified, Failed, In Progress, In Review)
- **Search**: Search by customer name, email, or order number
- **Bulk Actions**: Archive or unarchive multiple checks at once
### Check Details Page
Click on any ID check to view its full details:
- Customer information (name, email, phone)
- Verification status and confidence scores
- Submitted photos (ID front/back, selfie, signature)
- Document details extracted from the ID (name, DOB, expiration)
- Timeline of events (when sent, opened, submitted, verified)
- Actions (approve, reject, send reminder, archive)
## From Order Details
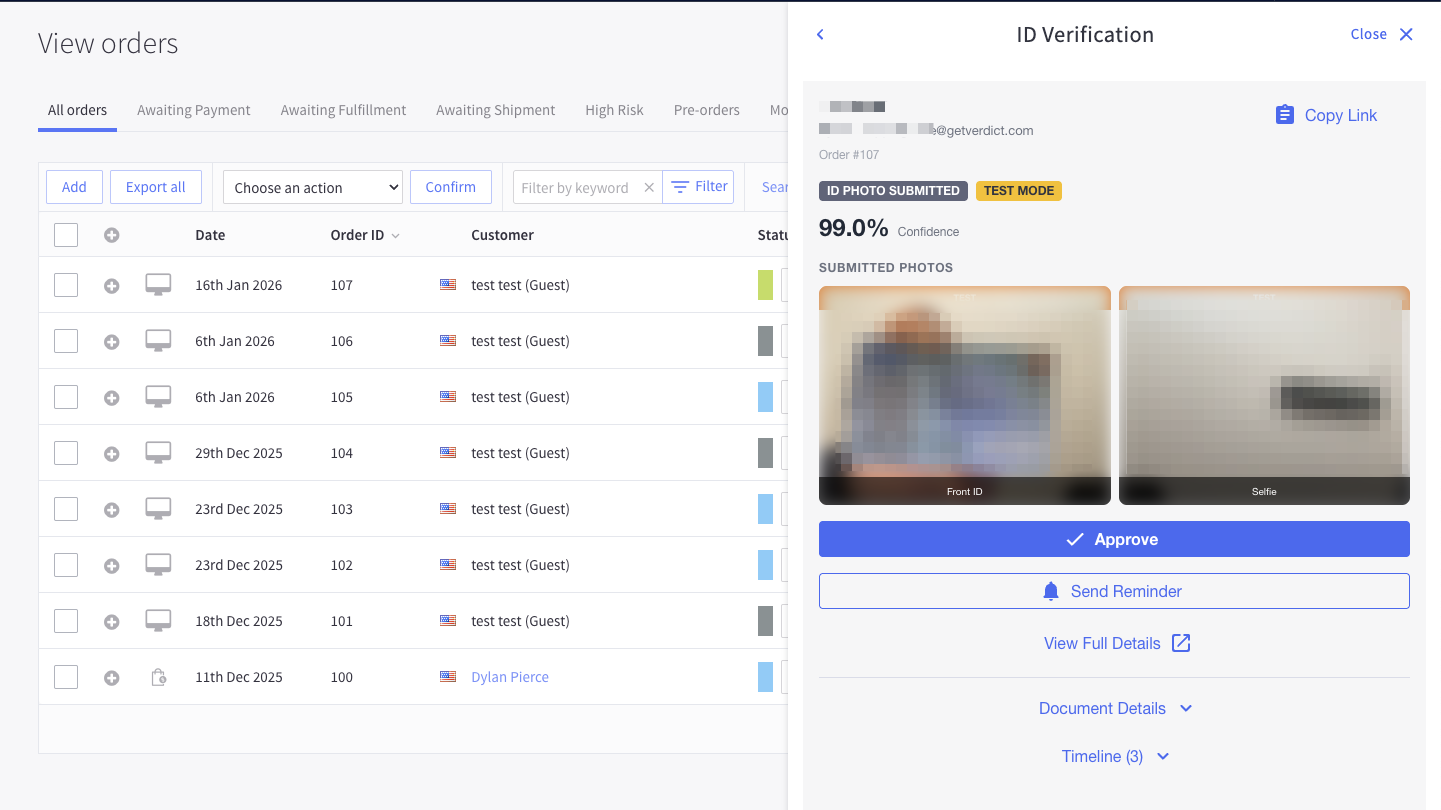
Real ID adds an **ID Verification** panel directly to your BigCommerce order pages, allowing you to view verification status without leaving the order context.
### How It Works
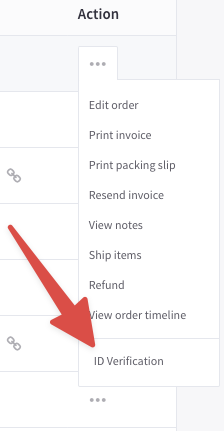
When viewing an order in your BigCommerce admin, you'll see an "ID Verification" menu item in the order actions. Clicking it opens a side panel with:
- **Customer Info**: Name, email, and order number
- **Verification Status**: Current status badge (Verified, In Progress, Failed, etc.)
- **Confidence Score**: Overall verification confidence percentage
- **Submitted Photos**: Thumbnails of ID and selfie photos
- **Quick Actions**: Approve, reject, or send reminder buttons
- **Copy Link**: Copy the verification link to share with the customer
### Empty State
If the order doesn't have an associated ID check, the panel displays a quick form to create one. The form is pre-populated with the customer's information from the order, allowing you to send a verification request immediately.
### Navigating to Full Details
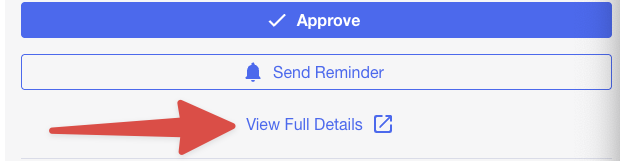
Click **View Full Details** in the panel to open the complete check details page in the Real ID app.
## From Customer Details
Similar to orders, Real ID adds an **ID Verification** panel to BigCommerce customer pages, showing the customer's verification history.
### Customer Panel Features
The customer panel shows:
- **Verification Status**: Whether the customer is verified or not
- **Customer Info**: Name and email from their most recent check
- **Latest ID Check**: The most recent verification with status and confidence score
- **Verification History**: A list of all ID checks for this customer
### Creating a Check for a Customer
If the customer has no verification history, the panel displays a form to create a new ID check pre-populated with the customer's information.
This is useful for:
- Proactively verifying customers before they place orders
- Re-verifying customers whose previous verification expired
- Verifying customers for non-order-related purposes
:::info REST API available
For developers and advanced integrations, you can retrieve ID checks programmatically using the Real ID REST API.
See the [REST API documentation](/docs/api/authentication) for details on authentication and available endpoints.
:::
## Summary
| Method | Best For |
| ------------------ | --------------------------------------------------- |
| **Real ID App** | Full management, bulk operations, detailed analysis |
| **Order Panel** | Quick status checks while processing orders |
| **Customer Panel** | Viewing customer verification history |
| **REST API** | Custom integrations, automation, reporting |
---
// File: delivering-id-checks
# Delivering ID checks
Real ID offers several ways to deliver ID checks to your customers. The right method depends on your verification flow and how you interact with your customers.
## Email and SMS
The most common delivery method. When an ID check is created — either [manually](./sending-an-id-check.md) or [automatically](./flows/after-checkout.mdx) — Real ID sends the customer a unique link to complete their verification via email and/or SMS.
You can customize the sender address, email content, and SMS messages in your [Theming](./theming/branding.md) settings.
If a customer doesn't complete their check right away, Real ID can send [automatic reminders](./for-merchants/automatic-id-check-reminders.md) to follow up.
## Embedded in your store
For a seamless experience, Real ID can embed the verification flow directly into your storefront — no separate link required. Depending on your needs, you can embed verification:
- **[After checkout](./flows/after-checkout.mdx)** — on the order confirmation page
- **[During checkout](./flows/during-checkout.md)** — within the checkout flow itself
- **[Before checkout](./flows/before-checkout.mdx)** — before customers can complete a purchase
- **[Before viewing your store](./flows/before-viewing-store.md)** — as a gate before browsing
- **[After account registration](./flows/after-registration.md)** — when a new account is created
These embedded flows still send email/SMS as a fallback if the customer navigates away before completing verification.
## Hosted links
Every ID check has a unique hosted link that you can share directly with customers:
```
https://verify.getverdict.com/{{checkId}}
```
This is useful when you want to deliver verification links through your own channels — like a custom email template, a chat message, or an in-app notification.
You can generate hosted links by [creating checks via the REST API](/docs/api/checks) with `deliver_check` set to `false` to suppress Real ID's built-in email/SMS, then send the link yourself.
### Email lookup links
If you don't have the check ID readily available, you can link customers to the hosted flow with just their email address:
```
https://verify.getverdict.com/?email=customer@example.com
```
When a customer visits this link, Real ID automatically looks up their pending ID check by email and redirects them to it. If no check is found, the customer is shown a form where they can search by email manually.
This is useful when you want to send customers a verification link but don't want to store or template the check ID — for example, in a generic follow-up email or a shared support link.
## JavaScript SDK
For full programmatic control, you can use the [JavaScript SDK](./js.mdx) to mount the verification flow anywhere on your site and control when and how it appears.
The SDK is ideal for custom integrations where you need to trigger verification based on your own application logic rather than Real ID's built-in triggers.
---
// File: faqs
# Frequently asked questions
Don't see an answer to your question? [Please ask us!](https://getverdict.com/contact)
## How does it work?
Real ID uses computer vision and A.I. technologies to identify the authenticity of your customer's IDs based on several proprietary models.
Your customers are sent a unique URL to their mobile device by email or SMS. This link opens a secure connection to allow the customer to upload a photo of their ID.
Once we receive the image, our combination of OCR (optical recognition technology), and A.I. models will score the photos. If the score of confidence is above your accepted threshold, as well as pass any additional rules set up for your account, the overall result is considered a "pass".
:::info
While Real ID is designed to help verify that a user is physically present in front of a camera with a valid ID and detect spoof attacks, including those presented via images or videos, it's not infallible and may not detect all spoof attempts.
Real ID provides a score of confidence of the likelihood of a valid ID and biometrics, with a pass or fail overall result based on a confidence threshold controlled by you and your staff within the app.
:::
## What kind of ID documents can Real ID recognize?
Real ID supports dozens of ID documents from hundreds of different countries. Supported documents include:
- Driver's Licenses
- Passports
- Residence Cards
- Commercially and nationally issued Health Insurance Cards
- Concealed Carry Licenses
[Please see our supported documents page](https://getverdict.com/supported-id-documents) for a full list of all documents that Real ID can instantly recognize.
Don't see the card or country you need to verify? Let us know. We'd be happy to help.
## How long does verification take?
The entire process can be completed in less than 30 seconds, assuming you have your ID on hand.
Real ID is built for eCommerce specifically, where speed is paramount especially if ID verification is required [before](./flows/before-checkout.mdx) or [during](./flows/during-checkout.md) checkout.
:::note
Real ID gives you and your team the ability to [override ID verification results](./for-merchants/overridding-results.md) at any time as well.
:::
## How can I tell when a customer has completed or failed ID verification?
On Shopify, Real ID will automatically leave [tags on customers and orders during the ID verification process](./shopify/tags.md). It will also [update metafields on customers and orders](./shopify/metafields.md) as well to allow theme customizations in liquid depending on the customer's verification status.
On WooCommerce, Real ID will automatically update the [customer's and order's meta as they progress through verification](./woocommerce/metadata.md). Real ID will also create an **ID verification** column in your orders page for easy reference.
## I don't want Real ID to send any ID checks automatically, can I choose which orders have ID verification?
Yes, all triggers are completely optional.
If you prefer to manually send out ID checks, just open the New ID Check page and select or manually type in the customer and their order.
## Why would I want my customer to submit a headshot with their ID photo?
Real ID gives you the choice to enable facial recognition scanning in addition to the ID document photo.
It's an option for higher risk transactions to protect against the possibility of using a physically stolen ID. By requiring a headshot of the ID document owner with the ID document, we can verify the photos match.
For example, even if a bad actor had possession of a stolen credit card and matching license - they would not be able to trick face matching to identify them.
It also helps prevent fraudulent chargebacks (a.k.a. "friendly fraud") by giving you even more hard evidence showing the customer intended to make the purchase.
## How are the IDs and photos secured?
Real ID encrypts the connection from your customers mobile devices. This protects their data from being intercepted by bad actors.
You don't have to think about compliance, Real ID stores your customers' data securely in our database in transit and at rest, and not on your own infrastructure.
You're always in control over what data you'd like to keep. [Delete your customer's ID or headshot photos at any time](./for-merchants/deleting-data.md) in the app.
## Are ID photos & data stored on my Shopify or WooCommerce store?
No, all customer data including photos & extracted details from the IDs are stored on Real ID's secure cloud. No PII (Personally Identifable Data) data is stored on your Shopify or WooCommerce store whatsoever. The only data stored on your store directly are the ID check statuses of each check, and the unique token that represents the customer's ID check. Please see the [tags](./shopify/tags.md), [metafields](./shopify/metafields.md), [notes](./shopify/notes.md) & [metadata](./woocommerce/metadata.md) to understand what this data looks like.
When viewing ID data in the Real ID dashboard, you're only viewing short lived photos that are directly from the Real ID secure cloud, and not from Shopify or WooCommerce. Please see our [Security & Privacy](https://getverdict.com/security-and-privacy) policies for more details.
You can also [restrict ID check access to specific staff members](./for-merchants/managing-staff-permissions.md) by limiting the permissions of who can view ID check data.
## If I receive a chargeback can I have a detailed report of an ID check for the dispute?
Yes, of course. Please [contact us](mailto:support@getverdict.com) if you have a chargeback from a customer with an ID verified by Real ID.
Chargebacks from ID verified orders are extremely rare. ID verification alone is a strong deterrent for both real and fraudulent chargebacks.
In the unlikely event you'll still receive a chargeback from an ID verified customer, we'll generate a detailed report for you to include in your evidence for the chargeback dispute.
:::tip
If your store is especially targeted by real or fraudulent chargebacks, we highly recommend [enabling biometric (selfie) verification](./id-check-process.md#face-match). Additionally you can also [enable Proof of Address documentation](./rules/proof-of-address.md) as part of the customer ID check for additional evidence.
:::
## Why are customers sent a link to `verify.getverdict.com`?
`verify.getverdict.com` is where customers submit their ID photos. It's the default hosted link for every ID check, and it's the domain used in both email and SMS notifications.
An ID check link looks like `https://verify.getverdict.com/abcedef123`, where the last segment is the unique ID check token.
:::note Older `idv.link` links
Real ID previously sent ID checks over a shortened `idv.link` domain. That domain is deprecated and is no longer used for new ID checks. If you have `idv.link` hardcoded anywhere — a theme snippet, a caching plugin's script exclusion list, or a firewall allowlist — update it to `verify.getverdict.com`.
:::
:::tip White labeling available
These links can be customized to match your website. For example, Real ID could verify your customers IDs at `verify.yoursite.com`, please [contact us](https://getverdict.com/contact) to get assistance setting up a white labeled link for better association with your brand.
:::
## How much does it cost?
We offer several different plans to meet your needs. See the [pricing page](https://getverdict.com/pricing) for more details.
There are two parts to each plan, the monthly fee and the usage fees.
The monthly fee is a base flat amount that doesn't change from month to month. The usage fees are incurred per ID check.
The higher monthly plans unlock more features, as well as reduce the per ID check usage fees.
Both fees are listed for each plan on the [pricing page](https://getverdict.com/pricing).
## Can I get a refund on completed or in progress ID checks?
Once a customer has submitted at least one photo for the ID check, it becomes non-refundable.
This still applies if the customer's photos are deleted after they've been submitted in the app.
## My customer says they can't open their ID check. What should I do?
We're happy to troubleshoot. Please contact us, or email us or chat with us in-app for support.
## Can I get a refund on my monthly subscription fee?
We cannot refund monthly subscriptions outside of a billing period (30) window.
## Can I delete my customers photos after they have been verified?
Protecting your customers privacy is very important to us. That's why we offer an option in any ID check to delete your customer's photos safely and permanently.
You can reassure your customers that their IDs will be wiped after they've verified their ID.
## What kind of information can I see in the dashboard?
Real ID automatically reads the text on any given document. Depending on the level of detail the document provides you can expect to read data such as:
- First Name
- Last Name
- Address
- Age
- City
- State
- Issuing Country of the ID
- Issuing State of the ID
- Unique License or Document ID
Additionally you can use these pieces of information to verify that the customer is qualified for the purchase. Or that their billing & shipping information matches their ID.
## Can I automatically require ID verification only on high risk orders?
Real ID offers a "sit and forget" customer verification process so you can require ID verification automatically on high risk orders.
You can enable rules to automatically trigger ID verification checks to your customers.
Total Order Price - depending on the amount of the total price of the order, you can trigger an ID check.
Mistmatching Shipping to Billing Address - if an order's shipping and billing address do not match, it's a sign of potential credit card fraud. Real ID can automatically verify these orders.
High risk - if an order is detected as medium or high risk by Shopify or other 3rd party anti-fraud apps, trigger an ID verification check.
And many more options. Learn more here.
## When is an ID check charged for?
ID checks are charged when the customer submits an ID photo and that ID is processed. The final automatic decision does not affect the charge.
If you have sent an ID check by mistake, you can approve or reject it manually to prevent the customer from uploading photos and incurring a charge.
If you have remember repeat customers enabled, then only ID checks will be sent to customers without the `ID verification completed` or `ID check manually approved` tag.
:::tip
To help prevent bad quality photos and failed checks, the customer must pass the [ID and selfie autocapture](./id-check-process#autocapturing-id-photos-and-headshots). This helps guide the customer to taking a quality in focus photo of their ID.
:::
## If I turn on automatic ID checking, will repeat customers receive ID checks twice?
There's an additional setting in the dashboard that allows you to only require ID verification once from your repeat customers.
That way you can reduce friction even further and keep your trusted customers from having to do multiple ID checks.
## I need to require my customer's signature for orders in addition to ID verification - can Real ID help?
Yes, easy & intuitive electronic signatures are available in Real ID. You can enable signature captures for ID verification checks. You'll be able to view and download your customers signatures right in the dashboard.
No code required to turn on or disable this feature.
---
// File: flows/after-checkout
import Tabs from "@theme/Tabs";
import TabItem from "@theme/TabItem";
# ID verification after checkout
If you have one or more automatic ID verification rules enabled, on qualified orders Real ID will automatically prompt your customer to complete their ID verification via a unique link sent over email or SMS.
However, to make ID verification even more seamless and intuitive for your customers, you can enable Real ID to collect your customer's ID within your native checkout flow.
:::tip
We recommend this ID verification flow if possible. It's the most flexible and is the least amount of friction for your customers to finish their buying journey.
However, if your compliance requires ID verification [before checkout](./before-checkout.mdx), [during checkout](./during-checkout.md), or [before customers can view your store](before-viewing-store.md), we have options for you.
**Using BigCommerce?** See our [BigCommerce After Checkout guide](../bigcommerce/after-checkout.md) for platform-specific setup instructions.
:::
## Getting Started
Your automatic ID verification settings can be found under the **Automations** section of the **Settings** page:
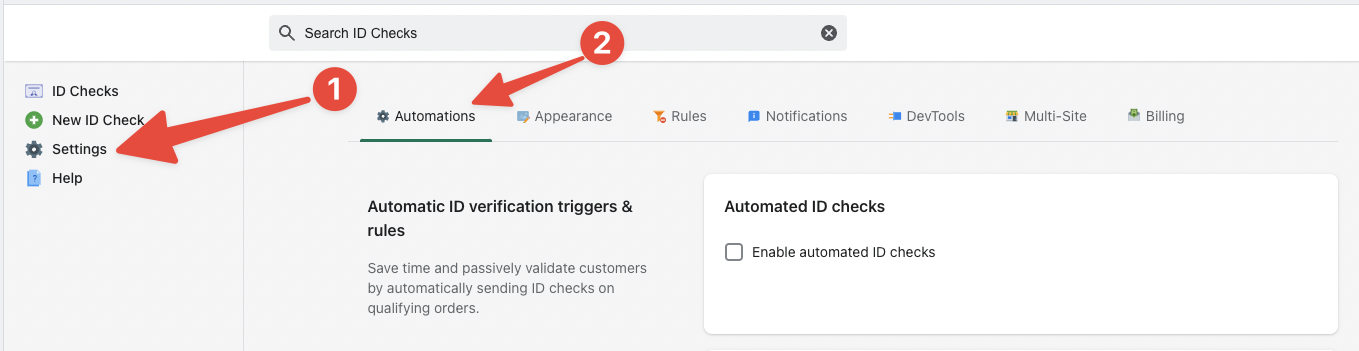
To enable automatic ID verification, click the checkbox next to **Enable automated ID checks**, then select the **After Checkout** option:
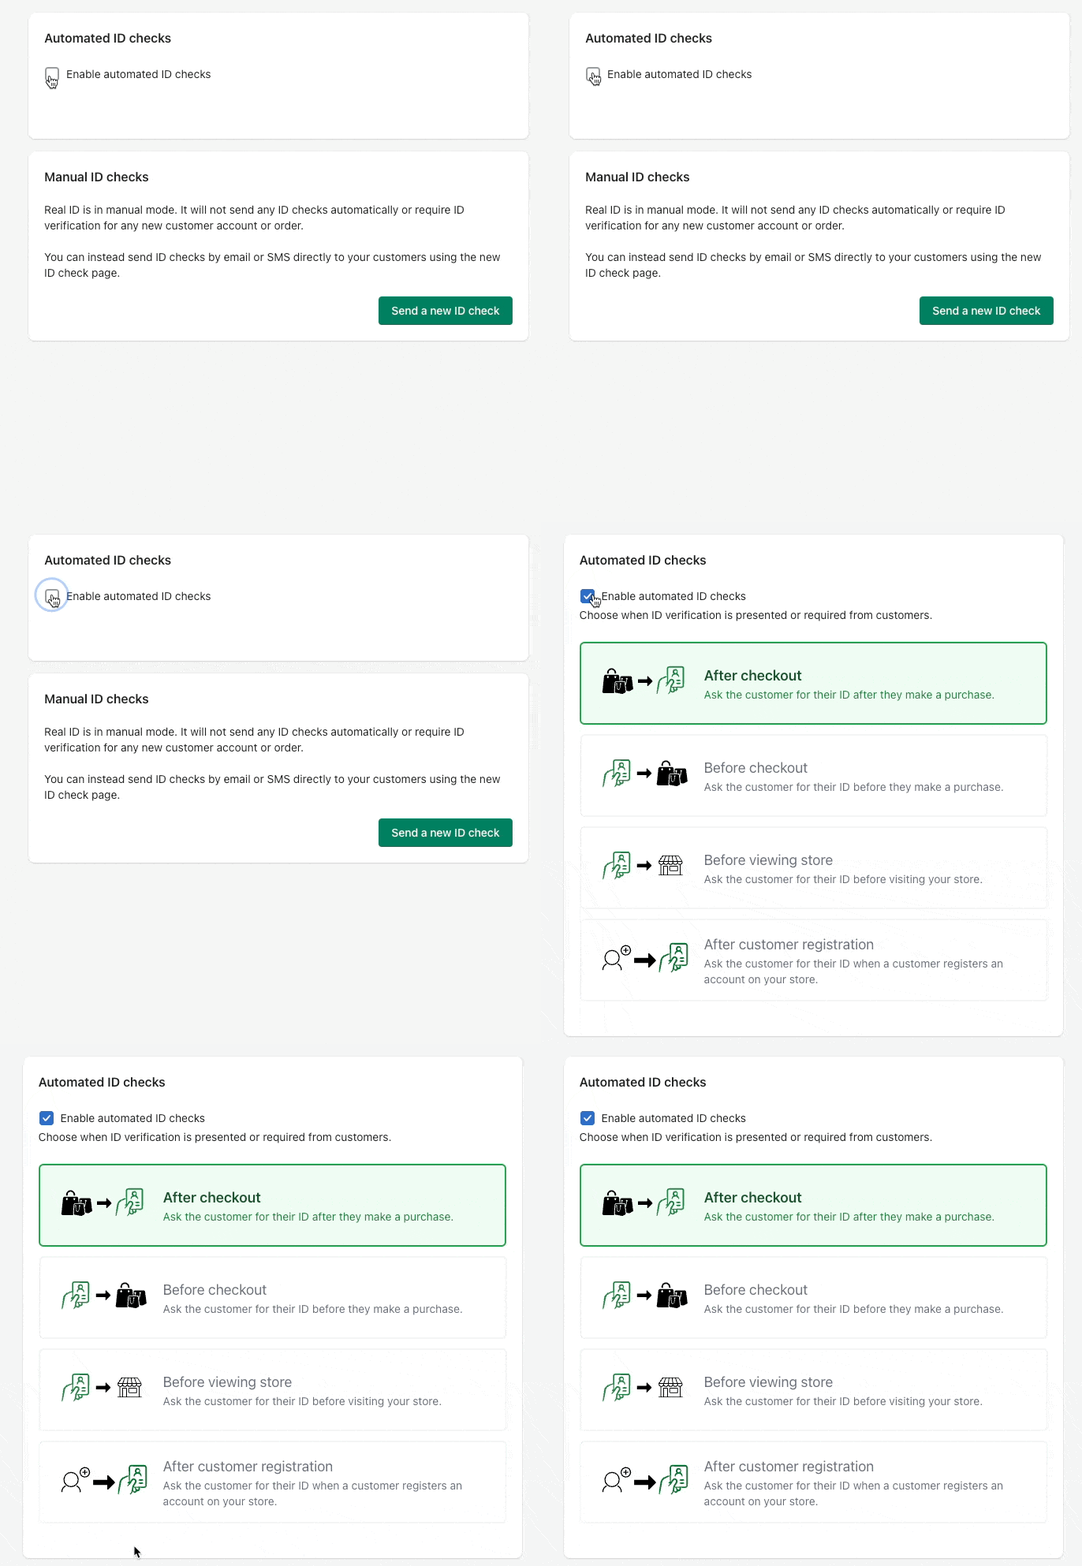
After choosing the after checkout ID verification flow, click **Save** to apply the change.
Real ID will automatically embed the ID verification flow within your store's order confirmation page, no coding or theme changes required.
:::note
You'll need to define one or more [triggers](../triggers/index.mdx) for Real ID to start verifying customer IDs.
:::
## Configuring triggers
Triggers control which orders require ID verification. You can enable triggers like high-value orders, address mismatches, specific products, and more.
**[See all available triggers →](../triggers/index.mdx)**
Need to combine conditions — like verifying only high-value orders *that are also* flagged as risky? Switch the trigger settings to [Advanced rules](../triggers/advanced-rules/index.mdx) (Automate and Protect plans) to build AND/OR condition groups. The after checkout flow supports every condition, including payment method, delivery method, and order risk.
You can also [exclude certain orders](../triggers/exceptions.mdx) from verification — for example, already-verified customers, in-store pickup orders, or specific payment gateways.
## How it works
After a customer places their order, Real ID checks it against your triggers. If the order qualifies, the customer is prompted to verify their ID on the order status page, or through a link sent by email or SMS.
```mermaid
flowchart TD
order([Customer places order]) --> triggers{Order matches your triggers?}
triggers -- No match --> done([No ID check needed])
triggers -- Match --> recognized{Already verified? Recognized customer}
recognized -- Yes --> done
recognized -- No --> required([ID verification required])
required -- Customer submits ID photos --> verify{ID verification}
verify -- Passes your rules --> passed([ID verification completed])
verify -- Fails your rules --> failed([ID verification failed])
failed -. Staff member overrides results .-> passed
```
### What triggers an ID check
Real ID checks each order against your [triggers](../triggers/index.mdx) — for example high-value orders, address mismatches, or specific products. You can also [exclude certain orders](../triggers/exceptions.mdx), like already-verified customers or in-store pickups.
### Passing or failing your rules
After the customer submits their ID photos, Real ID checks them against your rules — age, face match, document expiry, and address or name cross-checks. Customers who pass are tagged `ID verification completed`. If a check fails, the order is shown as **In Review** so your team can [approve or reject it](../for-merchants/overridding-results.md).
### When emails are sent
- **When an order qualifies** — the customer gets an email or SMS with a link to verify their ID.
- **When the check passes** — the customer gets a confirmation, and your team gets a notification that the ID was verified.
- **When the check fails** — the customer is told their verification needs review, and your team gets a warning email with the reason.
You can turn any of these customer emails on or off in the **Notifications** area of your **Settings**.
### When tags and metafields are added
Because the order already exists, Real ID syncs ID verification [tags](../shopify/tags.md), [notes](../shopify/notes.md), and [metafields](../shopify/metafields.md) on both the order and the customer throughout the ID check lifecycle. The customer tag is what lets Real ID remember repeat customers so they only verify once.
On WooCommerce, Real ID syncs the ID check status as [metadata on the customer and order](../woocommerce/metadata.md), and can optionally [override the order's status](../woocommerce/order-statuses.md).
## Where the ID check is displayed
If you have the **after checkout** flow enabled and the order triggers an ID check then Real ID will display the ID check in the order status page within your site automatically.
It will also send the ID check via email and/or SMS if the customer provided their phone number during checkout.
### Adding the Real ID checkout block
With [Shopify Checkout Extensibility](https://help.shopify.com/en/manual/checkout-settings/checkout-extensibility/checkout-upgrade) enabled, you can add the Real ID checkout block to your Thank You and Order Status pages to prompt for ID verification after the customer has placed their order.
To add ID verification to the order status page, open the _Online Store_ sales channel from the left hand menu, and select _Themes_:

Now let's open the Theme Editor by selecting the _Customize_ button:

Once the theme editor is loaded, click the top dropdown to select the **Checkout & Customer Accounts** page:

You should now see a sample checkout page loaded. At the top of the page click the dropdown and select _Order status_:

Then at the bottom left hand side of the page, you'll see an _Add app block_ prompt. Click this button to show a menu of available blocks to add to the page:

Then, select the _ID verification_ block:

Now drag it to the top of the _Order details_ layout section on the page:

And that's it! Your customers will see a prompt to verify their ID if their order meets [one of your trigger conditions](../triggers/index.mdx), or if you've set up a [Shopify Flow workflow](../shopify/flow.md) to create ID checks for them.
### Block settings
When the block is selected in the theme editor, you'll see a **Show ID verification status** setting:

After a customer places an order, Shopify takes a moment to create the order and run its own fraud and risk analysis before the order details are available. This short delay is by design on Shopify's side, not Real ID — we can't determine whether an ID check is needed until Shopify finishes. This setting controls what the customer sees during that brief window:
- **False** (default) — the block stays hidden until a verification is actually required, then shows the prompt to verify. This is Real ID's standard behavior.
- **True** — the customer sees a short waiting message while we check whether their order needs ID verification, and a confirmation when none is required. This keeps them on the page until the result is known.
The setting is configured per page, so you can enable it on the Thank You page, the Order Status page, or both.
:::tip
Turn this on if you check every order for compliance and don't want customers navigating away before Real ID has finished checking their order.
:::
:::warning Legacy classic checkout
If your store still uses Shopify's classic checkout, Real ID currently injects the ID verification prompt into the order status page automatically. This stops working on **August 26, 2026**, when Shopify upgrades all remaining stores to the new Thank you and Order status pages.
Switch before then by following our [app blocks migration guide](../shopify/migrating-to-app-blocks.mdx) — your triggers and verified customers carry over automatically.
:::
### Selectors
WooCommerce's order status page is more customizable than Shopify. But WooCommerce's order confirmation page usually includes the class `.woocommerce-order`.
Real ID will look for these classes in the order confirmation page:
- `.woocommerce-order`
- `page-checkout`
- `woocommerce-order-received`
- `real-id-post-checkout-mount`
If none of the default WooCommerce class are available in your theme, you can place the ID check in the order status page by adding this CSS class to it: `.real-id-post-checkout-mount`
```html
```
See our [BigCommerce After Checkout guide](../bigcommerce/after-checkout.md) for platform-specific setup instructions, including how to display the ID check on the order confirmation page and configure custom trigger scripts.
For custom integrations, use the [JavaScript SDK](../js.mdx) to embed the ID verification flow on your order confirmation page. Add the SDK script tag and mount the flow on a target element:
```html
```
You can also create checks server-side via the [REST API](../api/checks.mdx) and deliver them by email or SMS, without embedding anything in your page.
## Frequently Asked Questions
### What happens if a repeat customer makes another order? Will they be prompted to verify their ID again?
In Shopify, Real ID leaves a special tag on all customers that have completed ID verification. If this tag `ID check completed` is present on the customer's profile, they will not be prompted to verify their ID again.
In WooCommerce, [Real ID updates meta on the customer account](../woocommerce/metadata.md) that they have completed ID verification.
:::info
Please note, it's uncommon but unverified customers can place multiple orders.
This will trigger multiple unique ID checks, one for each order placed. However, when the customer verifies their ID with at least one of these orders, then the customer will be verified for future ID checks. But the other in progress ID checks are independent and will need to be comleted or [manually approved](../for-merchants/overridding-results.md) by your staff.
:::
### What does this order status page look like when a customer fails ID verification?
If a customer fails their ID check, whether automatically or manually by you or your team - they will be notified by email and if they return to the order status page they'll be presented with a warning screen.
Then your staff will be able to review the photos and accept or reject them.
### Can customers automatically retry after they've failed their ID check?
By default, no customers will not be able to redo the ID check. This is by design, so that way you don't have uncontrolled costs on your ID check usage.
If you wish, you can send new ID checks to customers that fail on their first attempt manually. Or you can [enable automatic retries](../for-merchants/retrying-id-checks.md) and limit how many retries a customer is given.
### Will my customers still be notified by email or SMS after checkout as well?
Yes. Real ID will still send a notifications to your customer containing their ID verification link. The same ID check is delivered over your order status page, or by email and SMS.
### I'm using Shopify Classic Checkout, can I still use Real ID?
Yes, for now — Real ID automatically injects the ID verification prompt into the classic order status page. But Shopify is upgrading all remaining stores to the new Thank you and Order status pages on **August 26, 2026**, and the automatic injection stops working then. Your customers will still get their verification links by email and SMS, but the on-page prompt disappears.
Follow our [app blocks migration guide](../shopify/migrating-to-app-blocks.mdx) to switch before the deadline — your triggers and verified customers carry over automatically.
### Can I require ID verification during checkout, before the order is placed?
Yes! If you'd like customers to verify their ID _before_ they can submit their order, see our [during checkout guide](./during-checkout.md). This requires Shopify Plus with Checkout Extensibility enabled.
### I don't see a trigger that I need
See the full list of [available triggers](../triggers/index.mdx). If none of the built-in triggers fit your use case, on Shopify you can use our [Shopify Flow integration](../shopify/flow.md) to create ID checks based on any condition. On any platform, our [REST API](../api/checks.mdx) and [JS SDK](../js.mdx) can be used to create ID checks programmatically.
If you need help setting up a specific trigger for your business, [please contact us](https://getverdict.com/contact).
### If I switch from before checkout to after checkout ID verification, will my past verified customers still be remembered?
Yes, Real ID will track your customers ID checks even if you decide to switch between before or after checkout flows. There are some minor differences on how ID checks are tracked between the flows, but your verified customers will still be remembered even if you switch between the before or after checkout flows.
---
// File: flows/after-registration
# ID verification after account registration
Real ID can verify customer accounts after they have registered an account with your store.
Customers will be sent an email to their email address with their account after they have registered with your store, or had an account automatically created after check out.
## Getting started
To enable ID verification notifications to customers after they register an account, open the **Settings** page and select the **Automations** tab.
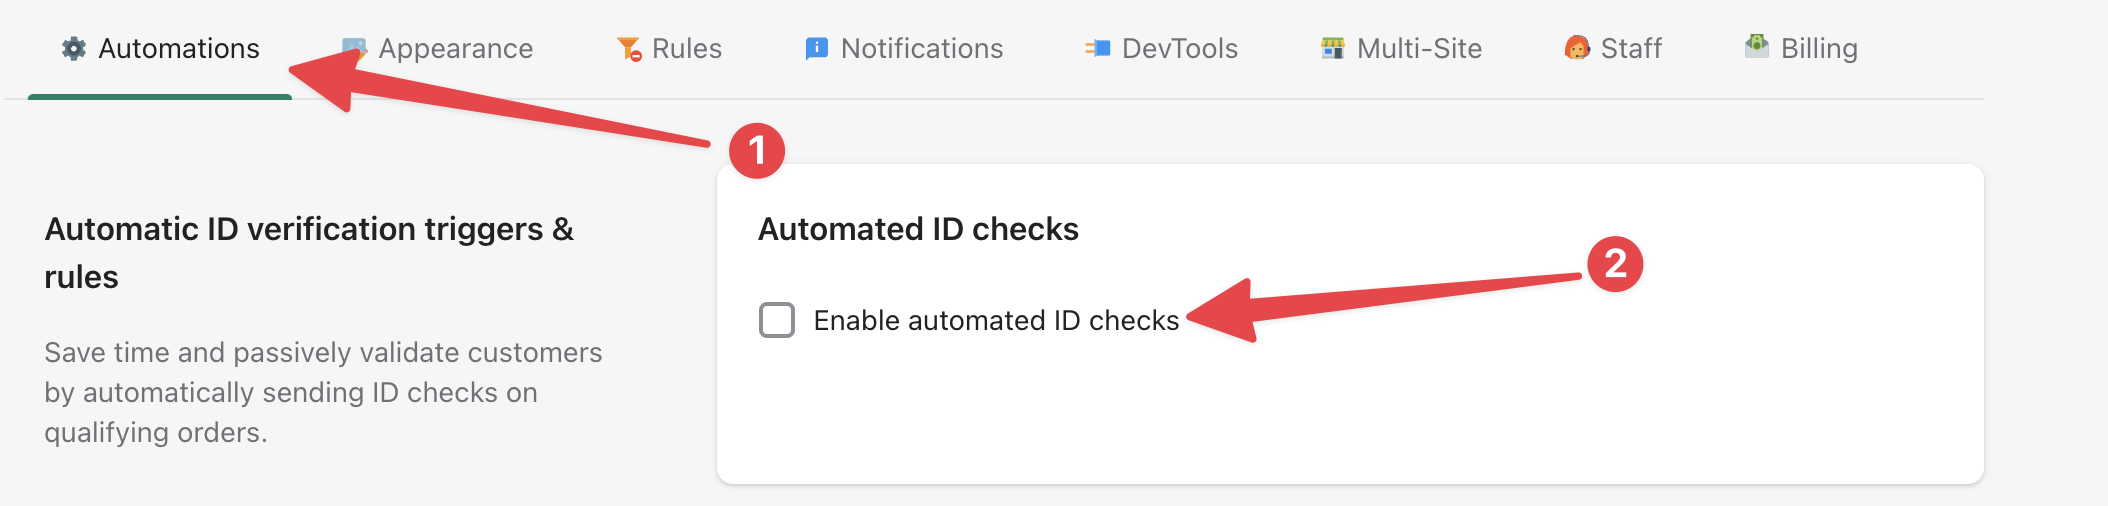
Then enable automatic ID veirfication and select the **After account registration** flow.
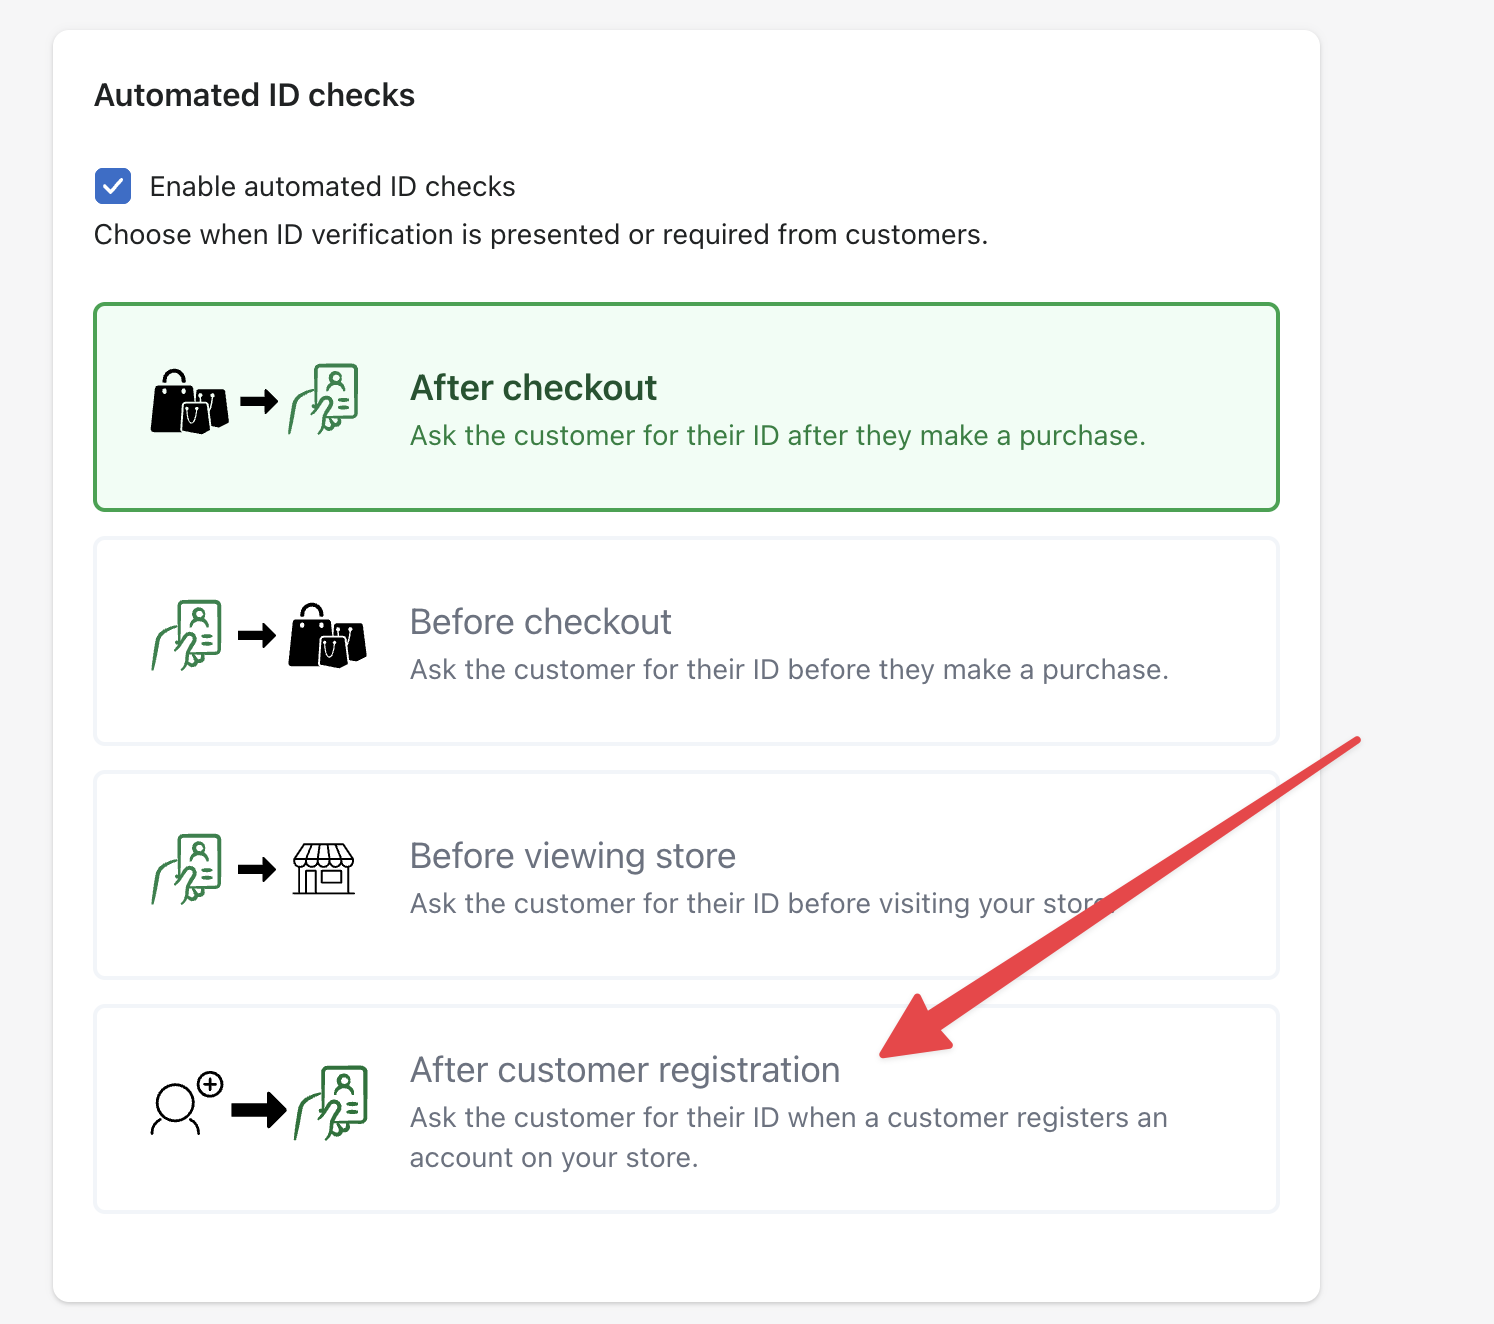
If you require ID verification before the customer can place an order, please see our [**Before Checkout**](./before-checkout.mdx) flow option instead.
:::tip
This flow does not block a customer from performing any actions like placing an order, creating a listing, etc. after they have registered.
- To prevent customers from starting an order please see the [Before Checkout flow](./before-checkout.mdx).
- To prevent unverified customers from viewing your store front entirely, please see the [Before Viewing Store flow](./before-viewing-store.md)
:::
### Sending ID checks based on customer role
If you're using Real ID in WooCommerce, you can define which roles should be sent an ID check notification. Otherwise, all new accounts are sent an ID check by default.
If you have a role that is custom, you can enter in the **slug** for the role. Then Real ID will also track this role for you:
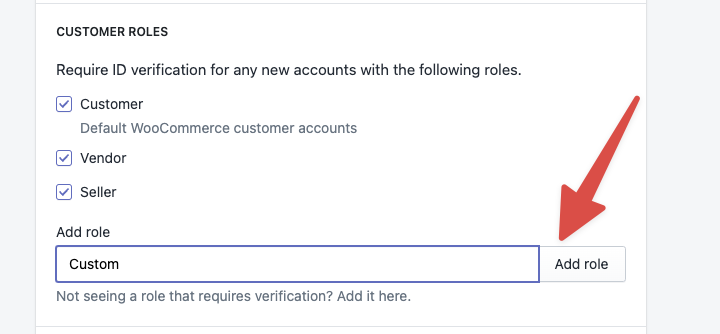
---
// File: flows/before-checkout
import Tabs from "@theme/Tabs";
import TabItem from "@theme/TabItem";
# ID verification before checkout
Due to specific age restrictions or K.Y.C. compliance requirements, you may require ID verification _before_ the customer can place the order.
The _before checkout_ flow will require ID verification before the customer can enter in their payment details and check out their order - _without_ any code changes to your theme.
Below is an example of a unverified customer being shown the prompt to verify their ID:
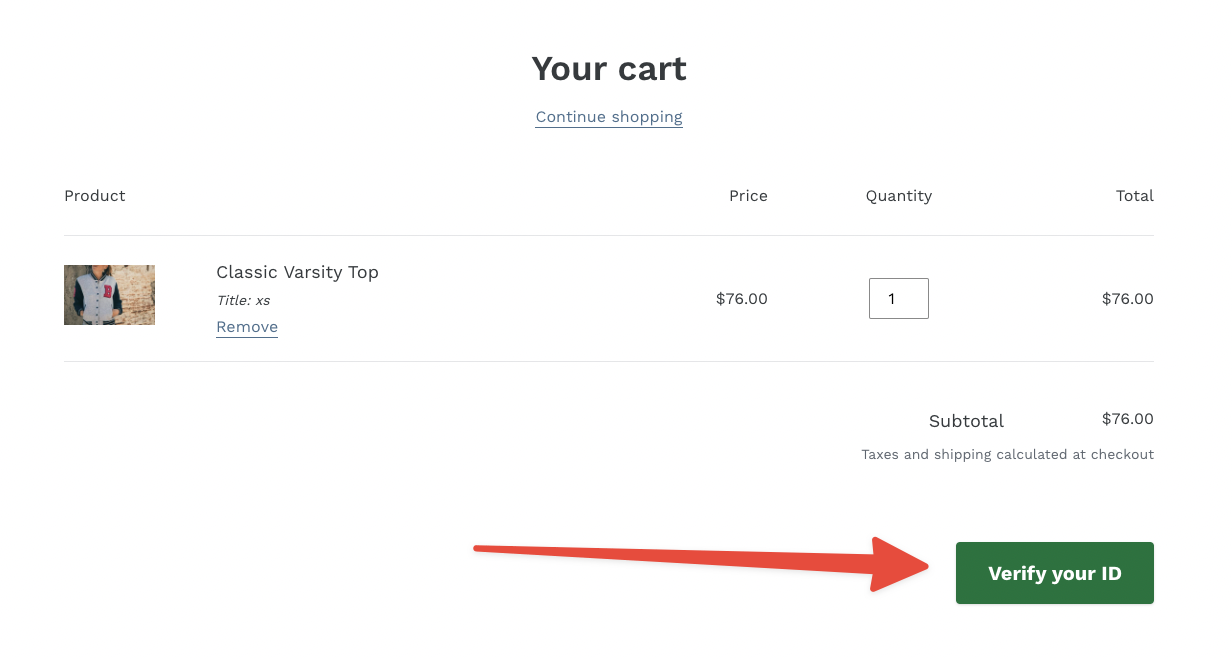
Then after verifying their ID, the **Checkout** button reappears automatically so they can continue checkout.
Real ID will override the **Checkout** button on your cart or product pages and replace it with a prompt to complete ID verification until the customer has passed ID verification automatically or a staff member has [manually approved it](../for-merchants/overridding-results.md).
## What this flow gates — and what it doesn't
The _before checkout_ flow gates the **purchase**, not the **browsing**. It replaces checkout and payment buttons, and nothing else.
That means your storefront stays fully public: products, imagery, descriptions, prices and promotional pages are all still visible to an unverified visitor. Customers only meet the verification prompt at the point they try to check out.
If you need verification to happen earlier than that, pick the flow that matches how much you want to hide:
| You want to gate… | Use | Code required |
| --- | --- | --- |
| The checkout button | **Before checkout** (this guide) | None |
| Your entire storefront, before anything is visible | [Before viewing store](./before-viewing-store.md) | None — but customers must register or log in |
| A few specific elements — a promo block, product imagery, a price | [`hidden-until-verified`](#hiding-elements-that-require-id-verification) on this page | One CSS class |
| Anything else, on your own terms | [JS SDK](../js.mdx) | Yes |
:::caution Gating the page is not the same as protecting it
_Before checkout_ and `hidden-until-verified` both work by changing what's rendered in the customer's browser. They're presentation, not enforcement — the markup is still in the page source and direct URLs still resolve.
For an age-restricted catalogue or anything carrying a compliance obligation, use [Before viewing store](./before-viewing-store.md), or enforce the gate on your own server with the [REST API](../api/checks.mdx). See also [the known bypasses below](#occasionally-unverified-customers-checkout).
:::
:::tip Shopify Checkout Extensibility
The _before checkout_ flow is supported on Shopify, WooCommerce, and BigCommerce.
However, if you're looking for our Shopify Checkout app block to drag and drop directly on your checkout page, [see our During Checkout guide](./during-checkout.md). For programmatic control over in-checkout verification on any platform, see the [JS SDK](../js.mdx).
**Using BigCommerce?** See our [BigCommerce Before Checkout guide](../bigcommerce/before-checkout.md) for platform-specific setup instructions.
:::
## Getting started
To enable ID verification before checkout, open the **Settings** area and make sure you're on the **Automations** tab. Then click **Enable automated checks**.
This will open the different ID check flow options. Select the **Before checkout** option, then click **Save**.
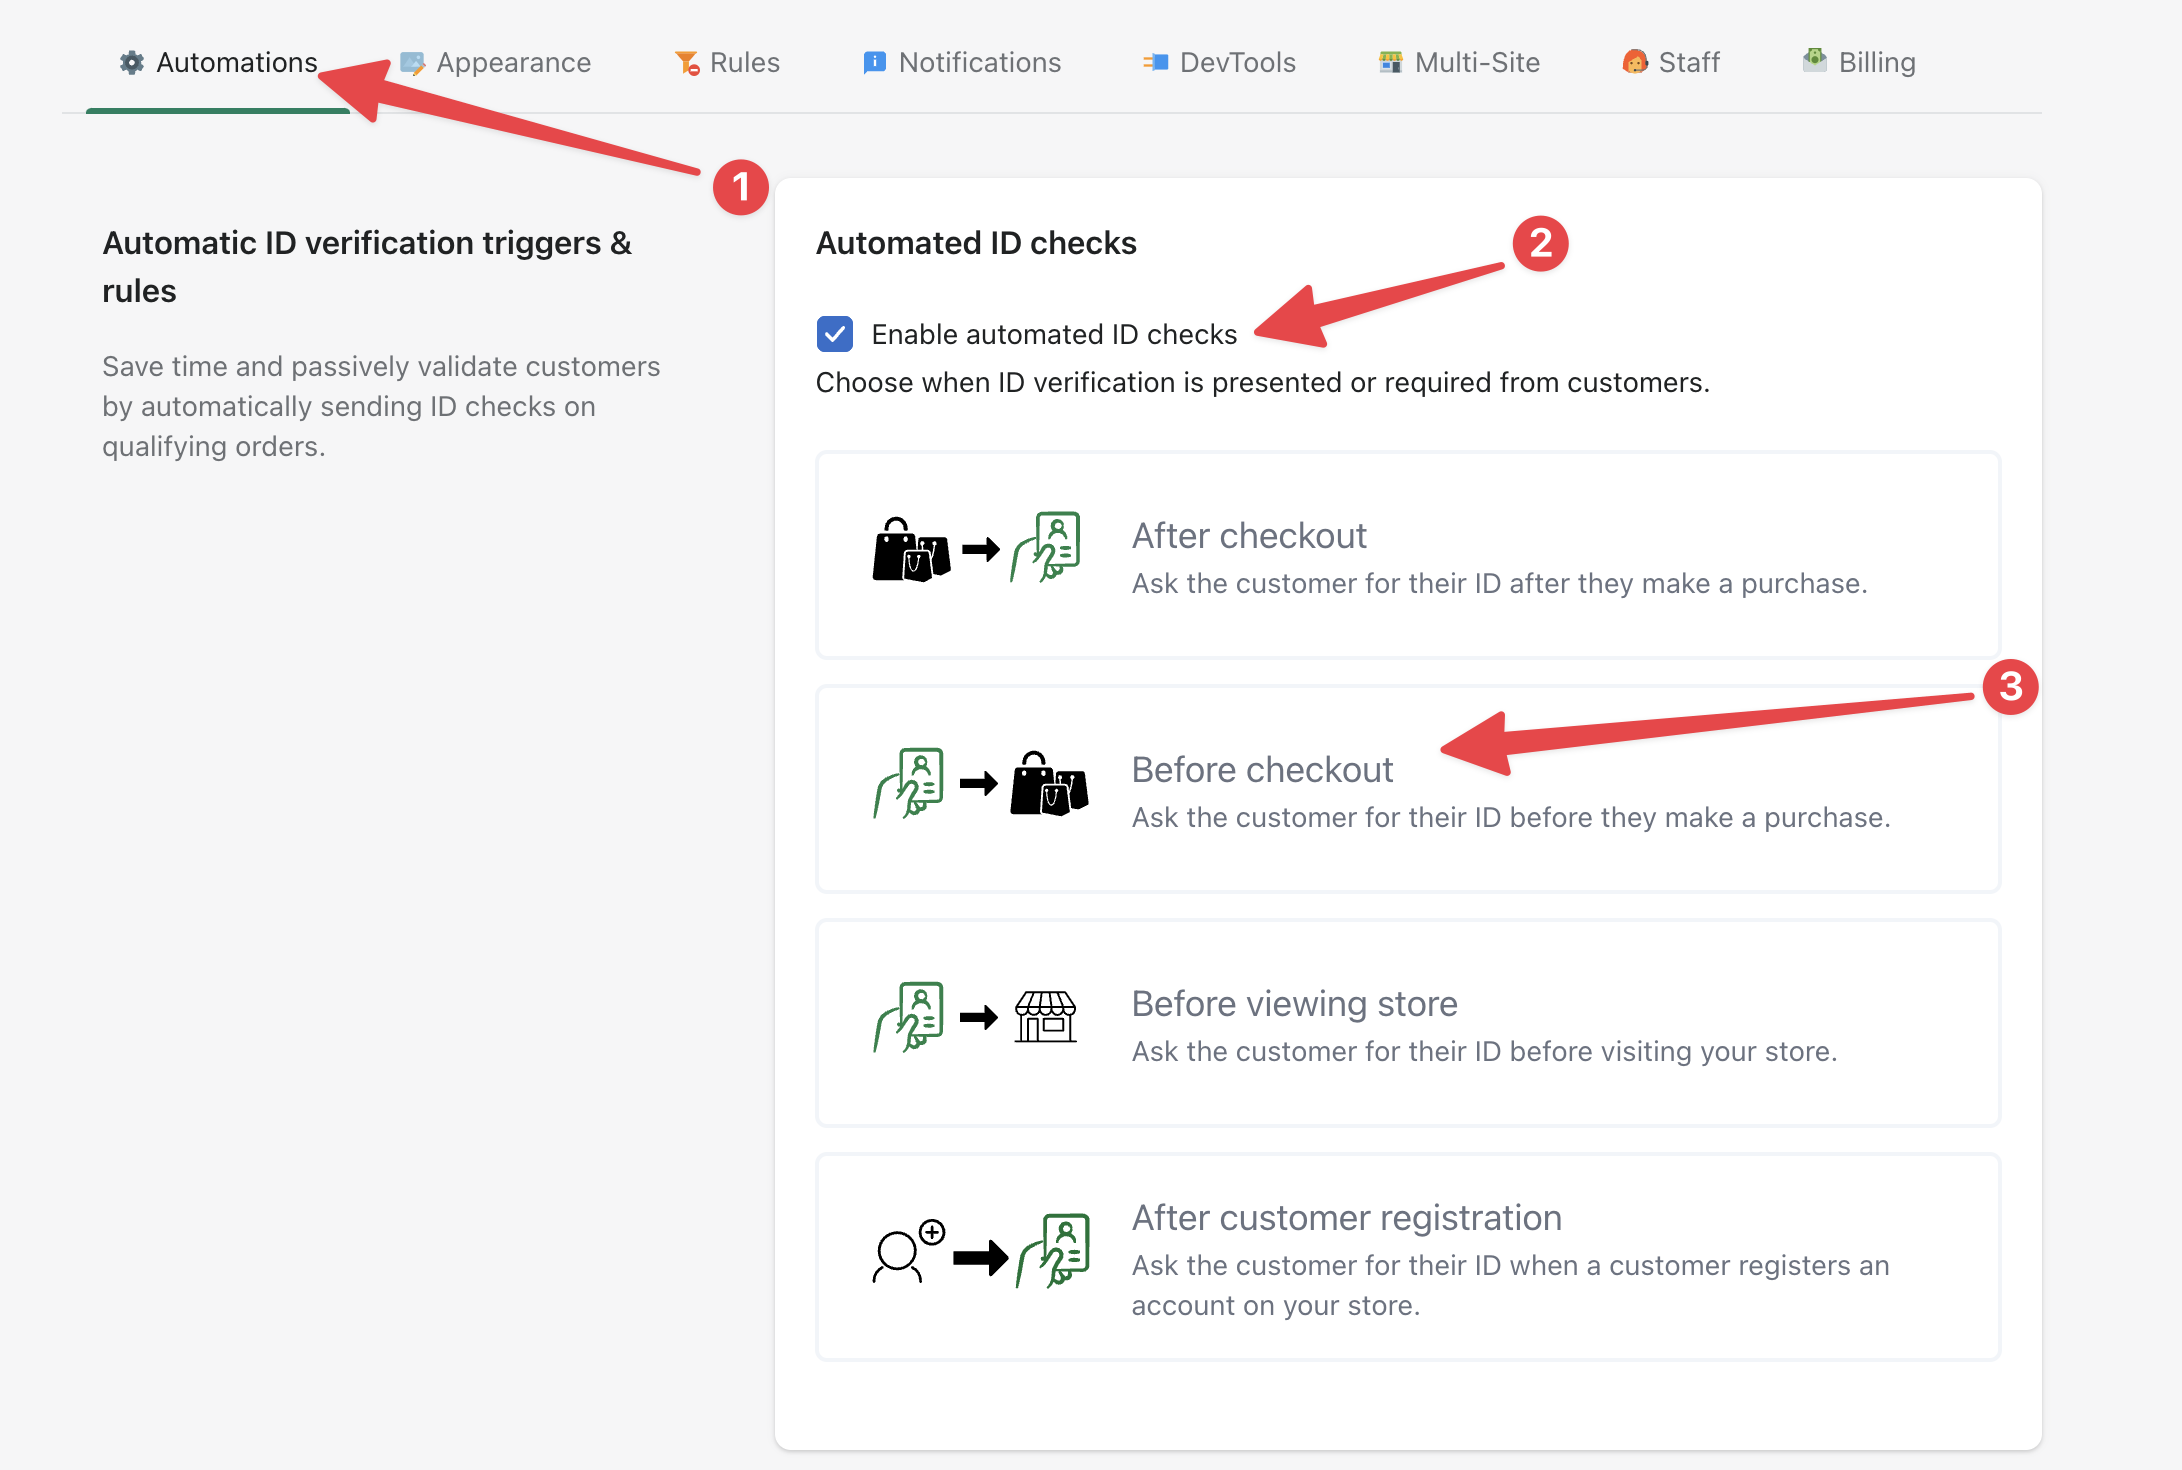
### Turn on the Real ID app embed
On Shopify, the before-checkout flow renders through the **Real ID app embed** — a theme app extension you switch on in your theme editor. (This replaces the older storefront script that Shopify is discontinuing — see the note below if you set this up previously.)
After you save the **Before checkout** flow, the settings page shows a **Turn on ID verification for before checkout** step. To activate it:
1. Click **Open theme editor**. This deep-links you straight to the **App embeds** panel with the Real ID embed pre-selected.
2. Toggle on **ID verification** under **App embeds**.
3. Click **Save** in the theme editor.
Back on the Real ID settings page, the step turns to **Done** and shows **ID verification is live 🎉**. If it hasn't updated yet, click **Check again**. (You can also click **Need help?** on that step to watch this same walkthrough.)
Real ID will then replace your site's checkout buttons with a prompt to verify their ID before purchase for unverified customers — no code changes to your theme.
:::info Already using Before checkout?
If you set up before-checkout verification previously, your existing storefront script keeps running until **March 1, 2027** — nothing breaks in the meantime. The settings page will prompt you to switch to the app embed. Turn it on before that date and Real ID retires the old script for you automatically, with no downtime.
:::
:::tip The embed is per-theme
An app embed is only active on your **published** theme. If you publish or switch to a different theme, turn the **ID verification** embed on there too.
:::
No extra step is needed on WooCommerce. Once you select **Before checkout** and click **Save**, Real ID automatically replaces your site's checkout buttons with the verification prompt for unverified customers.
See our [BigCommerce Before Checkout guide](../bigcommerce/before-checkout.md) for platform-specific setup instructions.
### Theme compatibility
By default Real ID works with most themes on Shopify and WooCommerce. It searches for common checkout or payment buttons on your entire site and will replace them in real time with the **Verify your ID** button instead.
However, if the customer is already verified, the checkout buttons will not be affected.
Here's a short list of selectors that Real ID uses to detect checkout buttons on the page:
For Shopify themes:
- `input[name='checkout']`
- `button[name='checkout']`
- `.real-id-checkout-button`
- `.verify-id-prompt`
- `#checkout`
- `a[href='/checkout']`
- `a[href='/checkout/']`
For WooCommerce themes:
- `.wc-proceed-to-checkout`
- `form[name='checkout']`
- `button.checkout`
- `a.checkout`
:::tip ID verification button not appearing?
You might have a very custom theme or have a side cart that doesn't render on the page load, when Real ID is searching for buttons that qualify for ID checks.
We can help with that! [Contact us for assistance.](/contact)
:::
## How it works
When a new customer starts checkout from the cart, they're prompted to verify their ID first. After they pass, the checkout button returns and they can place their order as normal.
```mermaid
flowchart TD
browses([Browsing storefront]) -- Customer clicks checkout --> triggers{Cart qualifies for verification?}
triggers -- No --> checkout([Checkout])
triggers -- Yes --> recognized{Already verified? Recognized by login or email}
recognized -- Yes --> checkout
recognized -- No --> required([ID verification required])
required -- Customer submits ID photos --> verify{ID verification}
verify -- Passes your rules --> checkout
verify -- Fails your rules --> failed([ID verification failed])
checkout --> order([Order placed])
failed -. Staff member overrides results .-> checkout
```
### What triggers an ID check
By default, the before checkout flow requires verification for **all products**. You can limit it to only [specific products or collections](#limiting-id-verification-to-specific-products) so customers verify only when their cart contains a restricted item.
Logged-in customers — and customers Real ID recognizes by email — skip verification when they've already passed.
### Passing or failing your rules
After the customer submits their ID photos, Real ID checks them against your rules — age, face match, document expiry, and address or name cross-checks. Customers who pass get their checkout button back and can place the order. If a check fails, a staff member can [manually approve or reject it](../for-merchants/overridding-results.md).
### When emails are sent
- **When verification is required** — the customer can get an email or SMS with a link to verify, so they can finish later if they leave.
- **When the check passes** — the customer gets a confirmation, and your team gets a notification that the ID was verified.
- **When the check fails** — the customer is told their verification needs review, and your team gets a warning email with the reason.
You can turn any of these customer emails on or off in the **Notifications** area of your **Settings**.
### When tags and metafields are added
Because the customer verifies before placing their order, their customer account and order are created at checkout. Real ID then adds ID verification [tags](../shopify/tags.md), [notes](../shopify/notes.md), and [metafields](../shopify/metafields.md) to both the new customer account and the order. The customer tag is what lets Real ID remember repeat customers so they only verify once.
### How already verified customers are recognized
Returning customers won't be required to complete ID verification again, but for best results; guide customers to login before they start checking out.
If a returning customer isn't logged in but enters the same email address from a prior ID check, Real ID sends them a 6 digit confirmation code to verify they own that email before loading their verified check. You can turn this requirement off — so a matching email is trusted automatically without a code — using the **Require email confirmation code for returning customers** setting. See [trusting the email address without a code](./remember-repeat-customers.mdx#trusting-the-email-address-without-a-code) for the trade-offs.
For more details on how Real ID recognizes already verified customers, [please see our documentation here](./remember-repeat-customers.mdx#before-checkout-flow).
### Overriding ID check results
Some customers may have extraordinary circumstances that keeps them from successfully passing an ID check automatically.
You can override the ID check requirement for individual customer, to allow them to complete checkout.
When the customer first opens their ID check, they're presented with a form to enter in their name and email address.
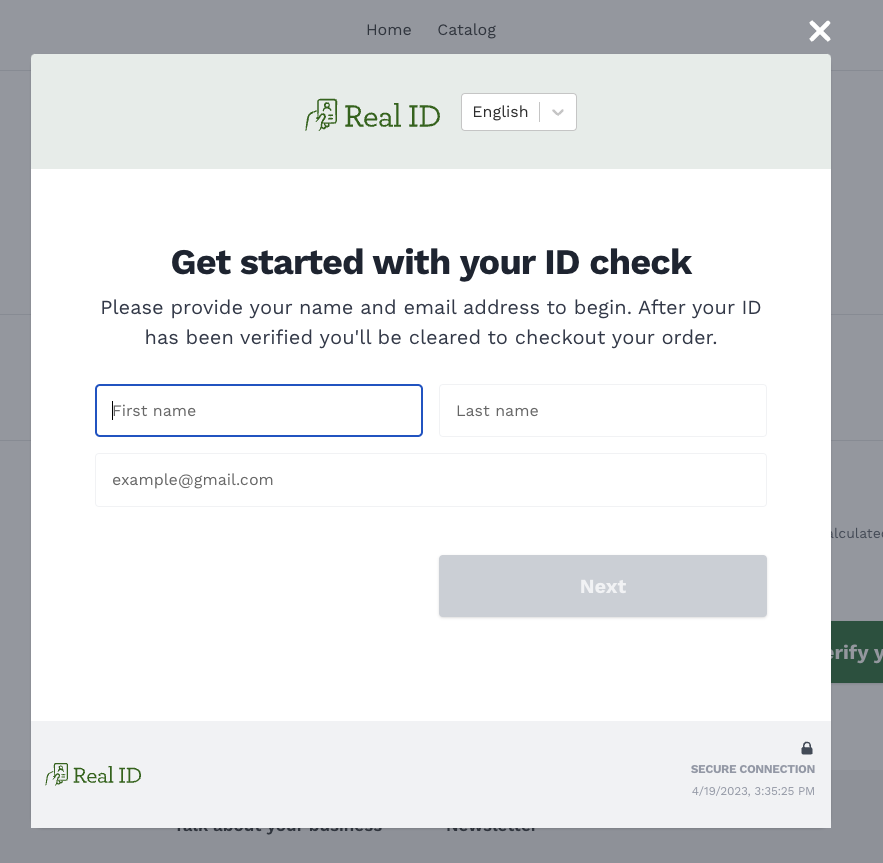
Using the customer's name and email address, you'll be able to search for their in progress ID check in the search bar.
Then with the check open, manually approve it to allow the customer to continue.
:::tip
After manually approving a customer's ID check, they should see they have passed within 10 seconds. However, you can instruct the customer to refresh the page if it's taking longer than expected.
:::
## Limiting ID verification to specific products
By default, Real ID will require ID verification for _all products_ if the **Before checkout** flow is enabled.
You can only require ID verification if the customer's cart only contains one or more restricted products.
Within the **Automations** area of the **Settings** page, scroll down the to **Filters** section to see the products and collections filters:
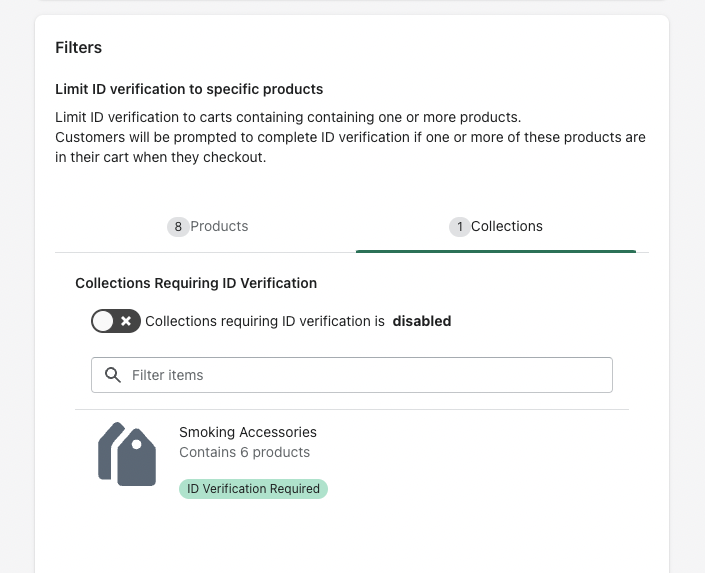
To enable ID verification on a specific collection for example, click **Collections** then enable the feature, and search for a collection. Clicking on the collection will require ID verification if the customer's cart contains one or more products from this collection.
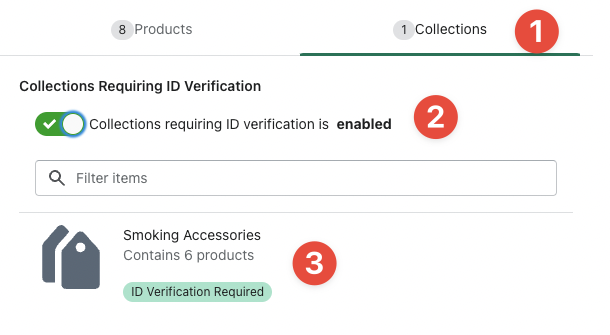
:::tip
As a best practice, we recommend that you create a single collection with the name `ID verification required`, and add products to it, and track it with this feature.
Then you can add additional products without having to also update them individually in Real ID.
:::
Within the **Automations** area of the **Settings** page, scroll down the to **Filters** section to see the products filter:

To enable ID verification on a specific category of products for example, click the toggle under the **Categories** then enable the feature, and click on a collection. Clicking on the collection will require ID verification if the customer's cart contains one or more products from this categories selected.

Lastly, don't forget to click **Save** in the upper right hand corner of the page to save your changes.
See our [BigCommerce Before Checkout guide](../bigcommerce/before-checkout.md) for platform-specific setup instructions on limiting ID verification to specific product categories.
For custom integrations, you control which products require ID verification in your own application logic. Use the [JS SDK](../js.mdx) to conditionally mount the verification flow based on the customer's cart contents, or use the [REST API](../api/checks.mdx) to create checks server-side only for qualifying orders.
## Adding ID verification to any button
Real ID will automatically recognize normally structured checkout buttons on your product and cart pages. However you may have a custom theme or a custom button that will need to be gated by ID verification.
You can trigger ID verification to any button on your site by adding the `verify-id-prompt` class to the button. For example:
```
```
This will replace the **Buy it now** button, with a **Verify your ID** button instead. Once the customer passes ID verification, the **Buy it now** button will return and become clickable.
## Side Carts
A side cart is a JavaScript-powered shopping cart interface that slides out from the side of a webpage, typically triggered when customers add products to their cart or click a cart icon. Unlike traditional cart pages, side carts are created dynamically after the initial page load.
### Automatic Support
Real ID automatically supports most popular side cart implementations by monitoring common cart interaction elements. When customers interact with these elements, Real ID automatically reinitializes to scan for new checkout buttons that may have appeared.
However, some custom side cart implementations may not be automatically detected.
### Manual Integration for Unsupported Side Carts
If your side cart isn't automatically supported, you can manually trigger Real ID reinitialization by adding the `.real-id-initialize` class to any element that opens your side cart:
```html
```
### Need Help with Your Side Cart?
If you're having trouble getting Real ID to work with your custom side cart implementation, our team can help you identify the right integration approach for your specific setup.
[Contact our support team](https://getverdict.com/contact) and we'll work with you to ensure your side cart works seamlessly with Real ID verification.
## Hiding elements that require ID verification
Gating the checkout button is sometimes not enough — you may not want unverified visitors seeing a product's imagery, description or price in the first place. Add the `hidden-until-verified` class to any element and Real ID keeps it hidden until the customer has a passed check, then reveals it:
```
This product is only available to customers with a verified ID.
```
This is the middle ground between gating only the checkout button and gating your whole storefront. It lets you hide the age-restricted parts of a page without forcing every visitor to register and verify before they can see anything — which is the trade-off the [before viewing store](./before-viewing-store.md) flow asks you to make.
:::caution This hides content, it doesn't protect it
The element is hidden in the browser, but its markup is still present in the page source, and any URL it links to still resolves for an unverified visitor.
Use `hidden-until-verified` for presentation. If a visitor genuinely must not reach the content — age-restricted goods, regulated material, anything with a compliance obligation — use [before viewing store](./before-viewing-store.md) or enforce it server-side with the [REST API](../api/checks.mdx).
:::
## Styling the start verification button
The button that starts verification is customizable without code through the [appearance section in the settings](../theming/branding.md).
But if that doesn't meet your exact criteria, you can use CSS within your site's theme to modify additional properties such as the border, border radius, shadows and more.
The Real ID verification button has the class name `.real-id-start-verification`, which you can use to apply custom styling via CSS rules. Here is an example:
```
button.real-id-start-verification {
border-radius: 5px; /* Adjust the value to control the amount of rounding */
}
```
## Troubleshooting
### Occasionally unverified customers checkout
If your seeing orders come through occasionally where customers can still checkout without completeing their ID check, you can follow these steps.
In Shopify, the *before checkout* flow is restricted to only modifying the *Checkout* buttons on your site's frontend. This means it's not possible to guarantee verification before checkout for all cases, but to help reduce that risk:
1. **Recommended** consider using the [during checkout flow](./during-checkout.md) instead. This is a Checkout Extension that doesn't have the same compatibility or performance issues as the before checkout flow.
2. Make sure other apps are not modifying the checkout buttons on your order status page. Apps that add checkboxes, or rental date pickers will occasionally override the Real ID app's verification button.
3. Make sure your page isn't loading another app's JavaScript or theme JavaScript that is blocking Real ID from loading performantly.
4. Make sure that all checkout buttons across all side carts, product pages and your cart pages have the checkout button overridden for verification. You can [use CSS classes](#adding-id-verification-to-any-button) to add ID verification to any checkout button.
In WooCommerce classic shortcode checkout, Real ID will validate the customer has verified their ID before allowing them to continue:

However, please make sure that the Real ID button is placed on your website in the appropriate locations, otherwise customers won't be able to checkout and won't know where to verify their ID to continue to checkout. You can use the [Real ID CSS classes](#adding-id-verification-to-any-button) to add ID verification to any button on your site.
This means that customers won't be able to complete checkout if their ID isn't verified. However, if your checkout is using the new **Checkout Blocks** instead, there unfortunately isn't validation at this time. We're currently working with WooCommerce to add checkout validation hooks for developers to block checkout on custom conditions, like ID verification status.
See our [BigCommerce Before Checkout guide](../bigcommerce/before-checkout.md) for platform-specific troubleshooting steps.
For custom integrations using the [JS SDK](../js.mdx), ensure that:
1. The SDK script tag is loaded before your checkout button renders.
2. The `target` selector in `RealID.createFlow()` matches your actual checkout button.
3. No other scripts are removing or replacing the verification gate before the customer verifies.
If you're using `mode: "modal"`, the checkout button is hidden until the customer passes verification. Listen for the [`real-id-check-passed` event](../js.mdx#events) to confirm the gate was lifted.
### Shopify
#### **Buy it now**, Shop Pay, Apple Pay, and Google Pay buttons bypass ID verification
Shopify renders dynamic checkout buttons — **Buy it now**, **Shop Pay**, **Apple Pay**, and **Google Pay** — inside an iframe that themes and apps cannot modify. Because Real ID's _before checkout_ flow works by replacing checkout buttons on the page, it can't override these dynamic checkout buttons. A customer who clicks one of them will skip ID verification and go straight to checkout.
If you sell products that require ID verification, we recommend one of the following:
1. **Recommended** — use the [during checkout flow](./during-checkout.md) instead. It runs as a Checkout Extension inside Shopify checkout itself, so it gates _every_ checkout path, including **Buy it now**, **Shop Pay**, **Apple Pay**, and **Google Pay**.
2. If you'd like to keep using _before checkout_, disable the dynamic checkout buttons on products that require ID verification. Most Shopify themes offer a setting (in the theme editor or on the product page itself) to hide these buttons — with them off, customers are forced through the cart, where Real ID can replace the **Checkout** button with the verification prompt.
### WooCommerce
#### The **Verify your ID** button stopped appearing on my site, or it's failing to load after clicking the button suddenly
If you're using a caching plugin such as **Speed Optimizer** to bundle JavaScript scripts, you'll need to exclude the Real ID script from the bundle.
If you have **Speed Optimizer** installed, you can tell if you have this feature enabled by opening the plugin, then clicking **Frontend** and open the **JavaScript** tab. Check to see if the the **Combine JavaScript Files** feature is enabled:
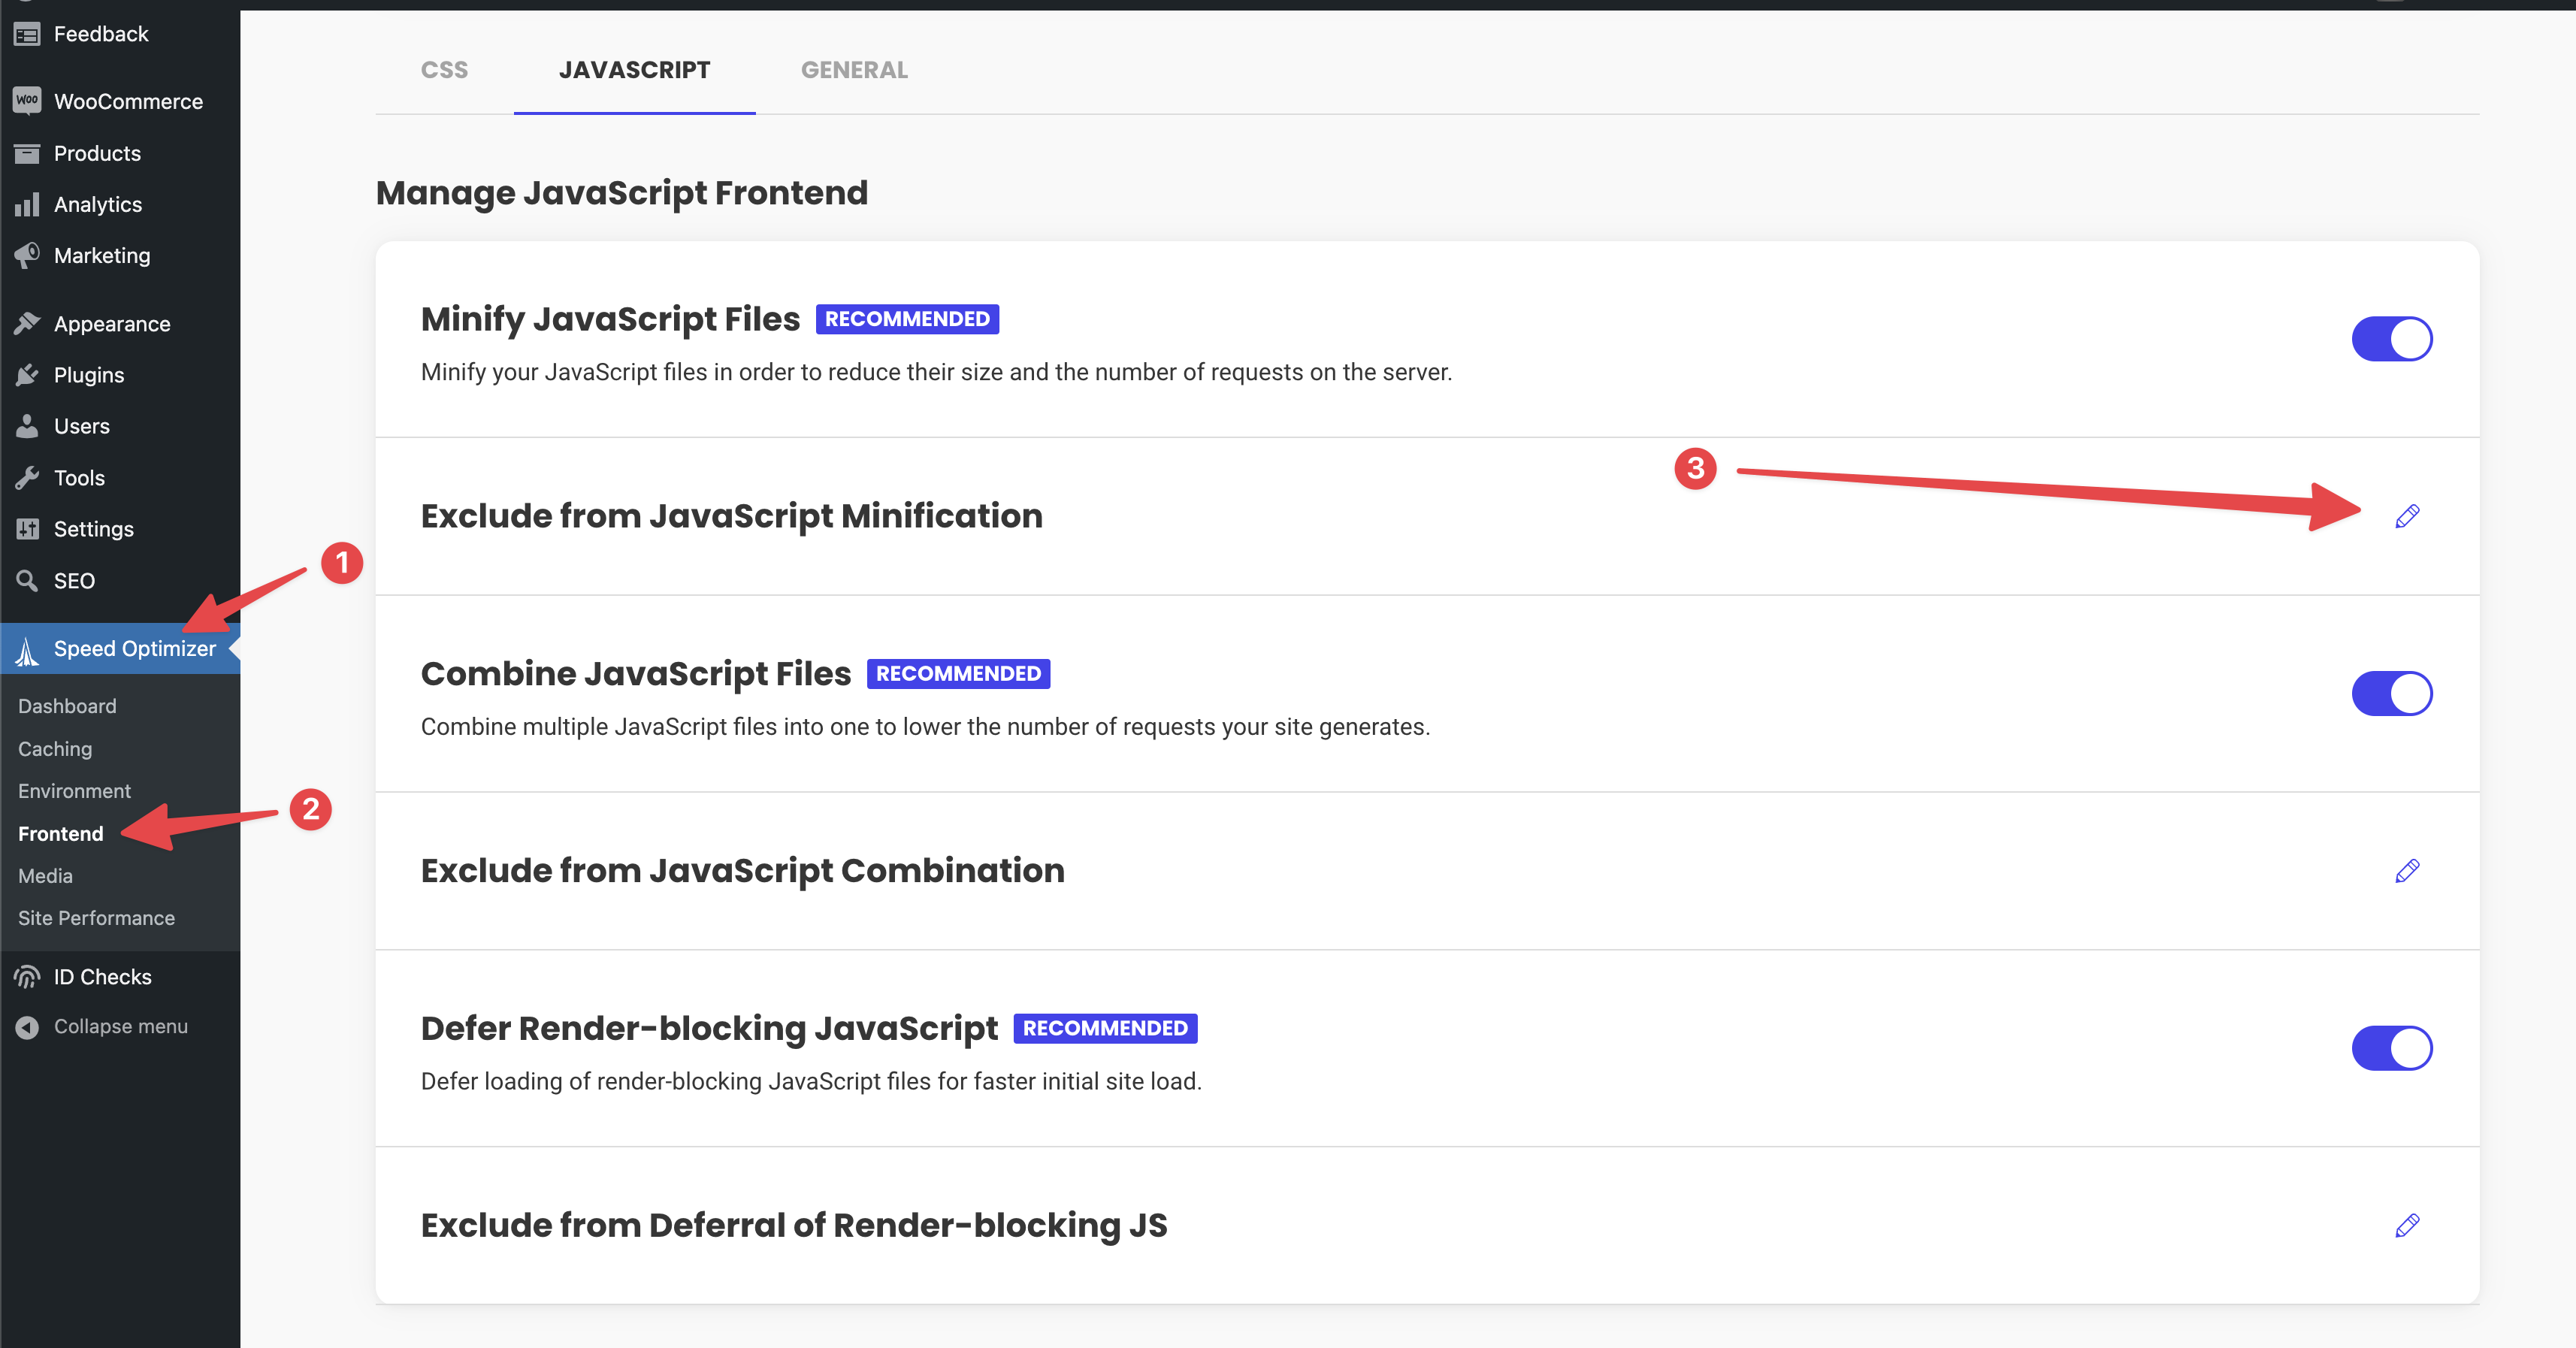
If this feature is enabled, you'll need to exclude the Real ID script by opening the **Exclude Scripts** popup and selecting the `https://real-id-flow.getverdict.com/assets/index.js` script:

Then click **Confirm** to confirm the exclusion of the Real ID script from the Speed Optimizer's bundle of scripts:
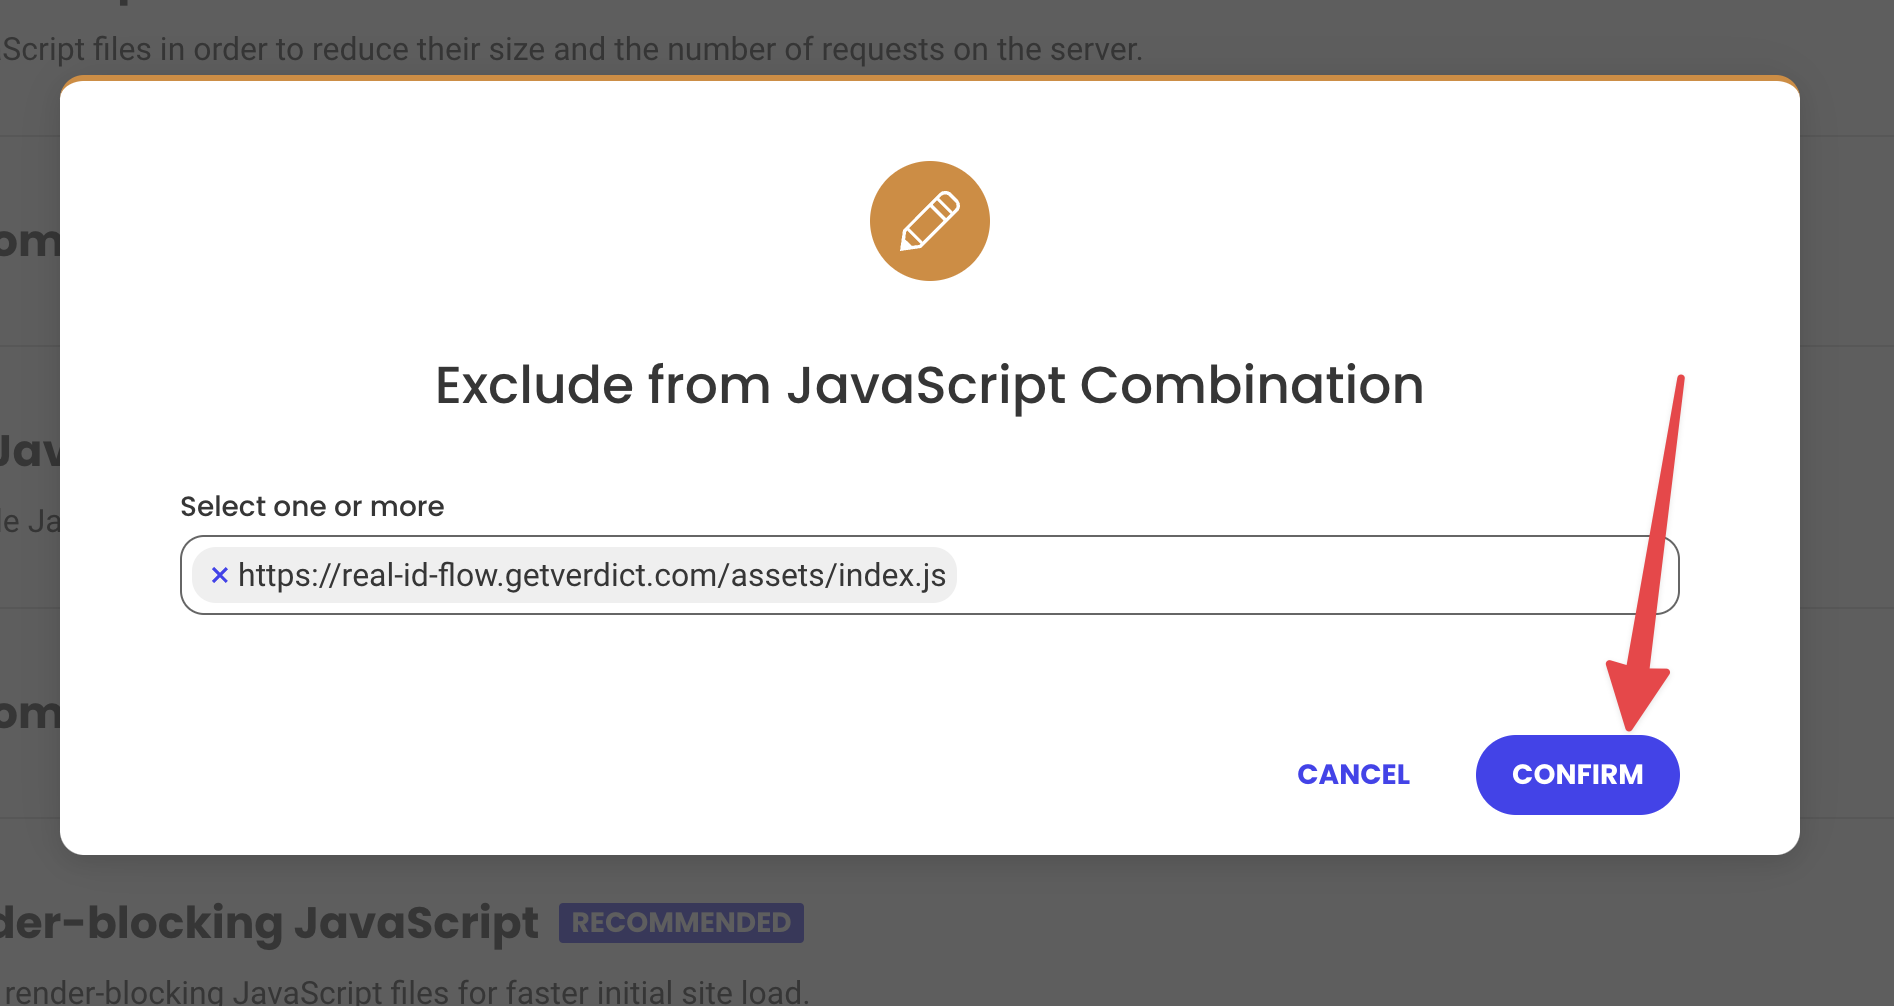
After you've confirmed this change, refresh the page and you should see Real ID working properly once again.
---
// File: flows/before-viewing-store
# ID verification before viewing store
Require ID verification before customers can even view your store. Real ID has a flow just for you, no code required.
Real ID has a built in flow to require customers to sign in or register an account with your store, and verify their ID before they can view your store, open their cart or checkout.
:::tip Is this more than you need?
This flow gates your **whole storefront**, and requires customers to register or log in before they can see anything. That's the right choice when nothing should be visible to an unverified visitor.
If you only need to gate the purchase, use [before checkout](./before-checkout.mdx). If you only need to hide particular elements — a promo block, product imagery, a price — while leaving the rest of the page browsable, use the [`hidden-until-verified` class](./before-checkout.mdx#hiding-elements-that-require-id-verification) instead.
:::
Unregistered guest customers will be greeted with a page to explain that ID verification is required to proceed:
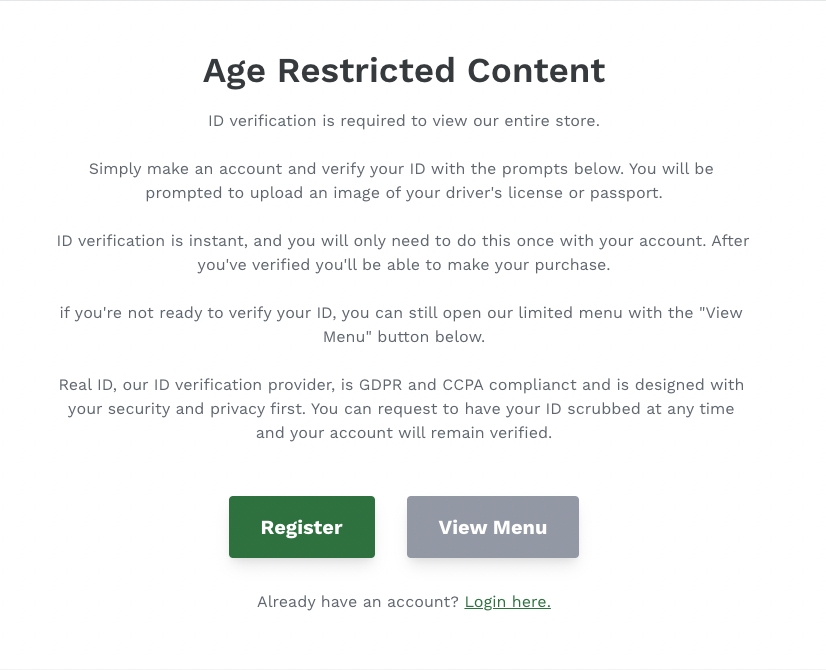
Then after they login, they'll be prompted to verify their ID.
## How it works
This flow will require the customer to login or register an account _and_ also verify their ID before they can continue to see the products on your store, or checkout an order.
Real ID will modify your storefront to add this functionality - no code required.
Here's what the customer journey from guest to verified customer looks like:
```mermaid
flowchart TD
browses([Browsing storefront]) -- Unregistered guest prompted to login or register --> register
register([Signs up]) -- Customer registers an account, ID check associated with their account --> id_check_prompt{ID verification prompt}
id_check_prompt([ID verification prompt]) -- Customer submits ID photos --> id_check_processed{ID verification}
id_check_processed -- Customer fails ID check --> id_check_failed([ID verification failed])
id_check_processed -- Customer passed ID check --> checkout([Checkout])
checkout -- Order placed --> confirmation([Order confirmation])
id_check_failed -. Staff member overrides results .-> checkout
```
## Setting it up
To enable this flow, first open the **Automations** section of the **Settings** within Real ID:

Then you can enable this flow by enabling **Automatic Verification** and then selecting **Before viewing store**:

### Adding pages unverified customers are allowed to view
By default, Real ID will only allow your store's account registration and login pages to be viewed by unverified customers.
This is the required so they can sign up and verify their new account.
But you can add individual pages that unverified customers and guests alike can view without ID verification, such as your privacy policy page, or a page explaining this ID verification policy.
To add a new page that doesn't require ID verification, scroll down in the **Automations** section of the **Settings** page and add additional pages by their link.
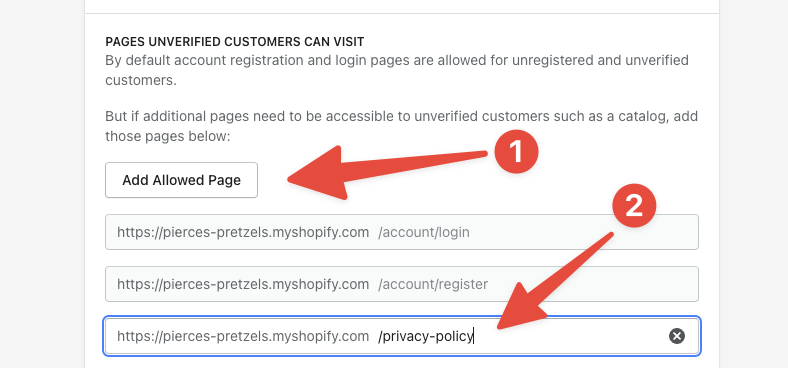
Don't forget to click **Save** when you're finished!
### Changing the appearance and content
To change the theme and the content explaining the ID verification process and why it's required for your store, you can visit the **Appearance** section of the **Settings**.

Then click on the **Registration** tab to change the ID verification gate content:
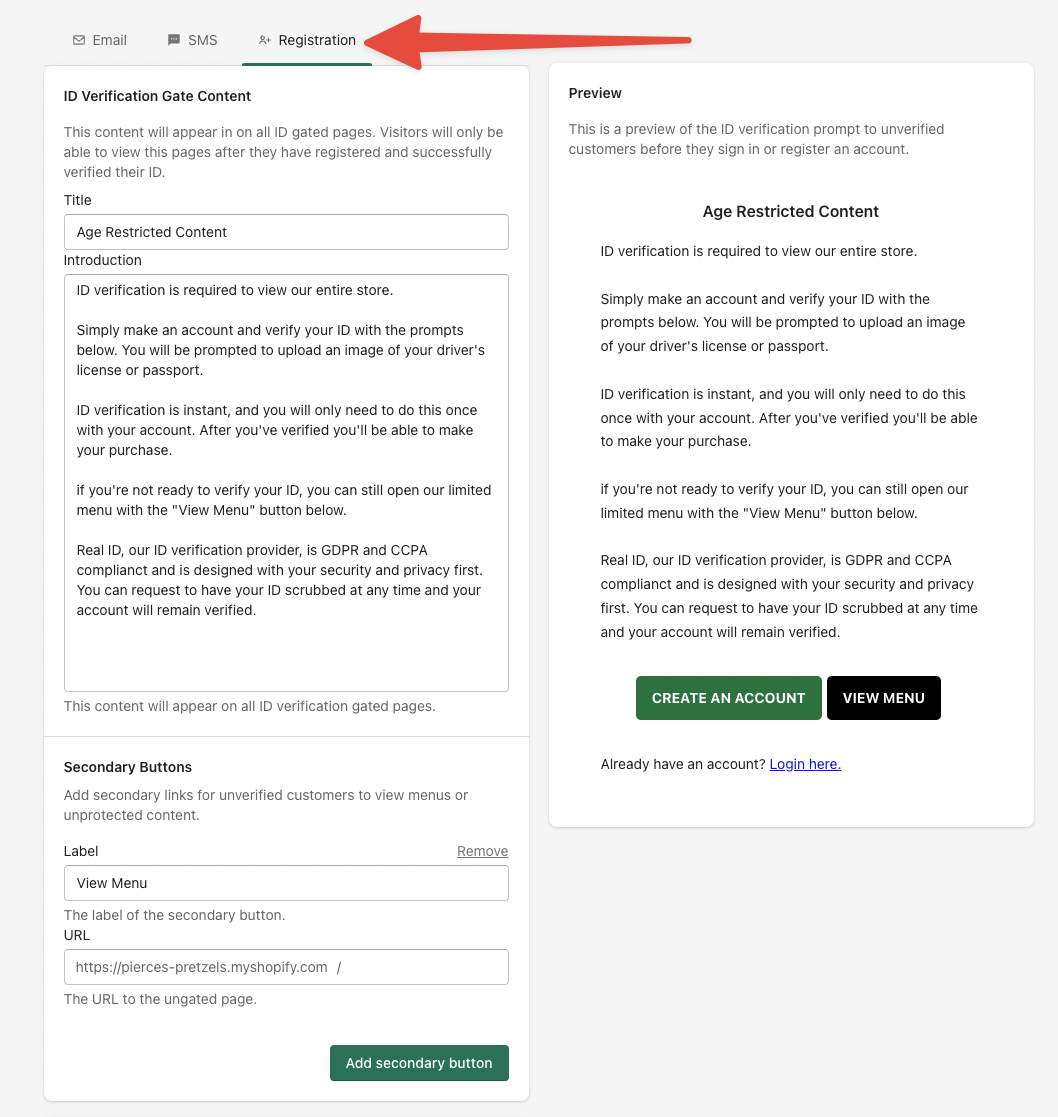
This content is shown to unregistered guests, so it should clearly communicate that the ID verification process is:
- Required for viewing your store
- Takes just few minutes to complete
- Only needs to be done once for their account
- It's secure and encrypted
In addition to changing this content, you can also add additional buttons that link to pages on your store. These are helpful for making links to privacy policy pages, or pages that explain further why ID verification is required.
:::note
Make sure the links are allowed to be visited by guests, otherwise guests won't be able to open them.
:::
### Optimizing your Shopify Theme
You can optimize your theme to prevent unverified customers from viewing any details while the ID check loads.
By using a bit of liquid code checking the [customer's metafields](../shopify/metafields.md), you can make sure unverified customers cannot navigate or view your store at all without verification.
:::tip Code changes required
This modification requires code changes to your theme. Please make a backup of your theme before making changes.
:::
First, open your Online Store Theme Editor, and then open the **Edit Code** dropdown:
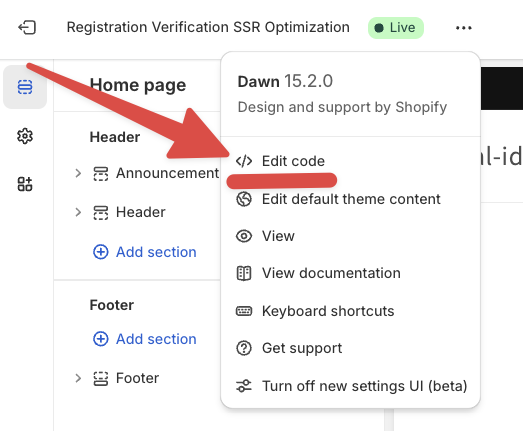
Once the code editor is open, open the `layout` folder and open the `theme.liquid` file. This file wraps all of your sections and contains the header, footer and body of all of the pages on your store.
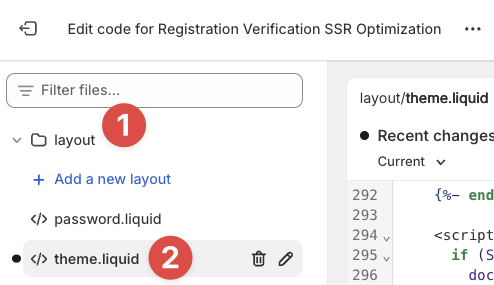
Now search for the keyword `content_for_layout` in this theme code. You can use `CMD + F` or `Ctrl + F` to search for this in the page. It will be between the header and footer sections of your site.
It should look something like this:
```ruby
{% sections 'header-group' %}
// highlight-next-line
{{ content_for_layout }}
{% sections 'footer-group' %}
```
Once you find this `{{ content_for_layout }}` line, you can wrap it with a conditional to check the customer's verification status:
```liquid
{% sections 'header-group' %}
// highlight-start
{% if request.design_mode or request.visual_preview_mode or request.path == routes.account_url or request.path == routes.account_register_url or request.path == routes.account_login_url or request.path == routes.account_recover_url or customer.metafields.real_id.verified %}
{{ content_for_layout }}
{% else %}
Loading...
{% endif %}
// highlight-end
{% sections 'footer-group' %}
```
Then click **Save** in the top right of the code editor to apply these changes. Last step, don't forget to **Publish** this copy of the theme if you started from a duplicate.
This code is checking to see if:
- The customer is logged in and verified
- If the customer is on public pages like the login, registration and password reset pages
- If this page is being viewed within the Shopify theme editor
If none of those conditions are present, then the ID check prompt is shown to the customer.
:::info JS SDK for advanced use cases
If you need even more control over when the ID check is shown and how it's displayed, [use our JavaScript SDK](../js.mdx) to craft a more custom experience.
:::
## Styling the start verification button
The button that starts verification is customizable without code through the [Appearance section in the settings](../theming/branding.md).
But if that doesn't meet your exact criteria, you can use CSS within your site's theme to modify additional properties such as the border, border radius, shadows and more.
The Real ID verification button has the class name `.real-id-start-verification`, which you can use to apply custom styling via CSS rules. Here is an example:
```
button.real-id-start-verification {
border-radius: 5px; /* Adjust the value to control the amount of rounding */
}
```
## Setting up on WooCommerce
Setting up an ID gate in WooCommerce requires a few more set up steps for the gate to function properly.
### Allow users to register
Customers will need to be able to register accounts on your site in order to complete the ID verification process.
Follow these directions to allow customers to register their own accounts on your WooCommerce site:
1. Login to your WordPress admin
2. Open **Settings**
3. Open **General**
4. Near the middle of the page, under the **Membership** option, check the **Anyone can register** option.
5. Scroll to the bottom of the page and click **Save Changes** to apply the change
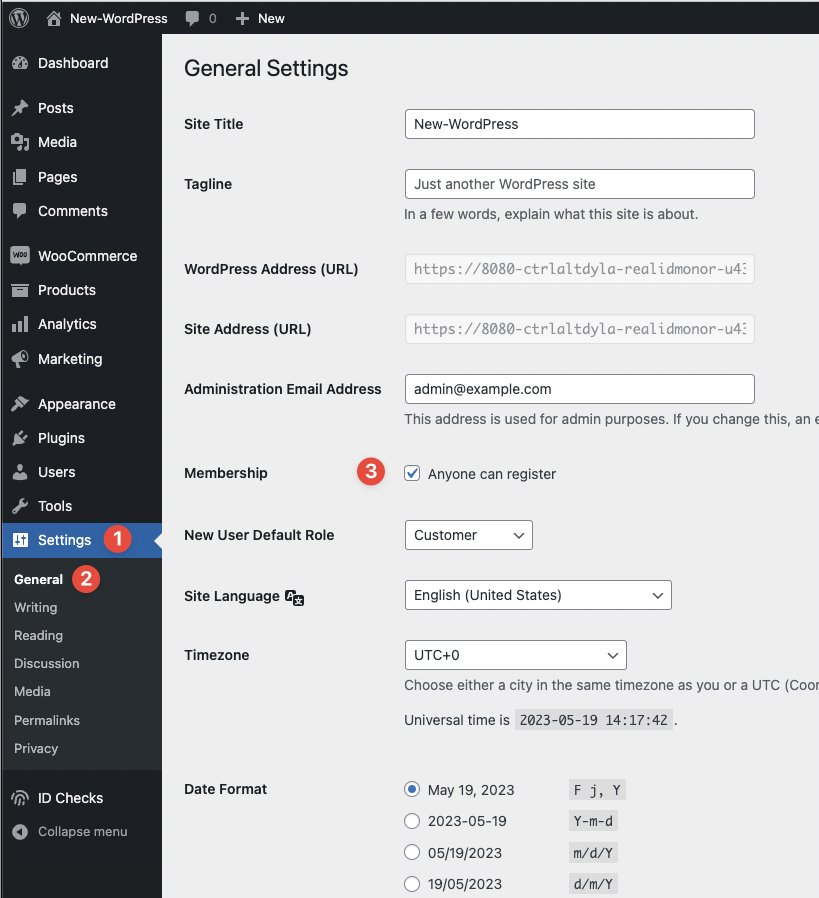
### Allowing the customers to view the login page
By default, Real ID will allow unverified guests to vist the `/my-account` page on your site.
However, if you have a different page for registering, logging in and resetting a password, you'll have to add [these pages as allowed pages](#adding-pages-unverified-customers-are-allowed-to-view).
:::tip
For the best experience, we recommend using the **Post name** permalink structure for your WordPress site. The default allowed pages assume this peramlink structure.
:::
## Frequently Asked Questions
### Do I need to make any modifications to my theme for this to work?
No, Real ID is compatible with most Shopify themes. There may be themes that might not be compatible out of the box, or apps that add frontend elements that need to be covered by the ID check gate.
If your theme isn't working as expected, [please contact us for help](mailto:support@getverdict.com).
### Will customers only need to verify once?
Yes, customers will only need to verify their account once. Even if they switch devices or log off, they can log back into their account and it will stay verified.
### What if a customer has an issue with completing their ID check?
If a customer is having difficulty completing their ID check, or they have failed it, you still have the ability to override their ID check.
Manually approving a customer's ID check will automatically verify their account and allow them to continue to browse your storefront.
:::note
After manually approving a customer, we suggest that they refresh their browser for the latest update.
:::
---
// File: flows/during-checkout
# ID verification during checkout
Using Real ID's app blocks for your Shopify checkout page, you can require ID verification at any point during the checkout process. Customers will be required to verify their ID before they can submit their order.
This short video shows you how to set this up on your Shopify store step by step:
:::tip Shopify Checkout Extensibility Required
Your Shopify checkout must upgrade to [Shopify Checkout Extensibility](https://help.shopify.com/en/manual/checkout-settings/checkout-extensibility/checkout-upgrade) to use this ID verification flow.
At this time only _Shopify Plus_ stores have access to checkout customizations through app blocks. If you do not have a Plus subscription, but require customer ID verification _before purchase_ consider our [before checkout flow](./before-checkout.mdx) instead.
:::
## Setting up Real ID
To get started, first open the Real ID app. Then open the **Settings** page.
Enable automatic verification in the **Triggers** tab, then select the **Shopify Checkout Extensibility** tab to view the available options.
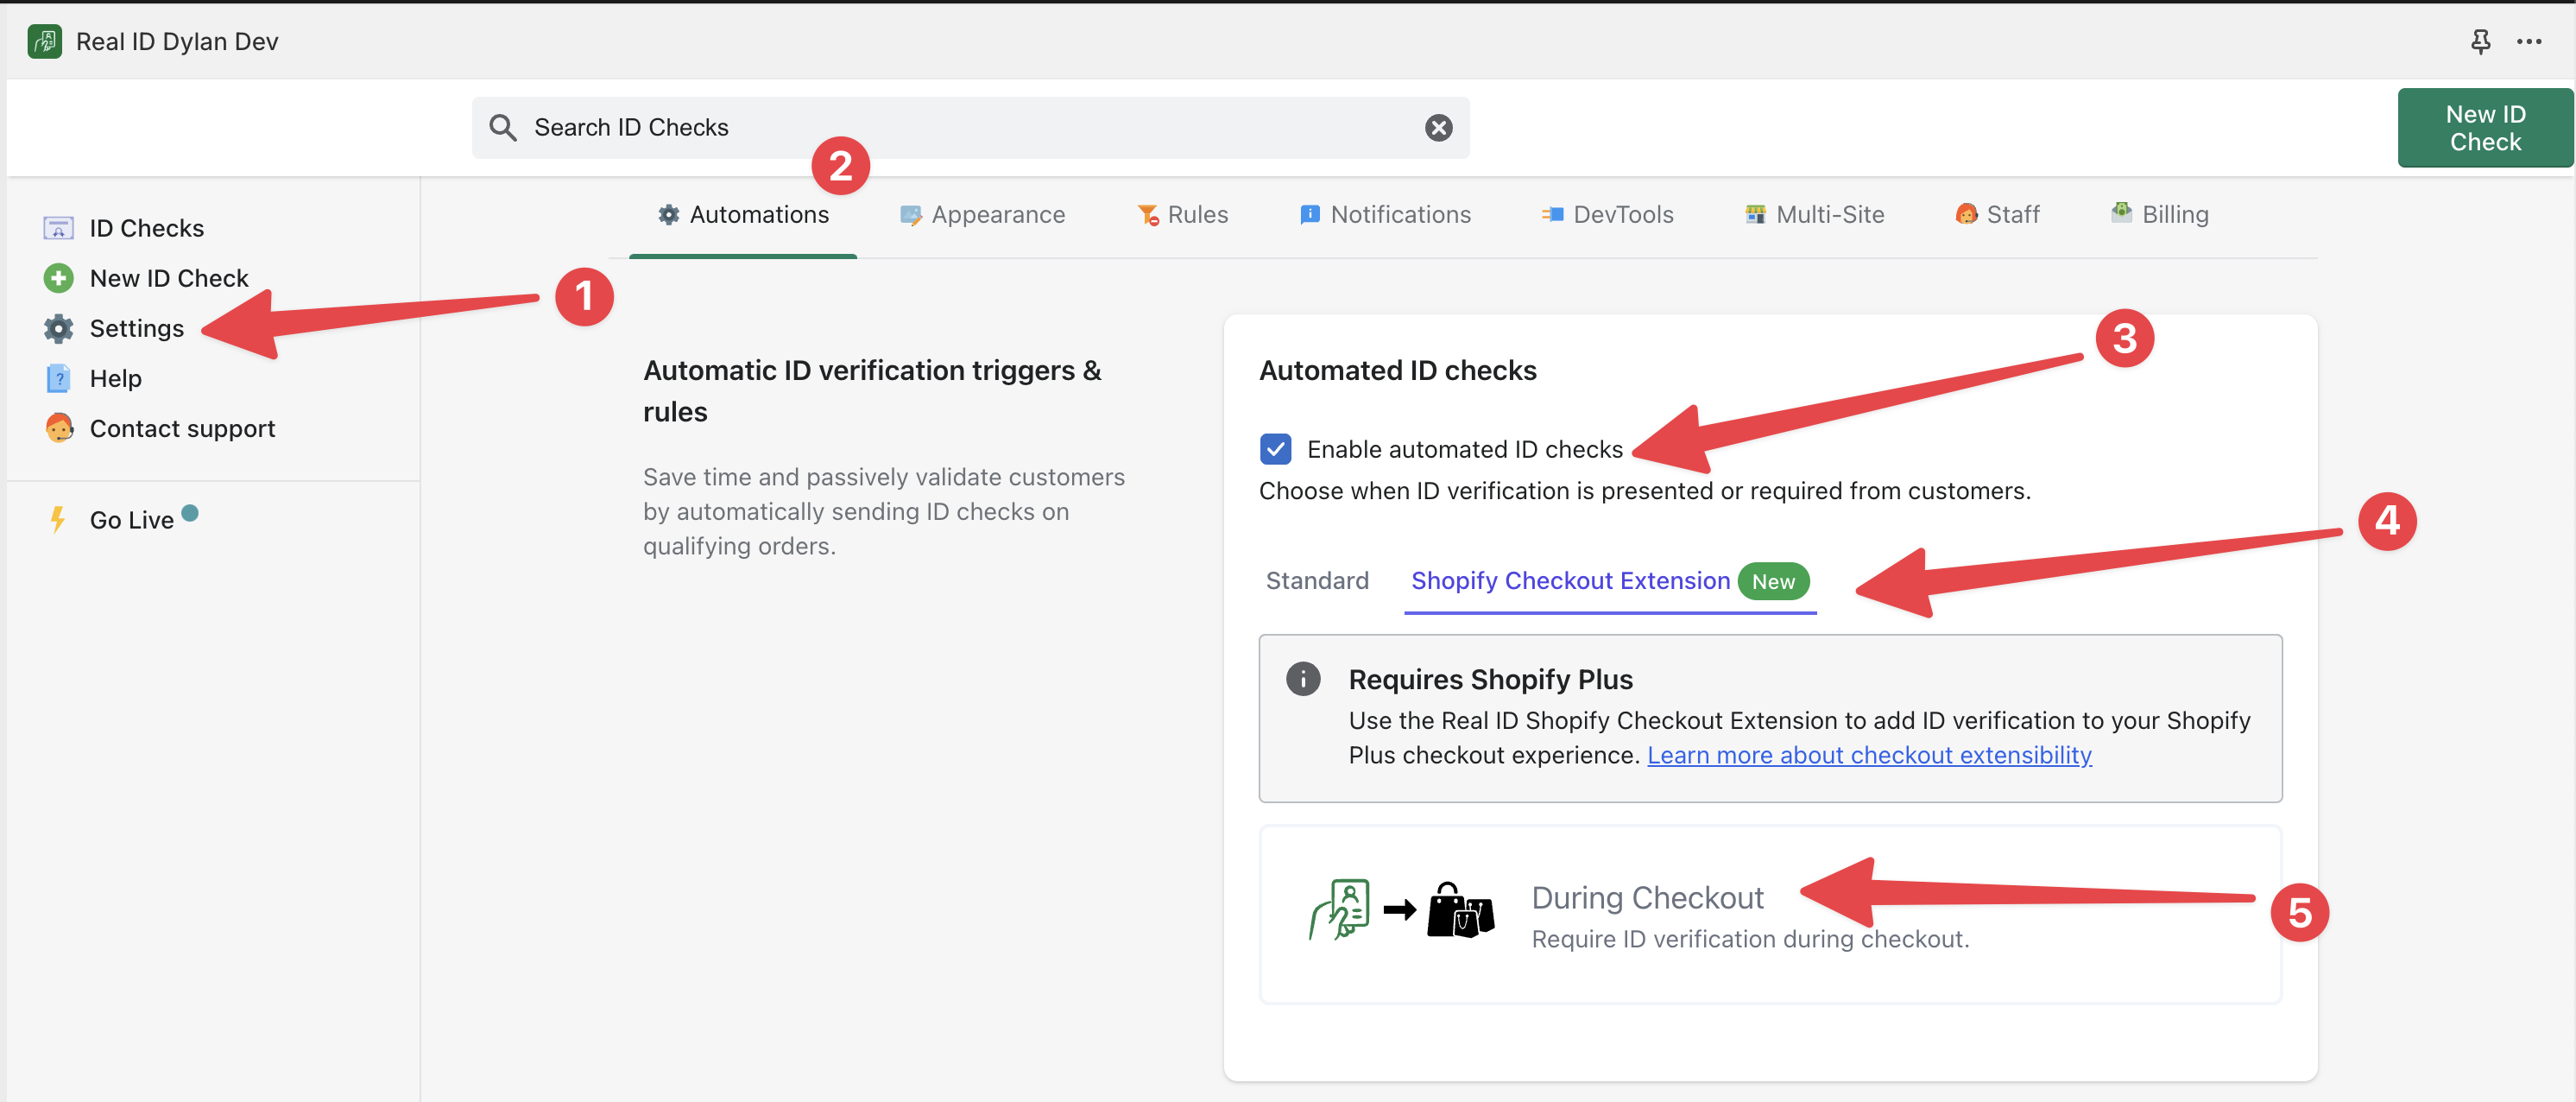
Then select **During checkout** option. Don't forget to click **Save** in the top right of the Real ID app to apply the flow.
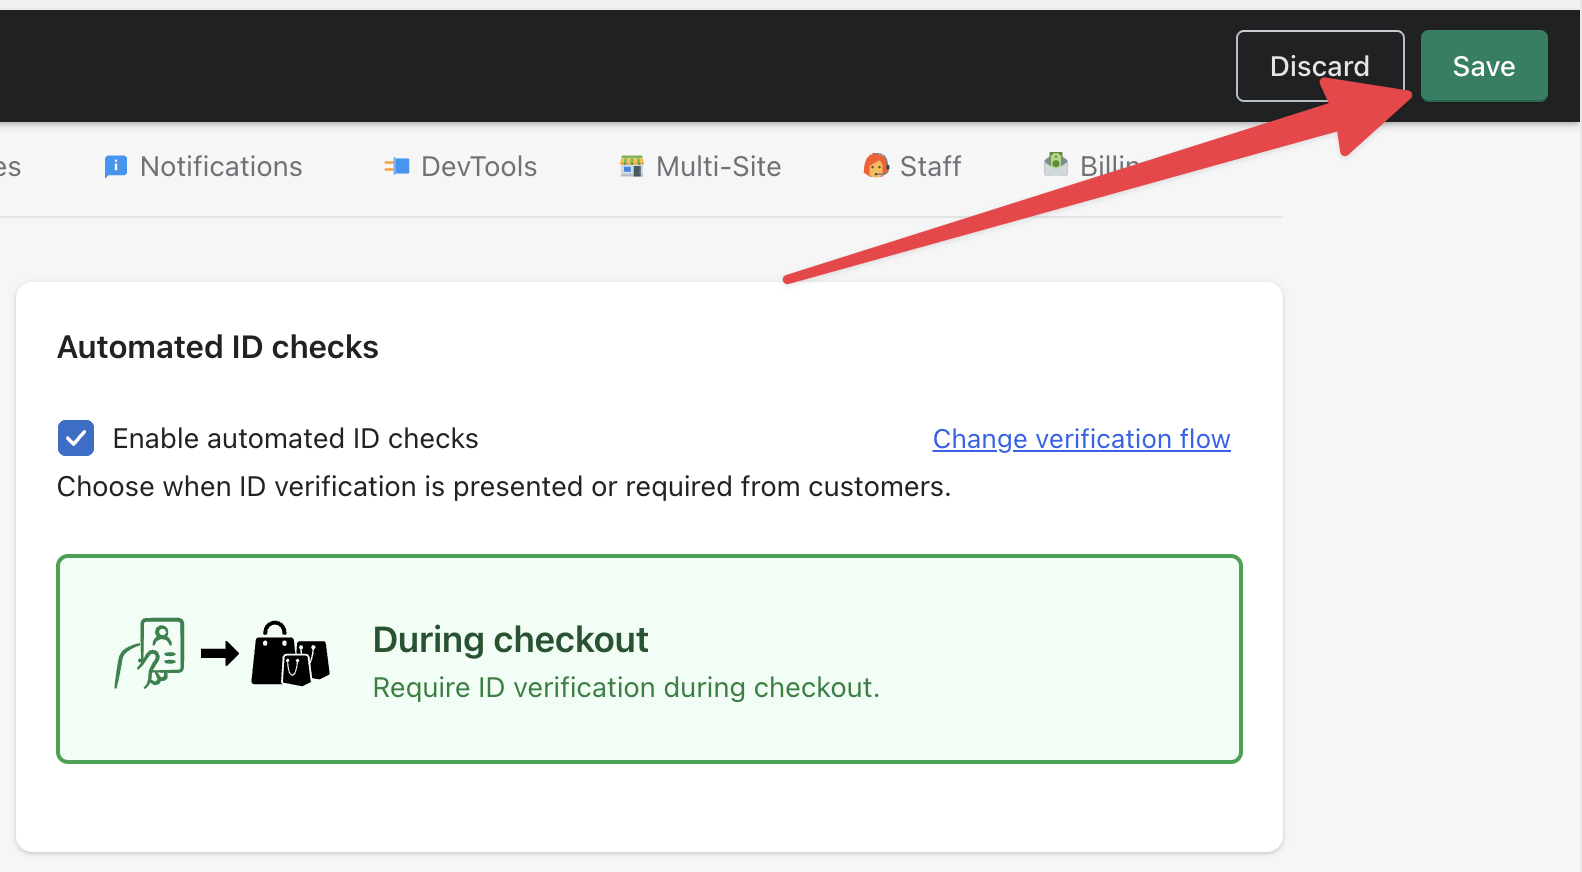
## Adding the ID verification app block to your theme
Now open the **Online Store** channel in Shopify, click the **Theme** section and click **Customize** to open the theme editor.

With the theme editor open, click the page dropdown and select the **Checkout** page.
Then at the bottom of the page, you'll see a button to **Add app block**, click this to view all available app blocks.

Click the **ID verification** app block to add it to your checkout page.

:::tip
Make sure the **Enable app to block checkout** option is checked. Otherwise the app block will not be able to block unverified customers from checking out.
:::
Now that the app block is added to your checkout, Real ID will automatically require unverified customers to complete ID verification before continuing through the checkout flow.
Logged in verified customers will not be required to complete ID verification.
If you'd like to change the position of the ID verification prompt in the checkout page, simply hover over the app block and drag it up or down between the other checkout blocks.
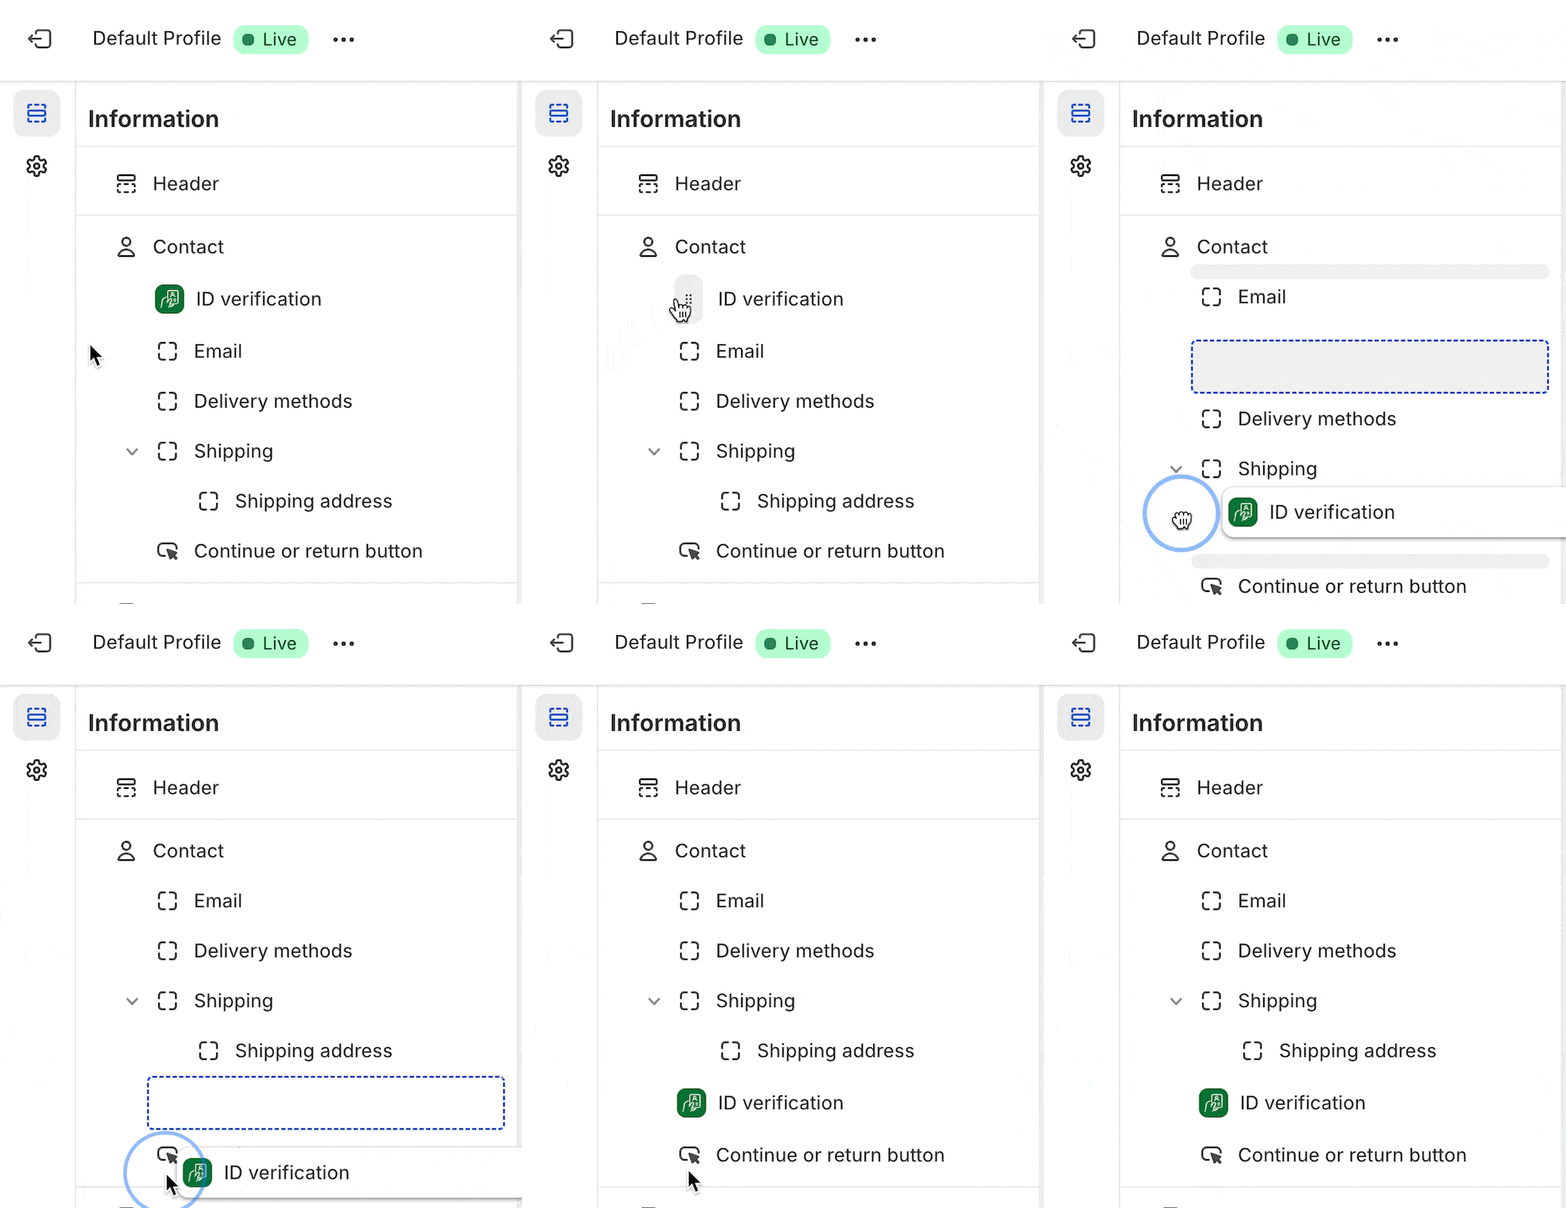
## How it works
When a customer reaches checkout, Real ID looks at their cart and checkout details to decide whether ID verification is required. If it is, they're prompted to verify before they can place the order.
```mermaid
flowchart TD
checkout([Customer reaches checkout]) --> triggers{Cart or checkout details match your triggers?}
triggers -- No match --> proceed([Checkout continues normally])
triggers -- Match --> recognized{Already verified? Recognized by login or email}
recognized -- Yes --> proceed
recognized -- No --> required([ID verification required])
required -- Customer submits ID photos --> verify{ID verification}
verify -- Passes your rules --> passed([ID verification completed])
verify -- Fails your rules --> failed([ID verification failed])
passed --> order([Order placed])
failed -. Staff member overrides results .-> order
```
### What triggers an ID check
Real ID checks each checkout against your [triggers](../triggers/index.mdx) — for example:
- [Specific products or collections](../triggers/specific-products.mdx) in the cart
- A [high-value order](../triggers/high-value-orders.md) above your price floor
- Shipping to [specific U.S. states](../triggers/us-shipping-states.mdx) or regions
You can also combine conditions with AND/OR logic using [Advanced rules](../triggers/advanced-rules/index.mdx) (Automate and Protect plans) — for example, requiring verification only when a restricted product ships to a specific state.
If nothing matches, the customer checks out as normal. If something matches, they verify before placing the order. Logged-in customers — and customers Real ID recognizes by email — skip verification when they've already passed.
### Passing or failing your rules
After the customer submits their ID photos, Real ID checks them against your rules — age, face match, document expiry, and address or name cross-checks. Customers who pass can place their order right away. If a check fails, the order is held for [manual review](../for-merchants/overridding-results.md), where a staff member can approve or reject it.
### When emails are sent
- **When verification is required** — the customer can get an email with a link to verify, in case they leave checkout before finishing.
- **When the check passes** — the customer gets a confirmation, and your team gets a notification that the ID was verified.
- **When the check fails** — the customer is told their verification needs review, and your team gets a warning email with the reason.
You can turn any of these customer emails on or off in the **Notifications** area of your **Settings**.
### When tags and metafields are added
- **Metafields** are written to the order as the customer verifies during checkout, so `real_id.verified` and `real_id.check_id` are already on the order the moment it's placed.
- **Tags and notes** are added to both the order and the customer shortly after the order is placed. The customer tag is what lets Real ID remember repeat customers so they only verify once.
See [Tags](../shopify/tags.md), [Notes](../shopify/notes.md) and [Metafields](../shopify/metafields.md) for the full list.
## Remembering already verified customers
By default this flow option will already remember verified customers. First the system will attempt to find their past verified ID by the customer's Shopify account, then it will attempt to find the customer's ID check based on the customers email address.
### By Shopify account
The customer will need to be **logged in** in order for Real ID to detect their current verification status by their Shopify account.
Please make sure that your Shopify store allows customers to login to their accounts.
You can check this by opening the **Settings** section of your Shopify store, then opening the **Customer Accounts** area.

At the top of this section, you'll see the option to allow customers to login to their own accounts, make sure it's enabled. The option is labeled as **Show login link in the header of online store and at checkout**.
Then choose between **Classic customer accounts** or **New customer accounts**. Real ID is compatible with either choice.
The main difference between the two is that the **New customer accounts** choice will require the customer to open a link sent to their email address in order to login.
Whereas the **Classic customer accounts** allows email address and password combinations to login, which allows account sharing if you have the email address and password.
### By email address
If the customer isn't logged in, then the system will attempt to find their past verified ID by the customers email address.
If any check is found by the customer's email address, then it will prompt the customer to confirm ownership of the email address through a confirmation code.
After the customer enters in their confirmation code, they will be recognized and allowed to complete checkout even without logging in.
## Other platforms
The during checkout flow above uses Shopify's Checkout Extensibility and is only available for Shopify Plus stores.
If you need in-checkout ID verification on other platforms, you have two options:
- **JS SDK**: Use the [Real ID JavaScript SDK](../js.mdx) with `mode: "modal"` to gate any checkout button on any platform — including WooCommerce, BigCommerce, or custom sites. The SDK replaces the target element with an ID verification prompt and restores it after the customer is verified.
- **Before checkout flow**: The [before checkout flow](./before-checkout.mdx) works across Shopify, WooCommerce, and BigCommerce without any code changes. It replaces checkout buttons site-wide until the customer has verified their ID.
## Frequently Asked Questions
### Will ID verification be required for draft orders as well?
Yes, the same ID verification app block will appear for draft orders, even in the checkout links shared from the POS or from the Shopify Admin.
### How can I restrict ID checks to specific shipping locations with specific products in the cart?
If you require ID verification for specific countries or regions only for specific products like knives, [please contact us](https://getverdict.com/help/contact) for support. We have custom triggers for this use case.
### Can I still allow customers to check out, even if they've failed to verify their ID automatically?
Yes, in the **ID verification** app block in your checkout page in your Shopify theme, untick the **Allow app to block checkout** checkbox and then save your change.
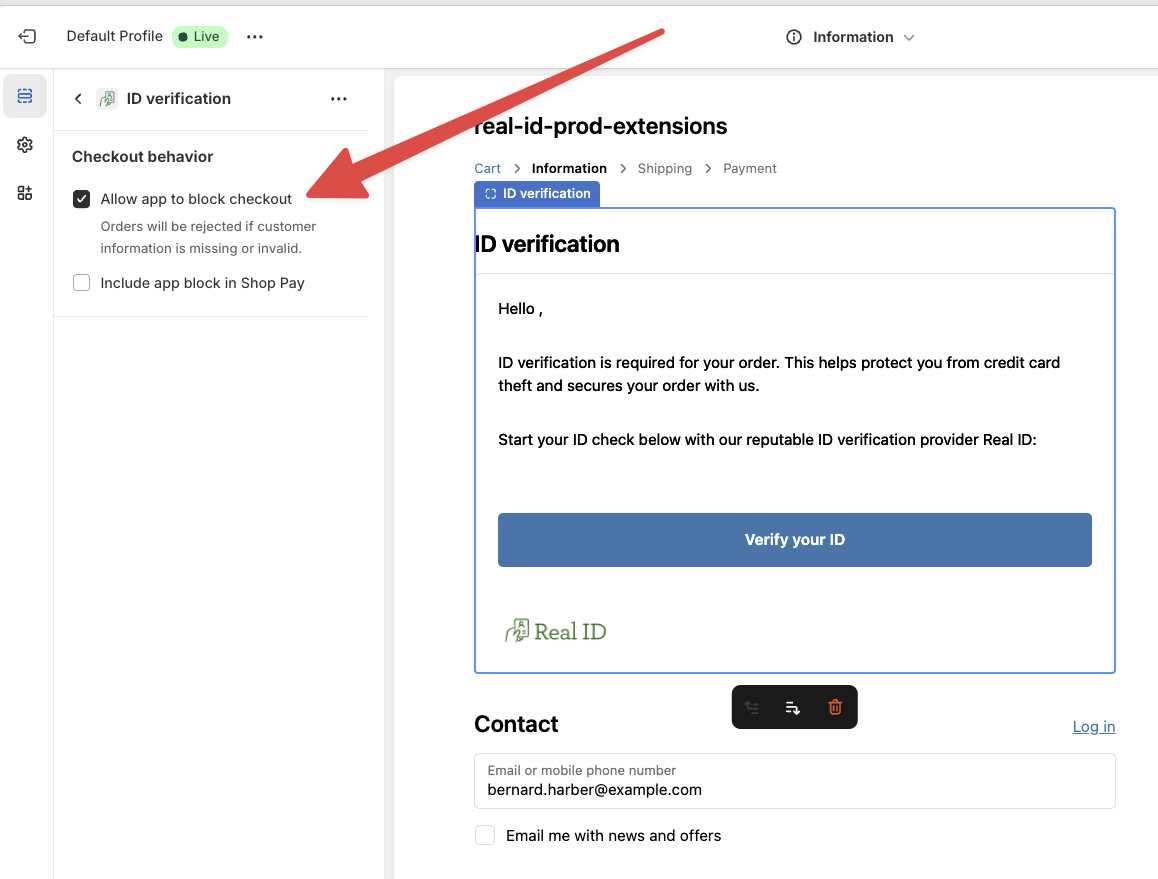
This will allow unverified customers to continue through to checkout.
:::warning This includes customers that don't submit their ID at all
If you choose to disable the ID verification requirement, it will also allow customers to checkout even if they do not upload any photos whatsoever.
:::
---
// File: flows/remember-repeat-customers
import Tabs from "@theme/Tabs";
import TabItem from "@theme/TabItem";
# Remember verified customers
Real ID can track which of your customers have already completed ID verification once. This way your customers can return and make repeat purchases without requiring ID verification on each purchase.
If enabled, Real ID will remember repeat customers and not require already verified customers to provide photos again.
## Enabling Remembering Repeat Customers
In the settings of the app, open the **Automations** tab. If you're using ID verification after checkout open the **Exceptions** tab.
Then click the checkbox next to **Customers only need to verify once** to enable the feature.
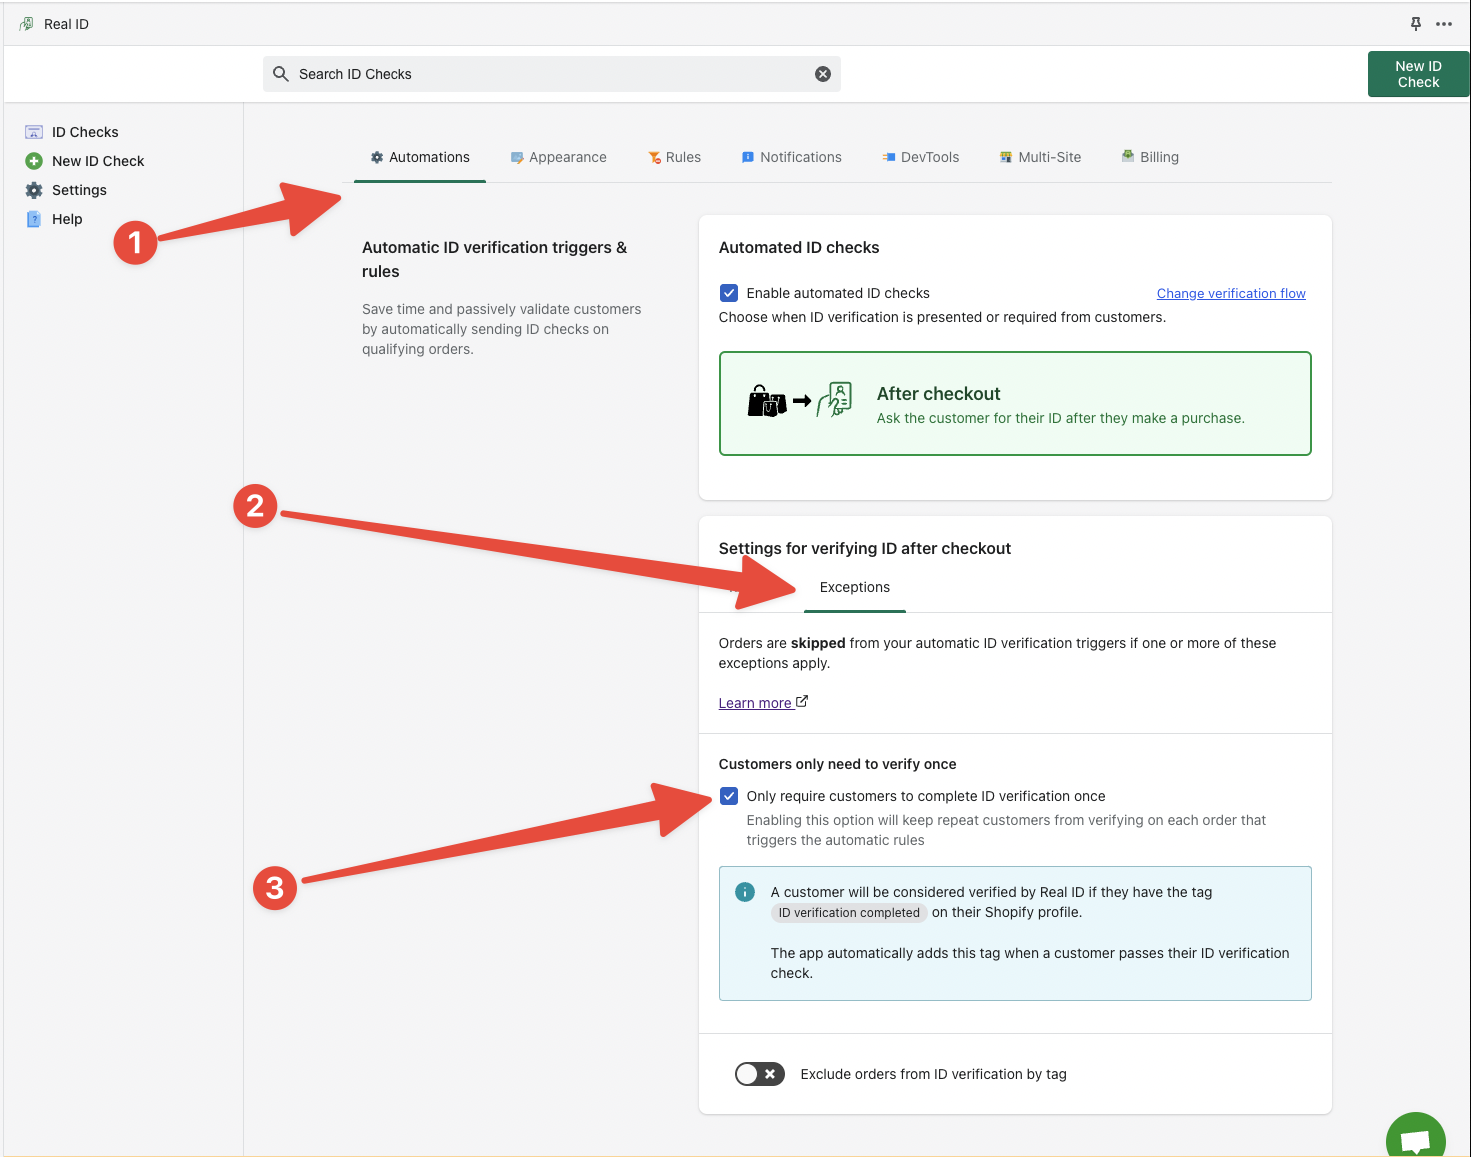
## How are verified customers tracked?
Real ID will associate the completed ID check with your customer's account on your store. There are some differences between the out of the box ID verification flows, we'll go into those details below.
### After checkout flow
When a already verified customer returns to your store to checkout again, Real ID will automatically find the completed or manually verified ID check in the database of your store's ID checks and count the customer as verified.
On Shopify, customer profiles with the `ID verification completed` or `ID check manually approved` tags are considered verified.
Real ID [automatically updates tags on orders and customers](../shopify/tags.md) during the ID check lifecycle. If a returning verified customer places an order using the same email address _or_ the is logged into their account on your store before placing the order, then Shopify will associate that order with their prior account that includes the `ID verification completed` or `ID check manually approved` tags.
Real ID will receive this order notification and see that the customer is already verified, so the returning customer won't be prompted for verification on their new order.
On WooCommerce, customer profiles with the `real_id_check_status` set to `completed` or `manually_approved` will be considered verified. Real ID automatically [updates metadata](../woocommerce/metadata.md) on both orders and customers during the ID verification lifecycle.
If an already verified customer returns using the same email address as their prior order _or_ they are logged into their account before purchasing, then Real ID will not prompt the customer to verify again.
On BigCommerce, Real ID tracks verified customers using [metafields](../bigcommerce/metadata.md) under the `realid` namespace. When a customer completes ID verification, their customer profile's `realid.verification_status` metafield is set to `verified` (or `manually_approved` if a staff member manually approved the check).
When an already verified customer places a new order, Real ID will look up the customer by their BigCommerce customer ID and find the completed ID check in the database. If a prior verified check is found, the customer won't be prompted for verification on their new order.
For custom integrations, Real ID tracks verified customers by their email address. When a returning customer starts the [JS SDK](../js.mdx) flow or a new check is created via the [REST API](../api/checks.mdx), Real ID will look up prior completed checks by the customer's email.
If the customer has a prior completed or manually approved check, the JS SDK will automatically recognize them as verified — no additional integration is required on your end.
### Before checkout flow
If you're requiring ID verification before or during checkout, before the order is placed, then Real ID uses three different methods to determine if a returning customer is already verified:
1. [From browser cookies](#from-browser-cookies)
2. [From the customers login (recommended)](#from-the-customers-login)
3. [From the customers email address](#from-the-customers-email-address)
:::info
In the **before checkout** flow, Real ID does **not** use tags or metafields to consider the customer verified.
:::
#### From browser cookies
Because customers can be unregistered at the time they verify their ID, Real ID will place a cookie within their browser to mark them as verified. Then after the customer completes checkout, their account will be associated with the ID check in Real ID's database.
That way, if the customer switches browsers or devices in the future, they can still login to their acccount on your store and remain verified.
However, this is the most brittle of the methods. Customers may switch devices, or browsers, or have their browsers to block cookies.
If an unregistered customer blocks cookies, they'll still be able to verify their ID as well as look it up using their email address when returning to your store.
#### From the customers login
Customers can also log into their account on your store and Real ID will automatically recognize them as verified.
After the customer logs in, Real ID will not require them to verify their ID again. Instead they'll be able to checkout directly.
For this feature to work properly, we highly recommend enabling customer accounts and allowing customers to login to their accounts.
#### From the customers email address
If a returning customer isn't logged in, but they enter in the same email address from their account, then Real ID will recognize their past ID check.

The customer will be sent a 6 digit confirmation code to their email inbox. When the customer enters
in this 6 digit code into the Real ID prompt, it will automatically load their corresponding ID check.
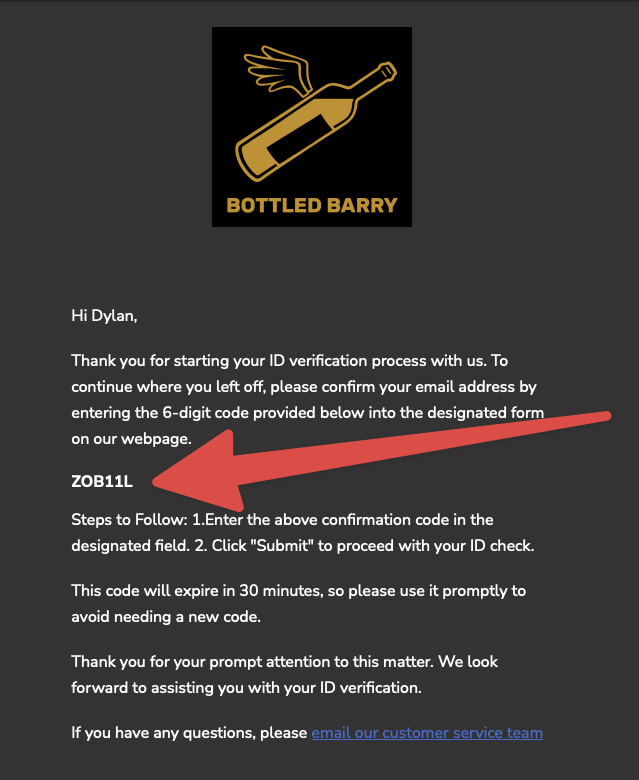
If they have a prior verified or manually approved ID check, then the customer will be able to complete the order.
This way, even if the customer isn't logged in, Real ID will recognize their already completed ID check.
:::info
This feature includes ID checks that are in progress, in review, or manually rejected by your staff.
If you'd like to allow the customer to try again, use the resend ID check feature to send the customer a brand new ID check for them to attempt again.
:::
:::tip
You are not charged for customers that return using their prior ID check from a confirmation code.
:::
#### Trusting the email address without a code
By default, returning customers must enter a 6 digit confirmation code to prove they own the email address before their prior ID check is loaded.
If you'd prefer a faster experience, you can turn this requirement off so that a returning customer who enters a matching email is recognized automatically — no confirmation code is sent or required.
To change this, open the **Settings** area and make sure repeat customer remembering is enabled. Then in the **Email verification for returning customers** section, turn off **Require email confirmation code for returning customers**.
This setting works the same way on Shopify, WooCommerce, and BigCommerce.
:::caution Consider the security trade-off
When the confirmation code is disabled, anyone who enters a previously verified email address is treated as that verified customer — without proving they actually own the inbox. We recommend keeping the confirmation code enabled unless you have a specific reason to trust email entry, such as a checkout where the email is already verified by your platform.
:::
## How can I tell in my store admin if a customer is considered verified?
You can view your customers verification status witin your eCommerce platform's dashboard.
[Real ID automatically tags orders and customer profiles](../shopify/tags.md) in your Shopify dashboard. When a customer completes ID verification, their profile is tagged with `ID verification completed`. Additionally, if you elect to manually approve an ID check, the customer will be tagged with `ID check manually approved`. Either one of these tags counts the customer as permanently verified for future orders.
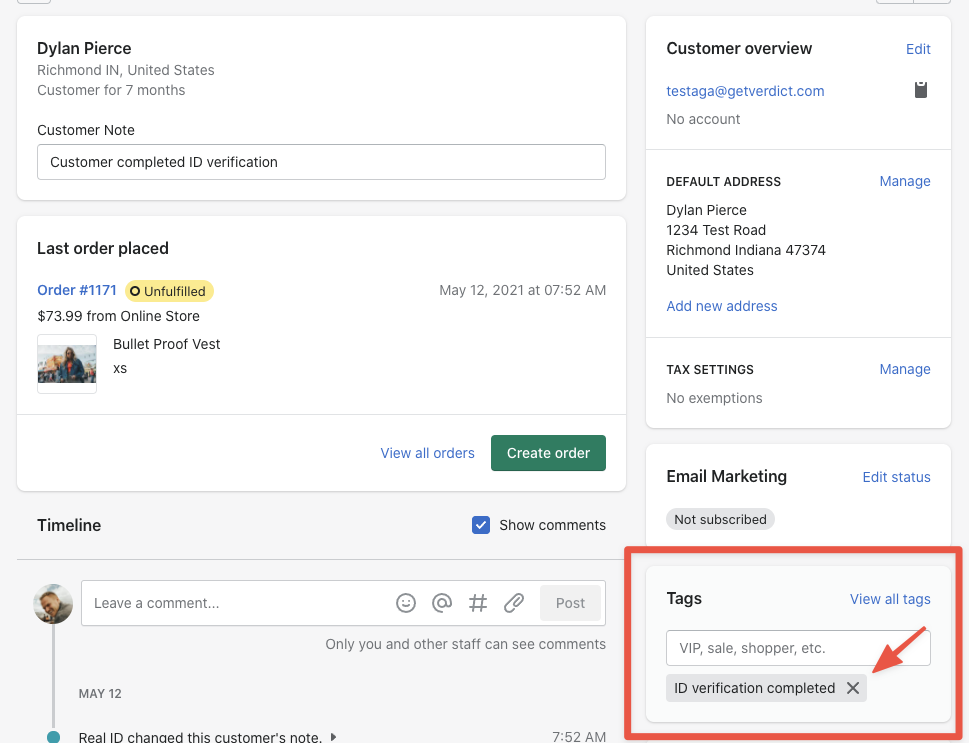
:::note Tags can be edited outside of Real ID's control
Since tags can be modified in the Shopify Admin, they do not dictate if an order is verified or not. The customer must have a prior completed or manually approved ID check to be considered verified.
:::
Additionally, Real ID also updates the metafields on the customer's account as they complete ID verification.
You can view the metafields of a customer within your Shopify dashboard, by visiting the customer's profile.
Metafields are also accessible in your store's theme within liquid templates, which allows you to craft feedback to the customer in their account page if they are verified.
Real ID uses meta data on the customer's user profile to store their ID verification status.
You can view this meta within your theme, or within the WordPress dashboard.
Real ID uses [metafields](../bigcommerce/metadata.md) on both customer and order profiles to store ID verification status. The `realid.verification_status` metafield reflects the current state of the customer's ID check (e.g., `verified`, `manually_approved`, `failed`).
You can view a customer's verification status directly from the BigCommerce admin using the Real ID [customer panel](../bigcommerce/viewing-ids.md#from-customer-details), which shows the current verification status and a full history of all ID checks for that customer.
You can also access these metafields programmatically through the [BigCommerce Metafields API](https://developer.bigcommerce.com/docs/rest-management/customers/customer-metafields).
You can view the verification status for any customer's ID check in the Real ID dashboard, or retrieve it programmatically via the [REST API](../api/checks.mdx#retrieve-an-id-check).
The check's `step` field indicates the current status — `completed` for verified customers, `in_review` for pending manual review, and so on. Use [webhooks](../api/webhooks.mdx) to get notified in real time when a customer's status changes.
## Expired IDs
IDs such as driver's licenses commonly feature an expiration date. After the expiration date passes, the ID is no longer valid. For example, a U.S. issued drivers license can be unexpired at the time of verification, but in the future that ID's expiration date will pass and the ID is no longer valid.
Real ID will automatically invalidate expired IDs for you, so that way you can tell the ID is now expired:
- On **Shopify**, the customer's profile tag is updated to `ID expired`.
- On **WooCommerce**, the customer and order [`real_id_check_status` metadata](../woocommerce/metadata.md) is set to `expired`. The order's WooCommerce status is left unchanged.
The next time the customer returns to place an order, they will be prompted to verify their ID again.
### Example
A customer Jane Doe verified her ID for her purchase on your store. Her ID isn't set to expire until January 1st 2030. Jane Doe will be automatically verified for future purchases.
After January 1st 2030 Jane's ID will be expired and no longer valid. Real ID will automatically update her profile to `ID expired` which will invalidate her ID. The next time Jane makes a purchase from your store, she will be prompted to verify her ID once more.
:::note IDs without expiration
Some forms of ID do not feature an expiration date, or Real ID may not be able to confidently read the expiration date on the ID and the ID is [manually approved](../for-merchants/overridding-results.md) by your staff.
In these cases, Real ID will not be able expire these IDs automatically because there is not expiration date to invalidate.
:::
## Frequently Asked Questions
## Does this feature work with manually approved customers?
Yes! If you manually approve a check, Real ID will also count this as a successful verification.
Manually approving an ID check will tag the customer with "ID check manually approved", and future orders will count as verified.
:::tip Manual approval can happen without ID photos submitted from the customer
You can manually approve an ID check at any time, even if the customer has not actually submitted any photos.
Please be certain you intend to manually override a customer's ID verification for their order or account, because on future purchases they will not be prompted again if manually overridden.
:::
## Does this work with the before checkout and before viewing store flows?
Yes, by default Real ID will remember your already verified customers if you decide to require ID verification before checkout or before customers can view your store.
## How can I pre-approve customers in the **before checkout** flow?
You can pre-approve customers in the before checkout flow by starting an ID check manually for them, and then manually approving the ID check immediately after sending it.
That way, an ID check is created in Real ID's database for that account, and [they can use their email address at checkout](#from-the-customers-email-address) to link the ID check to their account.
They will not be prompted to submit photos, and their already manually approved check will be used.
## Do I need to require customers to have an account to be remembered for future purchases?
No, this is not required.
Real ID associates a verified ID with the customer's account as well as their email address used for their order. That way even if the customer doesn't have an account with your store, we can use their email address to look up their verified ID automatically.
---
// File: for-merchants/archiving-id-checks
# Archiving ID checks
If you are manually reviewing failed or verified ID check photos as part of your order fulfillment workflow, you may want to remove already manually reviewed checks from your ID check timeline in the app.
This is where archiving ID checks comes in handy. You can archive ID checks you have already reviewed, and they'll be removed from the home page of the app.
This allows you to clean up your already viewed ID checks, while still keeping their results.
## Only show archived ID checks
In the home page, select the **Archived** filter to only show ID checks that have been archived. From this view, you can also unarchive one or more ID checks using the bulk selection tool.
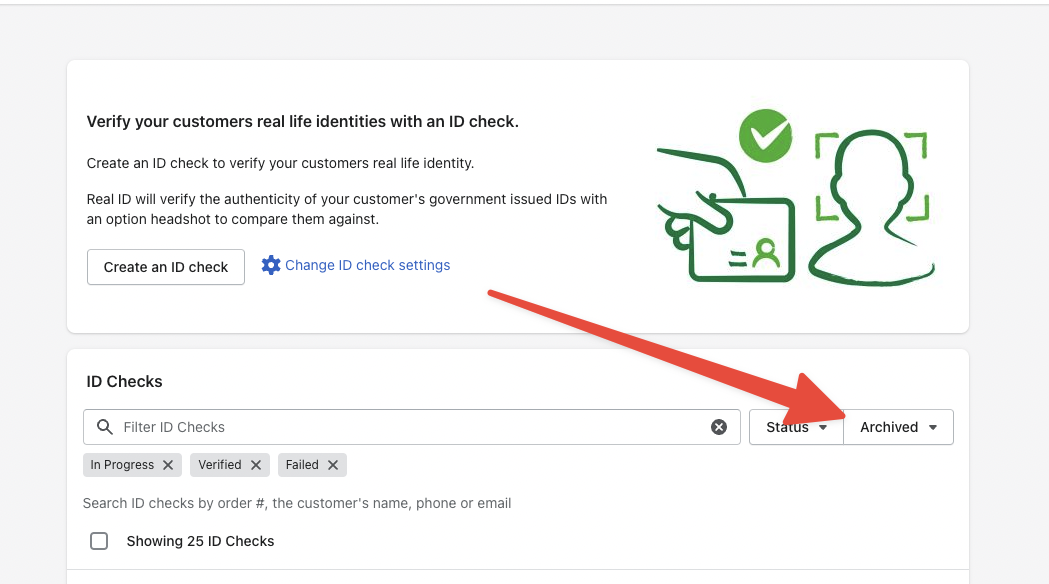
:::info
Archiving ID checks does not delete photos, data or modify tags in any way.
Archiving only affects how the ID check is shown in your dashboard when you first open Real ID.
:::
## How to archive an ID check
You can archive ID checks from either the ID check details page, or from the home page itself.
When viewing a specific ID check, you can archive it in the top menu of the page:
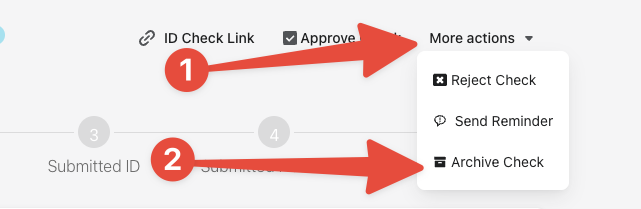
### Archiving multiple ID checks
You can archive multiple ID checks at once on the home page. Click the checkbox next to each ID check you'd like to archive, then click the **Archive Check** button in the toolbar to archive them all at once:
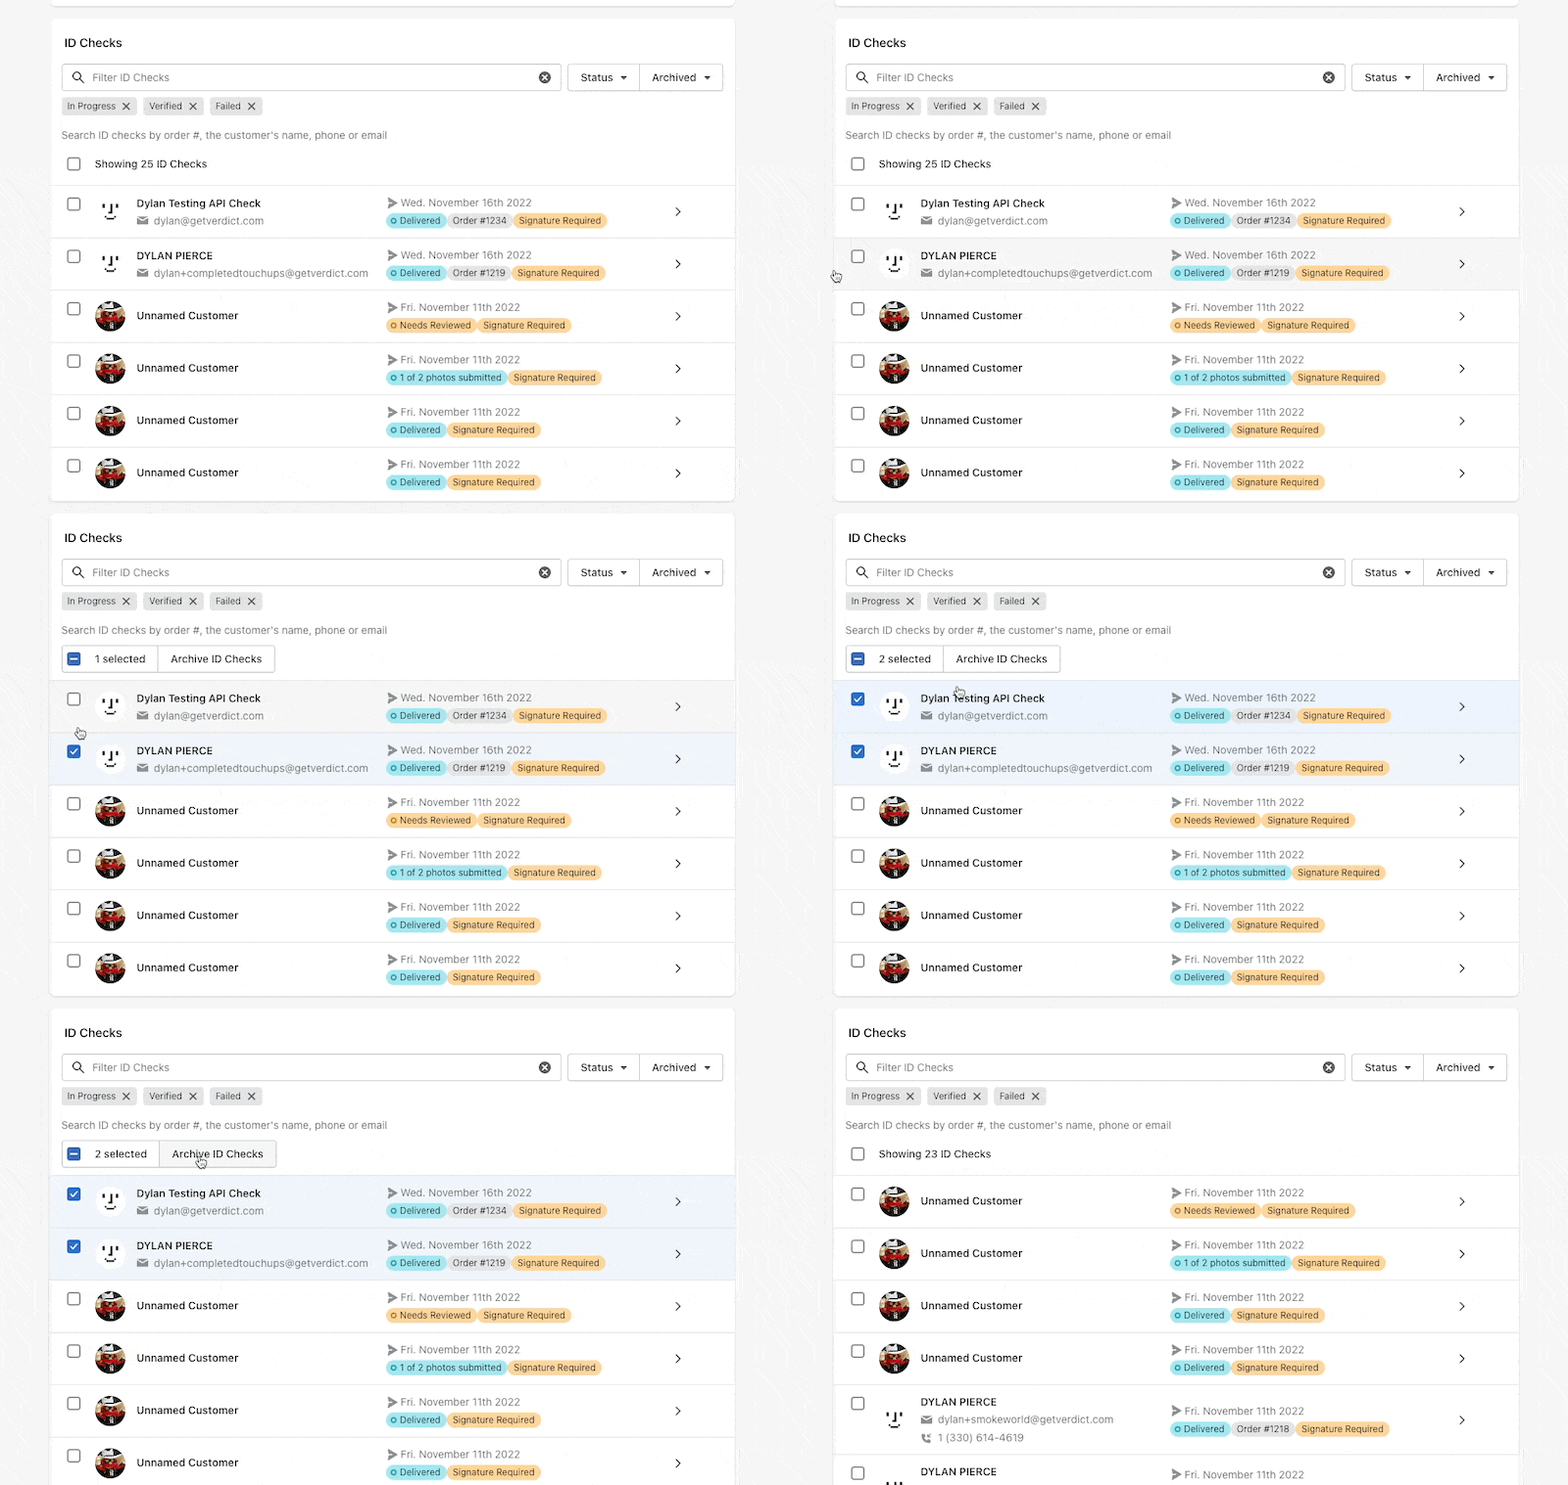
## How to unarchive an ID check
From an individual ID check, you can unarchive using the top menu of the ID check:
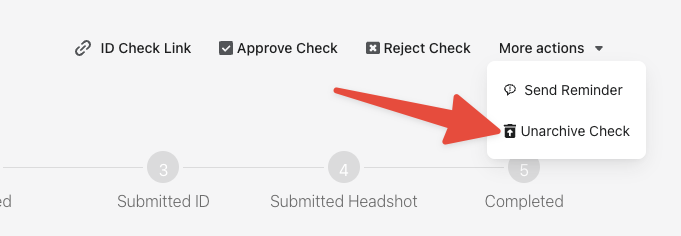
### Unarchiving multiple ID checks
You can also unarchive multiple ID checks with a single click. First apply the **Archived** filter in the top right of the toolbar, then click on each checkbox next to the ID check you'd like to unarchive.
Finally, click **Unarchive Checks** to unarchive all selected ID checks.
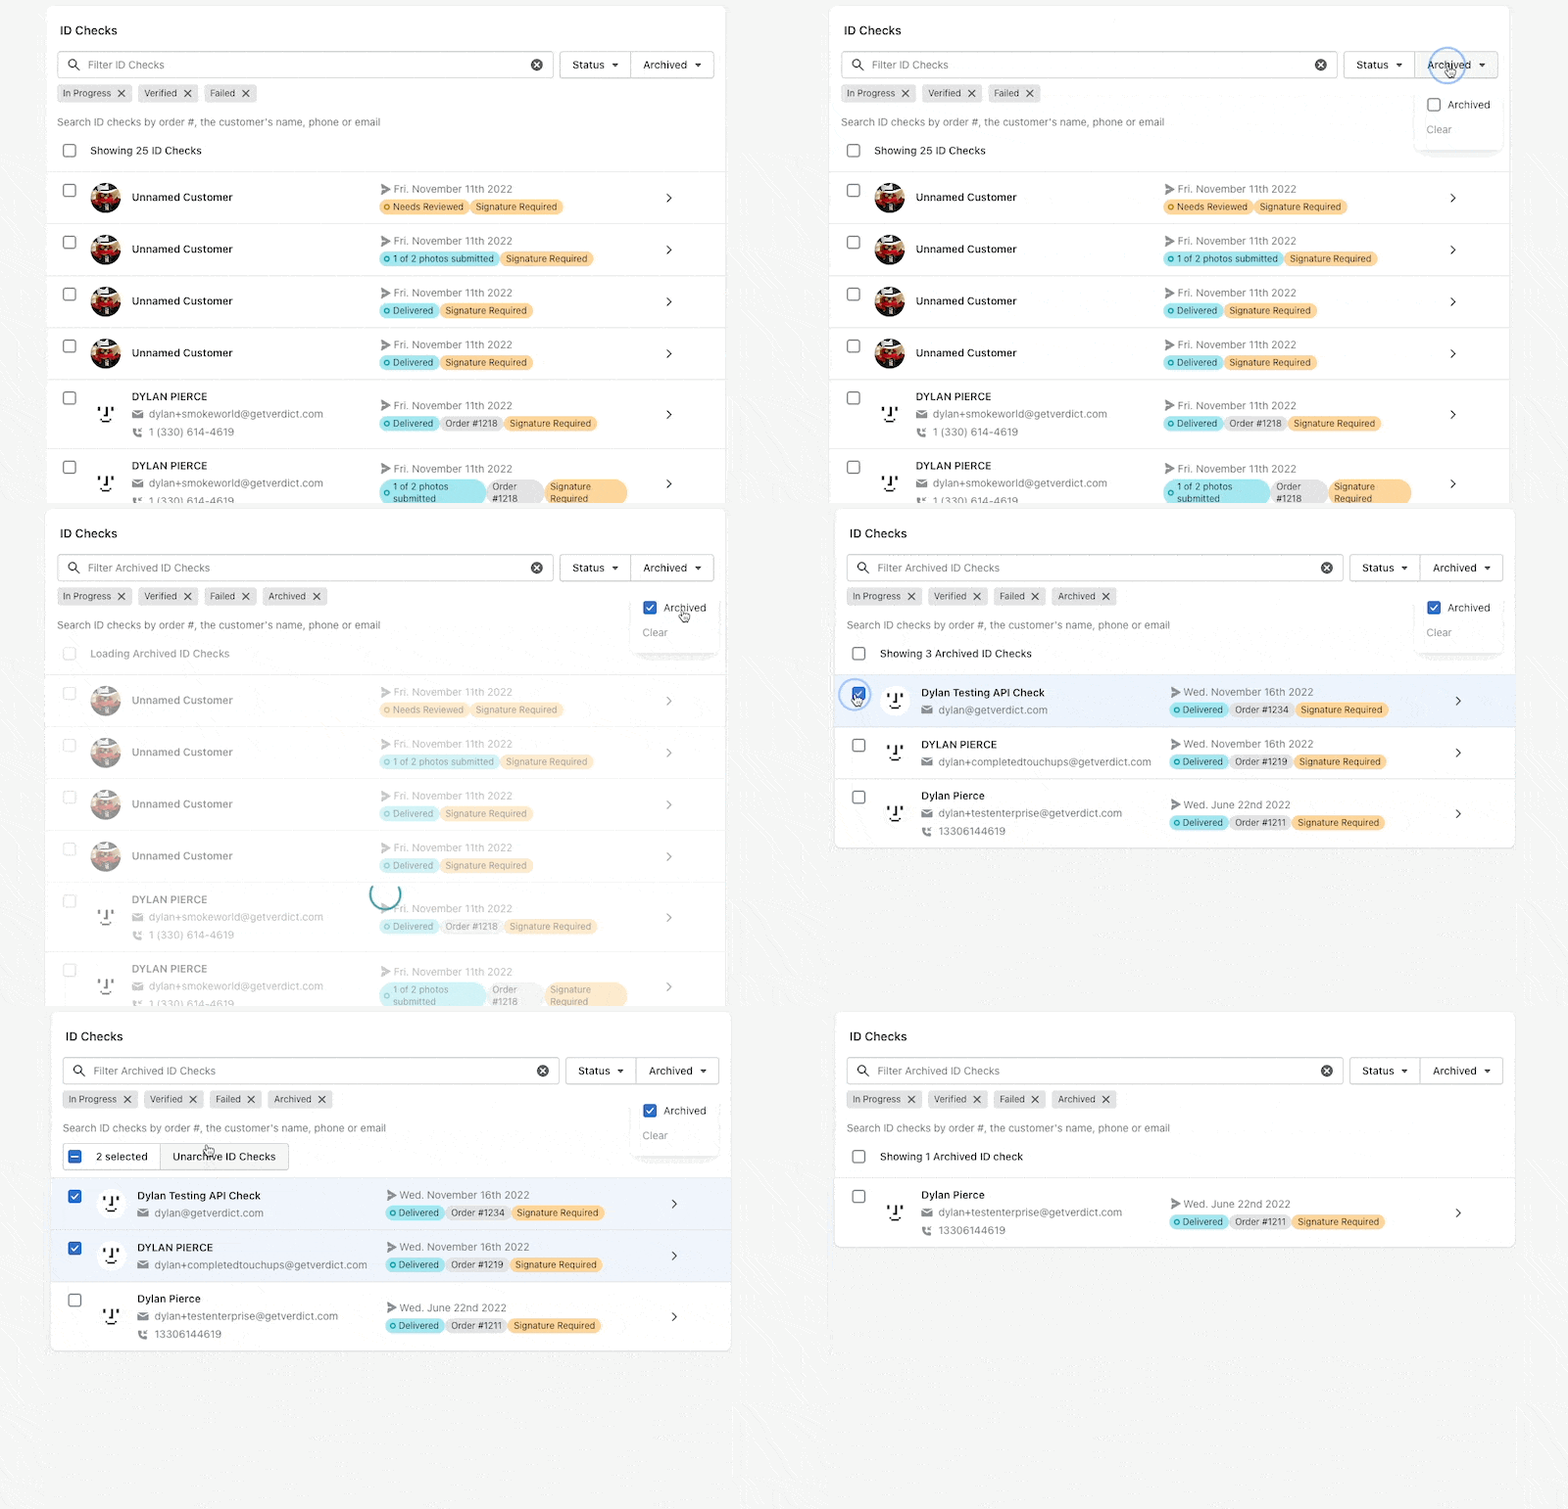
:::info
Don't forget to apply the **Archived** ID check filter before attempting to unarchive the checks, otherwise the **Unarchive** button will not appear.
:::
---
// File: for-merchants/automatic-id-check-reminders
# Schedule automatic ID check reminders for customers
You can increase your ID check completion rate by scheduling reminders in the Real ID app. Customers are busy too, they may not be able to complete ID verification after their order, and you can automatically follow up with them using Real ID.
Watch this short 2 minute video to learn how to enable this feature and customize it, or follow the instructions below:
:::info Only available for after checkout
This feature is only available for ID checks sent manually or [sent automatically by an **after checkout** trigger](../flows/after-checkout).
Automatic reminders will **not** be sent for [ID checks prompted before checkout](../flows/before-checkout).
:::
## How to enable automatic ID check reminders
Within the app, open up the Notifications area in the settings page.
Then you'll should see the Customer ID check Notifications section:
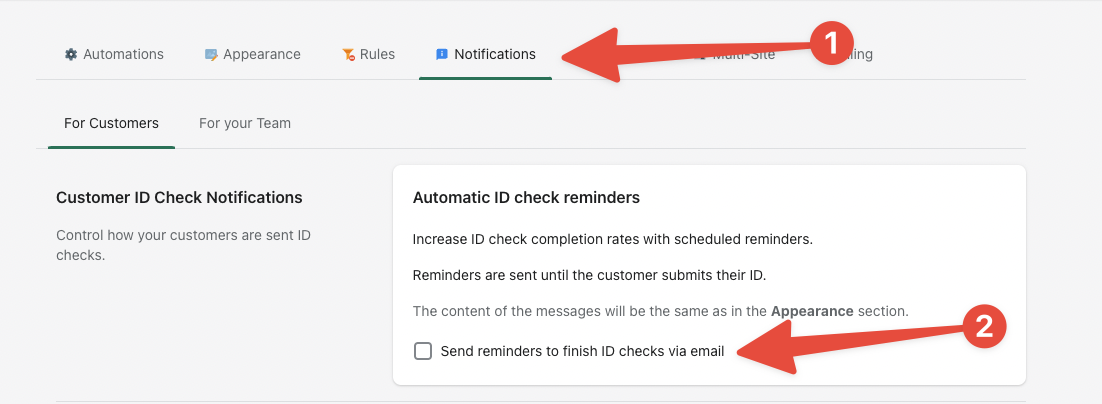
Enabling this feature will show three default emails that are scheduled for reminding the customer to complete their ID verification:
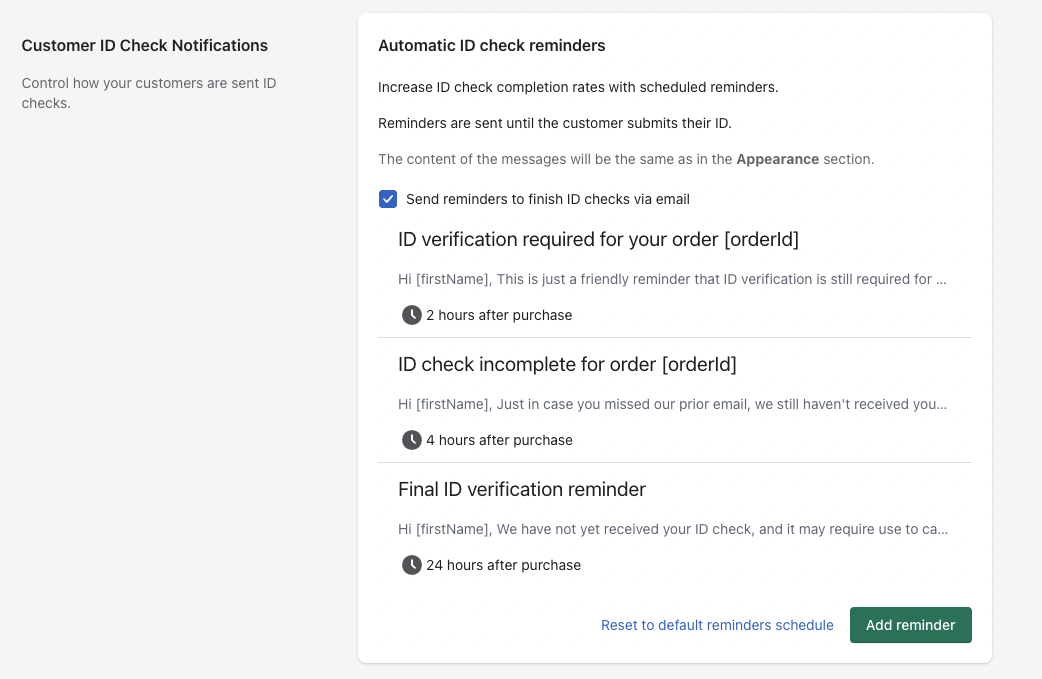
## How to change the schedule and content of the emails
To change the body, subject and the delay of a given reminder, click on it.
In the popup, you'll be able to adjust the subject line, body and choose how long to wait to send the email:
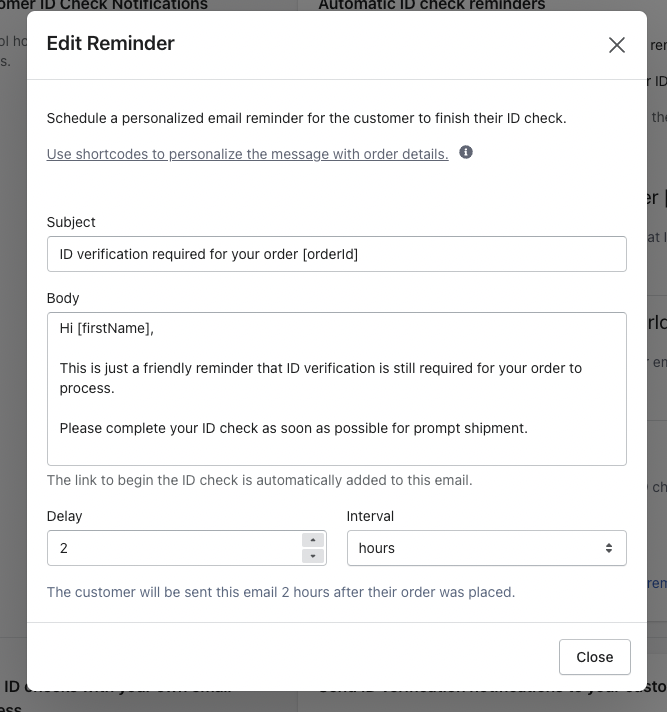
[You can use shortcodes to personalize the message with the customer's name and their order number.](../theming/customize-content#shortcodes)
## Frequently asked questions
### Is this an additional charge for using automatic reminders?
No, this feature is not an additional charge to your ID check. But there is a limit to the number of emails you can reschedule.
### If the customer completes their ID check, will they still receive emails?
No, when the customer completes their ID check, the rest of the scheduled reminders are immediately cancelled. The customer will not be reminded again, because they have submitted their ID.
### How many reminders can I schedule?
Real ID comes with 4 reminders maximum per schedule. If you need additional reminder slots, [please contact us](/contact).
### Will automatic reminders be sent for ID checks triggered by before checkout or before viewing store flows?
No, automatic ID verification reminders are only available for the [after checkout flow](../flows/after-checkout), or ID checks sent manually.
---
// File: for-merchants/deleting-data
# Deleting ID check data
You can delete customer data manually through the app at any time.
To delete a customer's photos and data, open the ID check and select **Delete Customer Photos** in the top action menu.
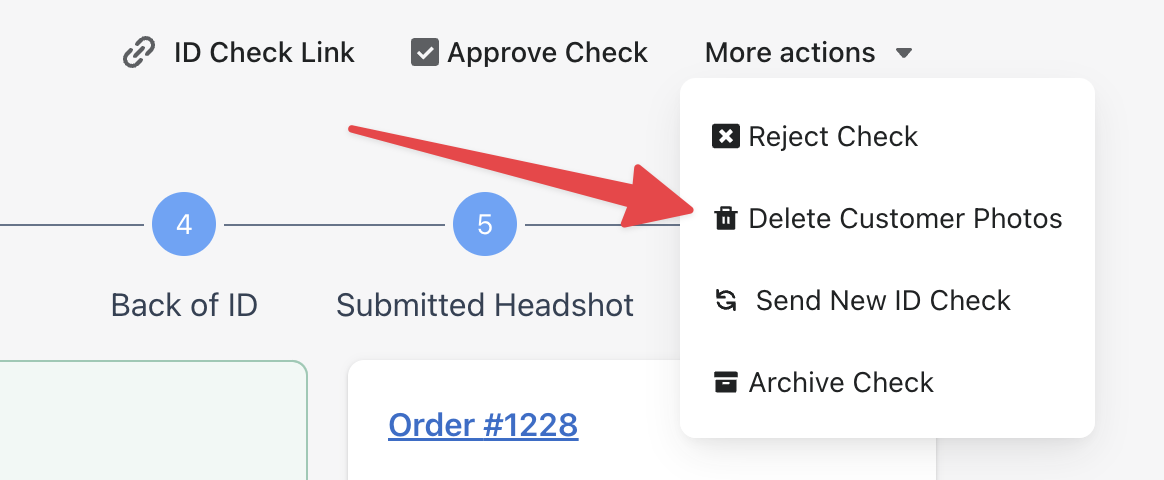
You'll be prompted to confirm the deletion.
:::warning This is permanent
Deleting customer data is an irreversible actions. This will permanently scrub and remove all customer photos and data from Real ID's vaults and databases.
:::
## Data deletion logs
After a customer's data has been deleted, the ID verification timeline updates to show exactly when the customer's ID data was deleted:

## Frequently asked questions
### Will deleting a customer's data also wipe their verification status? Will they need to verify again?
No, deleting the stored ID information will not unverify the customers account. That way they can make future orders without being prompted to verify again.
Real ID [updates the customer's profile on your eCommerce platform](../flows/remember-repeat-customers.mdx), so that way they are flagged for future orders.
### Will customers receive a notification when their data is permanently deleted?
Yes, customers will be notified by email when their ID was been deleted from our system.
### Are data deletions logged?
Yes, in the ID verification details timeline you can see the exact time of when the customers data was deleted for that ID check.
### Will archiving an ID check also delete data?
No, [archiving an ID check](./archiving-id-checks.md) will just filter the check from your main ID checks view by default. Archiving doesn't have any affect on customer data.
---
// File: for-merchants/downloading-customer-photos
# Downloading customer photos
You can download individual photos from any completed ID check directly from the Real ID dashboard.
## Available photos
All photos submitted during the ID verification process are available for download, including:
- **ID photo** - The front of the customer's government-issued ID (driver's license, passport, etc.)
- **Back of ID** - The back of the ID document, if required by your [verification rules](../rules.md)
- **Headshot/selfie** - The customer's face photo used for [face matching](../rules/face-match.md)
- **Proof of address** - Utility bills or other documents submitted for [address verification](../rules/proof-of-address.md)
- **Additional documentation** - Any other required documents such as firearms licenses or permits
- **Signatures** - Electronic signatures captured during the [eSignature step](../rules/capturing-e-signatures.md)
## How to download photos
To download a photo from an ID check:
1. Open the ID check from your [dashboard](./viewing-id-checks.md)
2. Scroll to the photo you want to download
3. Click the **Download** button below the photo
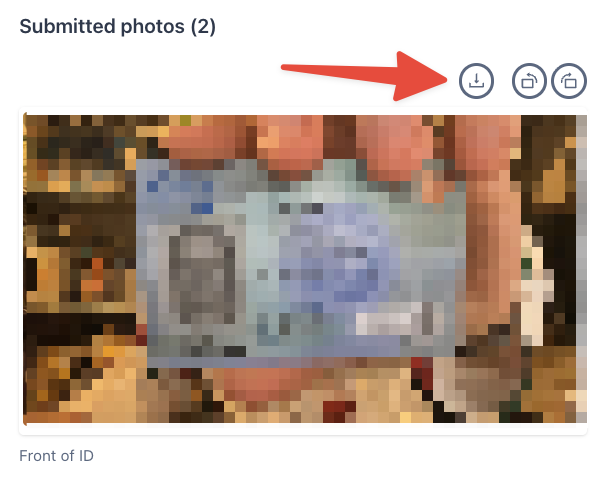
The photo will download directly to your device.
## Downloading photos via the API
You can also retrieve photos programmatically using the [REST API](../api/checks.mdx). When fetching an ID check, include the `withPhotos` query parameter:
```
GET https://real-id.getverdict.com/api/v1/checks/{{checkId}}?withPhotos=true
```
All photos will be returned as short-lived URLs in the API response under the `photos` key. These URLs expire after a short period for security purposes.
See the [Checks API documentation](../api/checks.mdx#retrieve-an-id-check) for full details on authentication and response format.
:::warning Data security responsibility
When you download customer photos, you become responsible for:
- **Secure storage** - Maintaining appropriate security measures to protect the downloaded PII
- **Access control** - Limiting who can view the downloaded photos
- **Data deletion requests** - Fulfilling any GDPR, CCPA, or other legal requests to delete the downloaded copies
- **Compliance** - Ensuring your handling of the data meets all applicable regulations
Real ID securely stores customer data on your behalf. We recommend only downloading photos when absolutely necessary for your business processes.
:::
---
// File: for-merchants/gdpr-compliance
# GDPR and CCPA compliance
Real ID stores government ID photos, selfies and personal details on your behalf, so both you and Verdict have obligations under privacy regulations like the GDPR and the CCPA.
This page covers what each side is responsible for, the tools you have for answering customer data requests, and how to get a Data Processing Agreement.
For the full legal statement, see [Security and privacy](https://getverdict.com/security-and-privacy) and the [Verdict Privacy Policy](https://getverdict.com/privacy).
## Who's responsible for what
Under the GDPR, you're the **data controller** and Verdict is the **data processor**:
- **You decide** what gets collected, which customers are asked to verify, how long you need the data, and how you respond to your customers' requests
- **We process** that data on your instructions, keep it secure, and give you the tools to export or delete it
The same split applies under the CCPA. Because you're the controller, data requests from your customers are yours to answer — we provide the tools and will help, but we can't decide on your behalf.
## Requesting a Data Processing Agreement
Data Processing Agreements (DPAs) are available on request. Email [privacy@getverdict.com](mailto:privacy@getverdict.com) and we'll send one over.
## Answering a customer data request
### Access and export requests
When a customer asks for a copy of the data you hold on them:
1. Find their ID check in [your dashboard](./viewing-id-checks.md)
2. [Download their photos](./downloading-customer-photos.md) and any documents they submitted
3. The check details page shows the extracted personal data — name, date of birth, document number and expiry
You can also retrieve checks and photos programmatically through the [REST API](../api/checks.mdx).
:::warning Downloaded copies are yours to protect
Once you download a customer's photos, you're responsible for storing them securely and deleting them when the customer asks. See [Downloading customer photos](./downloading-customer-photos.md) for the full list of responsibilities.
:::
### Deletion requests
To erase a customer's data, [delete the ID check data](./deleting-data.md) from the check's action menu. This permanently scrubs the photos and personally identifiable data from Real ID's vaults and databases.
Deleting the data doesn't unverify the customer, so they won't be asked to verify again on future orders. The deletion is recorded on the check timeline with a timestamp, which you can use as evidence that you honored the request.
## Data retention
The GDPR expects you to keep personal data no longer than you need it. By default Real ID retains ID check data until you delete it, so you stay in control of the timing.
If you'd rather have data aged out automatically, custom retention periods can be configured on request — email [privacy@getverdict.com](mailto:privacy@getverdict.com) with the retention window you need.
Pick your window with your own obligations in mind. A shorter window limits your exposure, but it also removes evidence you may still need — that an age-restricted sale was verified, that a chargeback window has passed, or that you met your compliance requirements.
## Requests your customers send to us
Customers can request deletion directly, either from their ID check or by emailing [privacy@getverdict.com](mailto:privacy@getverdict.com).
When a customer requests deletion from their check, Real ID:
1. Records the request
2. Emails the customer to confirm we received it
3. Emails you so you can review and action it
The request stays open until you delete the data. We notify you rather than deleting automatically, because as the controller you may have a legal reason to retain the record — for example, proving an age-restricted sale was verified.
## Shopify data requests
Real ID is subscribed to [Shopify's mandatory GDPR webhooks](https://shopify.dev/docs/apps/webhooks/configuration/mandatory-webhooks). When a customer submits a data request or redaction request through Shopify, or when you uninstall the app, Shopify notifies us.
Every request is verified and recorded on arrival, then reviewed and actioned by our privacy team.
:::note Need confirmation for your records
If you need written confirmation that a specific Shopify request has been completed, email [privacy@getverdict.com](mailto:privacy@getverdict.com) with the customer's email address or the request date.
:::
Verdict's published policy is to delete merchant and customer data within 30 business days of uninstalling Real ID.
## Opting out of automated decisions
The GDPR gives customers the right not to be subject to solely automated decisions. You can override any result the verification AI returns by [manually approving or rejecting an ID check](./overridding-results.md).
## Limiting who can see customer data
Access to ID photos and personal data is part of your own compliance posture. Use [staff permissions](./managing-staff-permissions.md) to restrict which staff can view, download and delete ID checks.
## Frequently asked questions
### Do you have a DPA I can sign?
Yes. Email [privacy@getverdict.com](mailto:privacy@getverdict.com) to request one.
### Where is customer data stored?
See [Security and privacy](https://getverdict.com/security-and-privacy) for current details on storage, encryption and sub-processors.
### Does archiving an ID check delete the data?
No. [Archiving](./archiving-id-checks.md) only filters the check out of your default view — it has no effect on the stored data. To erase the personal data, use **Delete Customer Photos** as described in [Deleting ID check data](./deleting-data.md).
### Can I delete data for a customer who verified on a different store?
No. Each ID check belongs to the store that requested it, and you can only delete data for your own store's checks.
### How do I prove to a regulator that I verified a customer's age?
Open the ID check. The timeline shows what was collected, when it was verified and who approved it, and you can [download the photos and documents](./downloading-customer-photos.md) the customer submitted. See [Interpreting results](./interpreting-results.md) for what each field means.
Keep in mind that deleting a customer's data removes this evidence, so check your own retention obligations before you action a deletion request.
---
// File: for-merchants/id-check-notifications
# ID Verification Notifications
In addition to updating customer accounts and orders in real time, Real ID will also send you emails as customers verify their IDs. You'll be notified when customers successfully pass, or fail to pass automatically. This way, you have a chance to [review the ID details](./viewing-id-checks.md) before fulfillment, and [can even override results](./overridding-results.md).
## Which email address is used?
For Shopify merchants, Real ID will use your contact email for your store to deliver email notifications. If you're using WooCommerce, your email address used for your [billing account](../woocommerce/activation.md) is the default.
:::info Fallback email behavior
If no team email addresses are configured in the notification settings, Real ID will automatically fall back to your store's contact email address. This ensures you always receive important ID verification notifications even if no specific team emails are set up.
:::
## Changing your email addresses for customer ID verification notifications
You can change which email address receives these notifications. For example, you may wish to delegate all ID verification tasks to a specific staff member, or decide to set up a specific email inbox for ID verification related processing.
To change your email addresses, open the **Settings** area of the plugin. Then select the **Notifications** menu tab.
Then open the **For your Team** section of the notifications settings.
Here is where you can manage the notifications for your team. You can change the email address, or define multiple email addresses that should be notified.
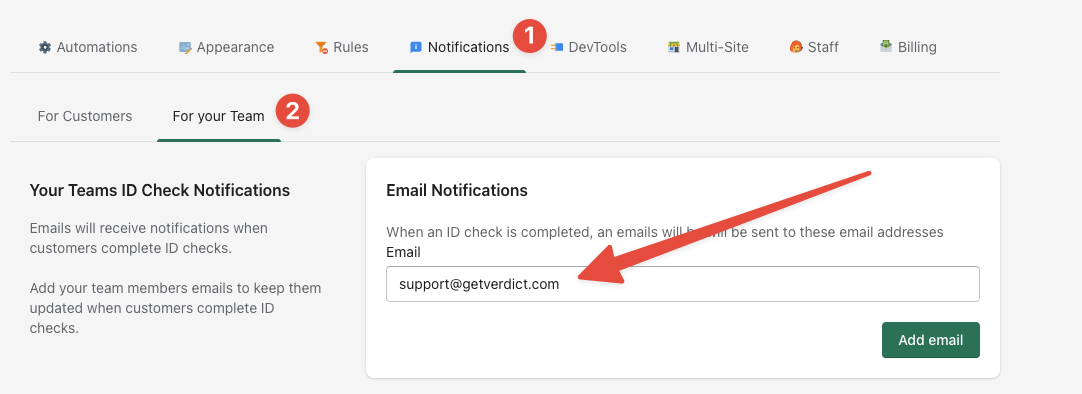
Don't forget to click **Save** to apply any changes you make.
## Controlling which email notifications you receive
You can choose exactly which types of email notifications your team receives. This allows you to reduce inbox noise by disabling notifications you don't need while keeping the ones that matter most to your workflow.
In the **For your Team** section of your notification settings, you'll find checkboxes for each notification type:
| Notification | Description |
|---|---|
| **ID verification completed** | Sent when a customer successfully passes ID verification. |
| **ID verification failed** | Sent when a customer fails automatic verification and needs manual review. |
| **Manually approved** | Sent when a staff member manually approves an ID check. |
| **Underage customer detected** | Sent when a customer is flagged as underage based on your age requirements. |
All notification types are enabled by default. Simply uncheck any notification type you'd like to stop receiving, and click **Save**.
:::tip
If you're only interested in knowing when an ID check needs manual review, you can disable the "ID verification completed" notification and keep the rest enabled. This way you'll only be notified when action is needed from your team.
:::
---
// File: for-merchants/interpreting-results
# Interpreting the ID check results
## Overall verdict
Real ID uses a combination of confidence scores from A.I. models, computer vision and [your rules](../rules.md) to determine if an ID check is considered a pass or fail.
## Confidence Scores
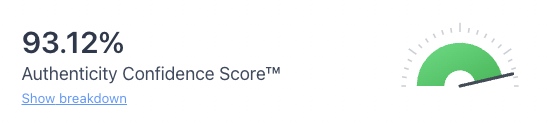
### ID photo quality
### Face photo quality
### Face match
## Extracted ID fields
### Name
### Address
### Document Type
### Birth Date
### Expiration Date
### Issue Date
### Class
## ID photos
## Signals
## Events Timeline
---
// File: for-merchants/managing-staff-permissions
# Setting up Staff Permissions
You can control which of your staff can view ID checks, override their results, or modify settings like setting up automatic ID check triggers.
To get started, first open up the **Settings** area in the app, then in the top menu select the **Staff** tab.
You should see a table of staff members and their current permissions.

:::info
This feature is only available to the Shopify version of Real ID at this time.
If you require this for your WooCommerce store or another platform, [please let us know](/contact).
:::
## Choosing permissions for a staff member
Real ID offers four permissions for each staff member:
* `View ID checks` - grants the ability to open ID checks, view the captured photos and the extracted information from them.
* `Manage ID checks` - grants the ability to manually approve or reject ID checks, or delete ID check data.
* `Manage Settings` - grants the ability to alter Real ID settings, including the ability to set up triggers, branding, etc.
* `Manage Staff` - grants the ability to change the permissions on other accounts.
## Default permissions for new staff
By default new staff members will always be granted the `View ID checks`, `Manage ID checks` and `Manage Settings` permissions. Only the account owner will be granted the `Manage Staff` permission.
That means that staff that open the app initially will be able to view ID checks, manually approve or reject them or change Real ID settings.
## Restricting staff to only process ID checks
If you need to restrict certain staff members to only process ID checks, and not have the ability to update settings, then enable `View ID checks` and `Manage ID checks` only:

## Allowing a staff member to manage other staff permissions
You can promote a staff member to manage other staff's permissions by adding the `Manage Staff` permission to their account:

## Not all staff appearing in the permissions list
Unfortunately Shopify does not allow apps to view staff lists. You can only manage staff permissions of staff that have opened the app at least once.
Once a staff member opens Real ID, the app will create an account for that staff member and it will appear in this permissions list.
By default, new staff members are assigned `View ID checks`, `Manage ID checks` and `Manage Settings` permissions.
---
// File: for-merchants/overridding-results
# Overriding ID check results
Occasionally you may want to override Real ID's results on an ID submission. You can easily do this from the Real ID dashboard.
From the app you can open the ID check details, at the very top of the ID check will be a menu of buttons.
Here you can choose to manually override the ID check results by either approving or rejecting the results.
## Manually approving an ID check
You can manually approve an ID check at any time, including before the customer has actually submitted photos or after they've failed their ID check.
To manually approve an ID check, click the **Approve Check** at the top of the page from within the ID check details page:

You'll be asked to confirm before the check is approved:

Then the check will be considered passed throughout Real ID. This includes if you have ID verification required [before viewing your store](../flows/before-viewing-store.md), or [before checkout is required](../flows/before-checkout.mdx).
**Email Notification**: When a staff member manually approves an ID check, your store's contact email addresses will automatically receive a notification email. The email will include contextual information such as the customer's name and order ID when available, helping you track manual approval activities across your team. You can [customize which email addresses receive these notifications](./id-check-notifications.md#changing-your-email-addresses-for-customer-id-verification-notifications) in your notification settings.
:::caution
If you manually approve an ID check that's in progress or doesn't have any photos submitted yet at all - it's will lock the customer from completing the ID check.
The ID check will be shown as completed to the customer.
:::
## Manually rejecting an ID check
You can also manually reject an ID check at any time, even if it's been passed or manually approved.
To manually reject an ID check, open the **More actions** menu in the top right in the ID check, and then select **Reject Check**:

You'll be asked to confirm this action:

Then the ID check will be considered failed throughout Real ID. This includes tags, metafields and notes left on the order and customer profile.
:::caution
If you manually reject an ID check that's in progress or doesn't have any photos submitted yet at all - it will lock the customer from completing the ID check.
The ID check will be shown as failed to the customer.
:::
---
// File: for-merchants/retrying-id-checks
# Retrying ID checks
Sometimes a customer fails their ID check and you'd like to give them another chance — for example, they used a document that isn't supported, their ID was damaged, or the photos came out too poorly to read.
Real ID handles this in two ways: **soft retries** during a single check, and **hard retries** that start a fresh check.
## Soft retries (automatic)
Within a single ID check, customers are given **3 attempts per stage** to capture a high quality, readable photo. If a customer requires both an ID photo and a portrait photo, they get 3 attempts for each.
Soft retries do not incur extra charges — you're only charged once for the entire check, no matter how many soft attempts the customer uses. If a customer uses all 3 attempts in a stage, they're allowed to continue on to the next stage so they can still complete the flow.
[Learn more about soft retries](../id-check-process.md#maximum-soft-retries).
## Hard retries (a fresh ID check)
A **hard retry** lets a customer start over with a brand new ID check after their previous one is complete — useful when the original check went [In Review](../id-check-process.md#in-review) or was [manually rejected](../id-check-process.md#manually-rejected) and you want to let the customer try again.
Because a hard retry creates a new ID check, it is treated as a separate check throughout Real ID.
### Sending a hard retry
You can send the customer a fresh ID check the same way you'd [send any ID check](../sending-an-id-check.md):
* Open the customer or order in the Real ID dashboard and send a new ID check, or
* On platforms that support it, enable [automatic retries](../rules/automatic-retries.md) so Real ID sends a new check automatically when a customer fails.
The customer receives a new ID check link and starts the flow again from the beginning, with a fresh set of soft retries.
:::note
A hard retry is a **new** ID check. Unlike soft retries, a new check may be billable depending on your plan. Review the original submission first — in many cases [overriding the result](./overridding-results.md) is faster than asking the customer to start over.
:::
## Which should I use?
| Situation | Use |
| --- | --- |
| Customer is mid-check and a stage failed | Soft retries (automatic, no action needed) |
| Check is complete but you believe the ID is actually valid | [Override the result](./overridding-results.md) |
| Check is complete and you want the customer to submit again from scratch | Hard retry |
---
// File: for-merchants/viewing-id-checks
# Viewing ID checks
You can view all of your customers ID checks in the Real ID app directly from the home page.
This is a real time dashboard of all past and current ID checks for your customers.
## Filtering ID checks
Real ID comes with easy to use filters to quickly exclude or include ID checks in the results by **status**, of view **archived** checks.
### By status
You can filter ID checks by their current status. By default, all ID checks are shown but if you need to filter only in progress checks, then select the **In Progress* filter:

The available statuses are:
* `In Progress` - ID checks where the customer still needs to submit one or more photos to finish their check
* `In Review` - ID checks where the customer was not able to be automatically verified, and they are ready for manual review
* `Verified` - ID checks where the customer was either automatically verified or their ID was [manually approved](./overridding-results.md) by a staff member on your team.
* `Failed` - ID checks where the ID was [manually rejected](./overridding-results.md) by a staff member on your team.
### Archived checks
You can archive old ID checks to mark them as processed or to help clean up your ID checks dashboard.
Archived ID checks are not deleted, you'll still be able to access photos & data, but they're just not within the home page by default.
To view archived ID checks, select the **Archived** checkbox to only display archived checks:

## Searching for a specific ID check
In the search bar on the homepage or at the top of the navigation bar, you can quickly search for specific ID checks by the customer's name, email address, phone number or even by the order number.

Real ID will automatically apply your search instantly, and the results in the home page will only show those ID checks.
## Viewing an ID check
To open a specific ID check that you've either filtered or searched for, simply check on the result:

:::tip View ID checks directly in your orders and customers pages
If you're using Shopify as your eCommerce platform, you can also view your customer's ID checks without leaving your Shopify dashboard.
[Use our Shopify Admin Blocks](../shopify/admin-extensions.md) to add the ID check results directly to your orders and/or customer pages to view ID checks without leaving Shopify.
:::
---
// File: getting-started/wizard
import GettingStartedWizard from '@site/src/components/GettingStartedWizard';
# Getting Started with Real ID
Welcome to Real ID! This interactive wizard will guide you through setting up ID verification for your store.
---
## Need Help?
If you have questions or run into issues during setup:
- **[FAQs](/help/docs/faqs)** - Common questions and answers
- **[Contact Support](/help/contact)** - Get help from our team
- **[Test Mode](/help/docs/getting-started/test-mode)** - Try verification in a sandbox environment
---
// File: getting-started/_steps/_age-restriction
# Configure Age Verification
Since you selected age verification as your use case, let's set up the age requirements for your store.
## Access Age Settings
Navigate to **Settings** → **Rules** → **Age Requirements** in your Real ID dashboard.
## Set Minimum Age
Choose the minimum age customers must be to pass verification:
### Standard Options
- **18+** - Common for adult products, gambling, certain media
- **21+** - Required for alcohol, cannabis in most U.S. states
### Custom Age
If you need a different age requirement, select **Custom** and enter your specific age (e.g., 25 for car rentals).
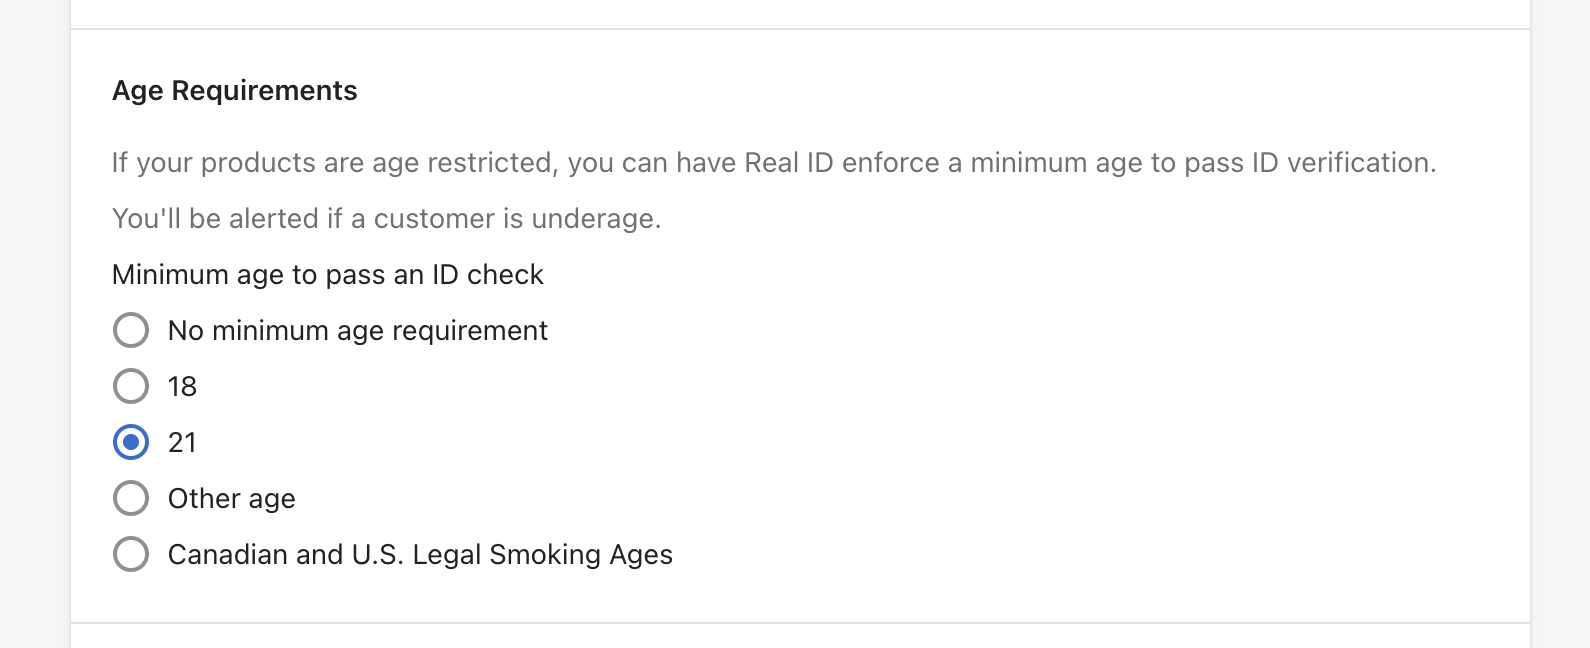
## Location-Based Age Rules
For U.S. and Canadian tobacco/cannabis merchants, age requirements vary by state or province.
### Enable Location-Based Rules
1. Enable **U.S./Canadian Tobacco Age Requirements**
2. Real ID will automatically apply the correct minimum age based on the customer's location
| Region | Tobacco Age |
|--------|-------------|
| Most U.S. States | 21+ |
| Alberta, Canada | 18+ |
| Ontario, Canada | 19+ |
| British Columbia | 19+ |
:::note Before Checkout Flow
If using the before-checkout flow, the age requirement is based on the province/state shown on the customer's ID document (since there's no shipping address yet).
:::
## How Age Verification Works
1. Real ID reads the **Date of Birth** from the verified ID document
2. The customer's age is calculated based on the current date
3. If the customer meets your minimum age requirement, the check passes
4. If the customer is underage, the check automatically fails
## What Happens When Someone Fails?
When a customer fails age verification:
1. The ID check is marked as **Failed**
2. The customer is notified they didn't pass verification
3. Your staff can review the submission in the Real ID dashboard
4. You can choose to manually approve if there was an error
## Products and Categories
Age verification applies to all ID checks, regardless of which trigger started them. If you only want age verification for certain products:
1. Create a specific collection/category for age-restricted products
2. Configure your triggers to only verify orders with those products
3. Age requirements will apply to those verifications
[Learn more about product-based triggers →](/help/docs/triggers/specific-products)
## Next Steps
Now let's configure how verification results sync back to your store.
---
// File: getting-started/_steps/_branding
# Customize Your Branding
Make the ID verification experience match your brand. Customers are more likely to complete verification when it looks familiar and trustworthy.
## Access Branding Settings
Navigate to **Settings** → **Appearance** in your Real ID dashboard.
## Upload Your Logo
Your logo appears in:
- The ID verification flow
- Email notifications
- SMS message links
To add your logo:
1. Scroll to the **Logo** section
2. Drag and drop your logo file, or click to browse
3. Click **Save**
:::tip Logo Tips
- Use a transparent PNG for best results
- Your logo will be automatically resized for different devices
- Square or horizontal logos work best
:::
## Set Your Colors
Customize the color scheme to match your brand:
### Primary Color
The background color used throughout the verification flow and emails.
:::tip
Use a neutral or light color as your primary color. This helps the action buttons stand out.
:::
### Button Color
The color for call-to-action buttons like "Start Verification" and "Continue".
:::tip
Use a darker, contrasting color for buttons. The button text is white, so darker backgrounds improve readability.
:::
## Preview Your Changes
After saving, click **Preview** to see how the verification flow will look to your customers. Test on both desktop and mobile views.
## Custom Content
You can also customize the text shown to customers:
1. Go to **Settings** → **Appearance** → **Content**
2. Edit the welcome message, instructions, and completion text
3. Click **Save**
[Learn more about customizing content →](/help/docs/theming/customize-content)
## Next Steps
Next, we'll set up email delivery so verification requests come from your domain.
---
// File: getting-started/_steps/_custom-email
# Set Up Email Delivery
ID verification requests are sent to customers via email. For the best customer experience and deliverability, configure emails to come from your own domain.
## Why Use Your Email Address?
- **Brand recognition** - Customers trust emails from your domain
- **Better deliverability** - Reduces spam filtering
- **Professional appearance** - Consistent with your other communications
## Option 1: Use Your Email Domain (Recommended)
Send verification emails from an address like `verify@yourdomain.com`.
### Step 1: Access Email Settings
Go to **Settings** → **Appearance** → **Email** in your Real ID dashboard.
### Step 2: Add Your Email Address
Enter the email address you want to send from (e.g., `verify@yourdomain.com` or `support@yourdomain.com`).
### Step 3: Verify Domain Ownership
To prove you own the domain, you'll need to add DNS records:
1. Click **Generate DNS Records**
2. Add the provided DKIM and SPF records to your domain's DNS settings
3. Click **Verify** once the records are added
:::info DNS Propagation
DNS changes can take up to 48 hours to propagate, though most complete within a few hours.
:::
### Step 4: Test Delivery
Send a test email to yourself to verify everything is working correctly.
## Option 2: Use Real ID's Email
If you don't want to set up custom email, Real ID can send emails from our domain. These emails will still include your logo and branding.
Emails will come from: `noreply@getverdict.com`
## Email Customization
Regardless of which option you choose, you can customize:
- **Subject line** - The email subject customers see
- **Preheader text** - Preview text shown in email clients
- **Body content** - The main message explaining why verification is needed
- **Button text** - The call-to-action text
Go to **Settings** → **Appearance** → **Email Content** to customize these.
## SMS Notifications
In addition to email, Real ID can send verification links via SMS to customers who provide a phone number.
1. Go to **Settings** → **Notifications**
2. Enable **SMS Notifications**
3. Customize the SMS message if desired
:::tip
SMS has higher open rates than email. Enable both for the best completion rates.
:::
## Next Steps
Your branding and email are configured! Let's continue with additional settings based on your use case.
---
// File: getting-started/_steps/_feedback-bigcommerce
# Order Feedback in BigCommerce
Real ID syncs verification results back to your BigCommerce store, letting you track order status and manage fulfillment.
## Order Status Syncing
Real ID can automatically update BigCommerce order statuses based on verification:
### Configure Status Mapping
1. Log in to your Real ID dashboard
2. Go to **Settings** → **Order Statuses**
3. Map verification events to BigCommerce statuses:
| Verification Event | Suggested BigCommerce Status |
|-------------------|------------------------------|
| Verification pending | Awaiting Fulfillment |
| Verification passed | Shipped or Processing |
| Verification failed | Cancelled or Manual Review |
:::tip Custom Statuses
Create custom order statuses in BigCommerce like "Awaiting ID Verification" for clearer order management.
:::
[Learn more about order status syncing →](/help/docs/bigcommerce/order-statuses)
## Viewing ID Checks
### From Real ID Dashboard
1. Log in to your Real ID dashboard
2. View all checks on the **ID Checks** page
3. Filter by status, search by order number or customer email
### From BigCommerce Orders
When viewing an order in BigCommerce admin, you can:
1. Click the order number to view details
2. Look for the Real ID status in order notes/comments
3. Click the link to view the full verification in Real ID
## Customer Verification History
Real ID tracks which customers have been verified:
- Verified customers won't be prompted again on future orders
- View a customer's verification history in the Real ID dashboard
## Notifications
### Staff Notifications
Configure email alerts for your team:
1. Go to **Settings** → **Notifications** in Real ID
2. Add email addresses for alerts
3. Choose which events trigger notifications:
- Verification started
- Verification completed (passed)
- Verification failed
- Verification requires review
### Customer Notifications
Customers receive automatic notifications:
- Email when verification is requested
- SMS if phone number is provided
- Confirmation when verification completes
## Webhooks
For advanced integrations, set up webhooks to receive real-time events:
1. Go to **Settings** → **Webhooks** in your Real ID dashboard
2. Add your endpoint URL
3. Select which events to receive
Webhook events include:
- `check.created` - New verification started
- `check.approved` - Customer passed verification
- `check.failed` - Customer failed verification
- `check.expired` - Verification link expired
[View webhook documentation →](/help/docs/api/webhooks)
## Reporting
View verification analytics in your Real ID dashboard:
- Total verifications by status
- Approval/failure rates
- Average completion time
- Common failure reasons
## Next Steps
Your BigCommerce integration is configured! Continue to the final step to learn about order holding for unverified orders.
---
// File: getting-started/_steps/_feedback-custom
# Handling Verification Results
With a custom integration you control how verification outcomes reach your application. Webhooks are the recommended path; polling and client-side events cover the rest.
## Receiving Results via Webhooks
### Configure Webhooks
1. Go to **Settings → DevTools → Webhooks** in your Real ID dashboard
2. Add your endpoint URL (e.g. `https://yourapp.com/webhooks/realid`)
3. Copy the **signing secret** — you'll need it to verify incoming requests
### Webhook Events
| Event | Description |
| --- | --- |
| `check.delivered` | The ID check was created and delivered to the customer |
| `check.opened` | The customer opened the ID check |
| `check.submitted-photo` | The check received a photo from the customer |
| `check.completed` | The customer successfully completed the ID check |
| `check.failed` | The customer failed the ID check |
### Webhook Payload
Every event uses the same envelope — only `event` and `check.step` change:
```json
{
"event": "check.completed",
"created_at": "2022-12-09T15:20:35.136Z",
"check": {
"id": "abcedef123",
"step": "completed",
"testing": false
}
}
```
:::info PII isn't in the webhook
The payload carries the check's identity and status, not the data extracted from the customer's ID. To read names, date of birth, document number or address, fetch the check over the REST API on a secure server-to-server connection.
:::
### Handling Webhooks
```javascript
app.post("/webhooks/realid", async (req, res) => {
// Verify the webhook signature before trusting anything in the body
const signature = req.headers["x-real-id-signature"];
if (!verifySignature(req.body, signature)) {
return res.status(401).send("Invalid signature");
}
const { event, check } = req.body;
switch (event) {
case "check.completed":
await handleCompleted(check);
break;
case "check.failed":
await handleFailed(check);
break;
default:
console.log("Unhandled event:", event);
}
res.sendStatus(200);
});
```
The signature is an HMAC-SHA256 of the request body, signed with your signing secret. See [verifying webhooks](/help/docs/api/webhooks#verifying-webhooks) for Node.js and Python implementations.
### Fetching the details
Once you know a check completed, retrieve it to get the verified data:
```javascript
async function handleCompleted(webhookCheck) {
const response = await fetch(
`https://real-id.getverdict.com/api/v1/checks/${webhookCheck.id}`,
{ headers: { Authorization: `Bearer ${process.env.REAL_ID_API_TOKEN}` } }
);
const { check } = await response.json();
const document = check.result.document;
await db.orders.update({
where: { name: check.order.name },
data: {
idVerified: true,
verifiedName: `${document.first_name} ${document.last_name}`,
verifiedBirthDate: document.birth_date_iso,
},
});
await fulfillOrder(check.order.name);
}
async function handleFailed(check) {
await db.orders.update({
where: { name: check.id },
data: { status: "on_hold", holdReason: "ID verification failed" },
});
await sendSlackNotification(`Check ${check.id} failed ID verification`);
}
```
A failed check isn't necessarily final — your staff can [manually approve or reject it](/help/docs/for-merchants/overridding-results), which emits a fresh `check.completed` or `check.failed` event.
## Polling the API
If webhooks don't suit your architecture, poll the check instead:
```javascript
async function pollCheckStatus(checkId, maxAttempts = 60) {
for (let attempt = 0; attempt < maxAttempts; attempt++) {
const response = await fetch(
`https://real-id.getverdict.com/api/v1/checks/${checkId}`,
{ headers: { Authorization: `Bearer ${process.env.REAL_ID_API_TOKEN}` } }
);
const { check } = await response.json();
if (check.step === "completed" || check.step === "failed") {
return check; // Terminal state
}
await new Promise((resolve) => setTimeout(resolve, 10000)); // 10 seconds
}
throw new Error("Polling timeout — verification not completed");
}
```
## Storing Verification Data
:::danger Storing PII is your responsibility
Real ID securely stores customer ID data on your behalf, and we recommend **not** copying it into your own systems. Anything you download becomes yours to secure, and yours to produce or delete when a customer exercises their data rights. Store the `check.id` and the status; fetch the rest on demand.
:::
A minimal record is usually enough:
```javascript
const verificationSchema = {
checkId: String, // Real ID check ID — the key for everything else
orderId: String, // Your order ID
customerId: String, // Your customer ID
step: String, // delivered, opened, completed, failed
verifiedAt: Date,
};
```
## JavaScript SDK Events
If you're mounting the flow in the browser, the SDK dispatches events on `window`:
| Event | When it fires |
| --- | --- |
| `real-id-check-loaded` | A check has been loaded or created — before the customer verifies |
| `real-id-check-passed` | The check completed and passed your rules |
| `real-id-check-failed` | The check failed, or was sent for manual review |
```javascript
window.addEventListener("real-id-check-passed", (event) => {
const { check } = event.detail;
showSuccess("Identity verified!");
// Tell your own server, which should confirm over the REST API
// before granting anything — never trust the browser alone.
fetch("/api/verification-complete", {
method: "POST",
headers: { "Content-Type": "application/json" },
body: JSON.stringify({ checkId: check.id }),
});
});
window.addEventListener("real-id-check-failed", (event) => {
const { check } = event.detail;
showError(`Verification could not be completed (${check.step}).`);
});
```
You can also read the current check at any time with `RealID.getCheck()`, which returns the same object or `null` if nothing has loaded yet.
## Next Steps
Your integration is configured! Review the complete [API documentation](/help/docs/api/checks) for additional endpoints and options.
---
// File: getting-started/_steps/_feedback-shopify
# Tags & Feedback in Shopify
Real ID automatically syncs verification results back to your Shopify store. This lets you filter orders, automate workflows, and keep your team informed.
## Order Tags
Real ID adds tags to orders based on verification status:
| Tag | Meaning |
|-----|---------|
| `ID check pending` | Customer has been sent a verification request |
| `ID check completed` | Customer passed verification |
| `ID verification failed` | Customer failed verification |
### Using Tags to Filter Orders
1. Go to **Orders** in Shopify admin
2. Click **More filters** → **Tagged with**
3. Select the tag you want to filter by
:::tip Create a Saved View
Create saved order views like "Pending ID Verification" to quickly see orders needing attention.
[Learn how →](/help/docs/shopify/setting-up-an-order-view)
:::
## Customer Tags
Similar tags are added to customer profiles:
- `ID check completed` - Customer has been verified
- Verified customers won't be prompted again on future orders
## Order Notes
Real ID can add notes to orders with verification details:
1. Go to **Settings** → **Shopify** → **Notes**
2. Enable **Add verification notes to orders**
3. Choose what information to include
[Learn more about order notes →](/help/docs/shopify/notes)
## Metafields
For programmatic access to verification data, Real ID can populate metafields on orders and customers:
- Verification status
- Check ID (for API lookups)
- Completion timestamp
- Extracted ID data (name, DOB, etc.)
[Learn more about metafields →](/help/docs/shopify/metafields)
## Shopify Flow Integration
Automate actions based on verification results using Shopify Flow:
### Example Flows
**Auto-fulfill verified orders:**
- Trigger: Order tag added `ID check completed`
- Action: Fulfill order
**Alert staff about failed verifications:**
- Trigger: Order tag added `ID verification failed`
- Action: Send internal email
**Cancel unverified orders after 48 hours:**
- Trigger: Order created
- Condition: After 48 hours, tag doesn't include `ID check completed`
- Action: Cancel order
[Set up Shopify Flow integration →](/help/docs/shopify/flow)
## Admin Extension
View ID check status directly on order and customer pages without leaving Shopify admin:
1. Open any order with an ID check
2. See the verification status, photos, and extracted data in the sidebar
[Learn more about the admin extension →](/help/docs/shopify/admin-extensions)
## Next Steps
Your Shopify integration is configured! Continue to the final step to learn about order holding for unverified orders.
---
// File: getting-started/_steps/_feedback-woocommerce
# Metadata & Feedback in WooCommerce
Real ID automatically syncs verification results back to your WooCommerce store. This lets you filter orders, automate workflows, and keep your team informed.
## Order Metadata
Real ID adds metadata to orders with verification details:
| Meta Key | Description |
|----------|-------------|
| `_realid_check_status` | Current status (pending, approved, failed) |
| `_realid_check_id` | Unique ID check identifier |
| `_realid_check_url` | Link to view the check in Real ID |
| `_realid_verified_at` | Timestamp when verification completed |
### Viewing Metadata
1. Open an order in WooCommerce
2. Look for the **Real ID** metabox in the sidebar
3. Or view under **Custom Fields** at the bottom
## Customer Metadata
Verified customer information is stored on user profiles:
- `realid_verified` - Whether customer has been verified
- `realid_verified_at` - Verification timestamp
- `realid_check_id` - Reference to the verification check
This metadata is used to skip verification for repeat customers.
## Order Status Syncing
WooCommerce order statuses can automatically change based on verification:
1. Go to **Real ID** → **Settings** → **Order Statuses**
2. Configure status mapping:
| Verification Event | Suggested WooCommerce Status |
|-------------------|------------------------------|
| Verification pending | On Hold |
| Verification passed | Processing |
| Verification failed | On Hold or Cancelled |
:::tip
Use a custom order status like "Awaiting ID Verification" for clearer order management.
:::
[Learn more about order statuses →](/help/docs/woocommerce/order-statuses)
## Webhooks
Receive real-time notifications when verification events occur:
1. Go to **WooCommerce** → **Settings** → **Advanced** → **Webhooks**
2. Create webhooks for Real ID events
Or use WordPress hooks in your theme/plugin:
```php
// Action when verification completes
add_action('realid_check_completed', function($check_id, $order_id, $status) {
$order = wc_get_order($order_id);
if ($status === 'approved') {
$order->update_status('processing');
} else {
// Send notification to admin
wp_mail(get_option('admin_email'), 'ID Verification Failed', "Order #{$order_id} failed verification");
}
}, 10, 3);
```
[Learn more about hooks →](/help/docs/woocommerce/hooks)
## Shortcodes
Display verification status on your site using shortcodes:
```
[realid_status] - Show current user's verification status
[realid_verify] - Display a verification button
```
[Learn more about shortcodes →](/help/docs/woocommerce/shortcodes)
## Viewing ID Checks
Access all ID checks from the WordPress admin:
1. Go to **Real ID** in the WordPress sidebar
2. View all checks, filter by status, search by order number
## Logs
Debug issues using the built-in logging:
1. Go to **Real ID** → **Logs**
2. View API calls, webhook events, and errors
[Learn more about logs →](/help/docs/woocommerce/logs)
## Next Steps
Your WooCommerce integration is configured! Continue to the final step to learn about order holding for unverified orders.
---
// File: getting-started/_steps/_install-bigcommerce
# Install the BigCommerce App
Real ID integrates with your BigCommerce store through the BigCommerce App Marketplace.
## Step 1: Install from the Marketplace
Visit the BigCommerce App Marketplace and search for "Real ID", or click the button below:
Install Real ID on BigCommerce
## Step 2: Authorize the App
After clicking install, you'll be asked to authorize Real ID. This allows us to:
- Read order and customer information
- Update order statuses based on verification results
- Display verification status in your dashboard
Click **Confirm** to continue.
## Step 3: Complete Account Setup
After authorization, you'll be redirected to the Real ID dashboard. If you're new to Real ID, you'll be prompted to:
1. Create your Real ID account (or sign in if you already have one)
2. Connect your BigCommerce store
3. Choose your subscription plan
## Step 4: Add the Verification Script
For after-checkout verification, you'll need to add our script to your order confirmation page:
1. In BigCommerce, go to **Storefront** → **Script Manager**
2. Click **Create a Script**
3. Configure the script:
- **Name**: Real ID Verification
- **Location**: Footer
- **Pages**: Order Confirmation
- **Script type**: Script tag
4. Paste the script provided in your Real ID dashboard
:::tip
The exact script code is available in your Real ID dashboard under **Settings** → **Installation**.
:::
## Next Steps
In the following steps, we'll configure:
- When to trigger ID verification
- How ID checks appear to your customers
- Order status syncing
---
// File: getting-started/_steps/_install-custom
# Set Up API Access
For custom platforms, Real ID provides a REST API for server-to-server work and a JavaScript SDK for anything that runs in the browser.
## Step 1: Create Your Account
First, sign up for a Real ID account:
Create Account
## Step 2: Get Your Credentials
Real ID issues two separate keys, and they are not interchangeable:
| Key | Where to find it | Used for | Safe in the browser? |
| --- | --- | --- | --- |
| **API token** | Dashboard → **Developers** | REST API (`Authorization: Bearer`) | **No** — server-side only |
| **Public key** (`pk_…`) | Dashboard → **Settings → DevTools** | JS SDK on custom sites | Yes |
:::caution Keep your API token server-side
Your API token has full access to your Real ID account, including customer PII. Never expose it in client-side code or commit it to a repository. The browser only ever needs the `pk_` public key.
:::
See the [authentication reference](/help/docs/api/authentication) for full details.
## Step 3: Choose Your Integration Method
### REST API
Use the REST API for server-to-server integration. The base URL is `https://real-id.getverdict.com/api/v1`.
```bash
# Create an ID check
curl -X POST https://real-id.getverdict.com/api/v1/checks \
-H "Authorization: Bearer YOUR_API_TOKEN" \
-H "Content-Type: application/json" \
-d '{
"customer": {
"first_name": "John",
"last_name": "Smith",
"email": "johnsmith@gmail.com",
"phone": "+12242225555"
},
"order": {
"name": "ORD-12345"
}
}'
```
At minimum you must supply either `customer.email` or `customer.phone` so the check can be delivered. The response contains the check under a `check` key:
```json
{
"check": {
"id": "abcedef123",
"step": "delivered"
}
}
```
Store `check.id` — it's the token you'll use to look the check up later and to build the customer's verification link.
[View full API documentation →](/help/docs/api/checks)
### JavaScript SDK
For web applications, load the SDK and mount a verification flow:
```html
```
`mode: "full"` embeds the whole verification wizard into the target element. `mode: "modal"` instead replaces the target — a checkout or submit button — with a **Verify your ID** button, and restores the original element once the customer passes.
[View JS SDK documentation →](/help/docs/js)
:::tip Try it without writing any code
The [SDK Playground](/help/sdk-playground) runs the real SDK against mock storefront pages, so you can see each mode and option before wiring it into your app.
:::
## Step 4: Configure Webhooks (Recommended)
Webhooks tell your app when a check changes state, so you don't have to poll:
1. Go to **Settings → DevTools → Webhooks** in your dashboard
2. Add your endpoint URL
3. Copy the **signing secret** so you can verify the requests are from Real ID
[View webhook documentation →](/help/docs/api/webhooks)
## Next Steps
In the following steps, we'll cover:
- Triggering ID verification from your application
- Customizing the verification experience
- Handling verification results
---
// File: getting-started/_steps/_install-shopify
# Install the Shopify App
Real ID integrates directly with your Shopify store through the Shopify App Store.
## Step 1: Install from the App Store
Click the button below to install Real ID from the Shopify App Store:
Install Real ID on Shopify
Or search for "Real ID" in the Shopify App Store from your admin dashboard.
## Step 2: Authorize the App
After clicking install, you'll be asked to authorize Real ID to access your store. This allows us to:
- Read order and customer information
- Add tags and metafields to orders and customers
- Display ID checks in your admin
Click **Install** to continue.
## Step 3: Complete Setup
After authorization, you'll be redirected to the Real ID dashboard within your Shopify admin. You're now ready to configure your ID verification settings!
:::tip
Real ID offers a free trial so you can test the integration before committing. No credit card required.
:::
## Next Steps
In the following steps, we'll configure:
- When to trigger ID verification
- How ID checks appear to your customers
- What happens when verification completes or fails
---
// File: getting-started/_steps/_install-woocommerce
# Install the WooCommerce Plugin
Real ID integrates with WooCommerce through a WordPress plugin.
## Step 1: Download the Plugin
Get the Real ID plugin from our website:
Download WooCommerce Plugin
You'll receive a `.zip` file containing the plugin.
## Step 2: Upload to WordPress
1. Log in to your WordPress admin dashboard
2. Navigate to **Plugins** → **Add New**
3. Click **Upload Plugin** at the top of the page
4. Choose the downloaded `.zip` file and click **Install Now**

## Step 3: Activate the Plugin
After the upload completes, click **Activate Plugin**.
## Step 4: Enter Your License Key
1. In your WordPress admin, go to **Real ID** in the sidebar
2. Enter your license key (received via email after purchase)
3. Click **Activate License**
:::info
Don't have a license key? [Contact us](https://getverdict.com/contact) to get started with a free trial.
:::
## Step 5: Verify Connection
Once activated, you should see a green "Connected" status in the Real ID settings. This means your store is ready to process ID verifications.
## Next Steps
In the following steps, we'll configure:
- When to trigger ID verification
- How ID checks appear to your customers
- Order status syncing with verification results
---
// File: getting-started/_steps/_order-holding-bigcommerce
# Order Holding in BigCommerce
With the after-checkout flow, customers complete their purchase before verifying their ID. Configure BigCommerce to hold orders until verification completes.
## Why Hold Orders?
- **Fraud prevention** - Don't ship until identity is confirmed
- **Age compliance** - Ensure customers are legal age before fulfillment
- **Chargeback protection** - Verified orders have evidence if disputed
## Order Status Workflow
The recommended workflow uses BigCommerce order statuses:
| Order Status | When Used |
|--------------|-----------|
| **Awaiting Fulfillment** | Order placed, awaiting ID verification |
| **Awaiting Shipment** | ID verification passed, ready to ship |
| **Cancelled** | ID verification failed (optional) |
### Configure Automatic Status Changes
1. Log in to your Real ID dashboard
2. Go to **Settings** → **Order Statuses**
3. Set up the mapping:
**When verification is requested:**
- Set order status to: `Awaiting Fulfillment`
**When verification passes:**
- Set order status to: `Awaiting Shipment`
**When verification fails:**
- Set order status to: `Manual Verification Required` or `Cancelled`
[Learn more about BigCommerce order statuses →](/help/docs/bigcommerce/order-statuses)
## Custom Order Status
For clearer order management, consider creating a custom status in BigCommerce:
1. Go to BigCommerce admin → **Orders** → **Order Statuses**
2. Click **Add Custom Status**
3. Name it "Awaiting ID Verification"
4. Select this status in Real ID settings
## Fulfillment Integration
If you use a fulfillment app or 3PL:
1. Configure it to only process orders with status `Awaiting Shipment`
2. Orders with status `Awaiting Fulfillment` will be held
Most fulfillment integrations support status-based filtering.
## Handling Failed Verifications
When a customer fails verification:
1. The order status changes based on your settings
2. Review the submission in Real ID
3. Options:
- **Approve manually** if the failure was a technical error
- **Contact the customer** to retry verification
- **Refund and cancel** if you can't verify
### Staff Notifications
Configure email alerts for failed verifications:
1. Go to **Settings** → **Notifications** in Real ID
2. Add team email addresses
3. Enable notifications for failed verifications
## Automatic Reminders
If customers don't complete verification, Real ID can send automatic reminders:
1. Go to **Settings** → **Notifications** in Real ID
2. Enable **Automatic reminders**
3. Configure reminder timing (e.g., 2 hours, 24 hours after checkout)
[Learn more about automatic reminders →](/help/docs/for-merchants/automatic-id-check-reminders)
## Dashboard Visibility
View order verification status in your BigCommerce dashboard:
1. Go to **Orders** in BigCommerce admin
2. Filter by order status to see pending verifications
3. Click an order to see verification details in notes
Or view all verifications in the Real ID dashboard with full details.
## Setup Complete!
You've configured Real ID for your BigCommerce store. Here's a summary:
- **Platform**: BigCommerce
- **Flow**: After Checkout
- **Triggers**: Configured based on your needs
- **Branding**: Customized with your logo and colors
- **Feedback**: Order status syncing
- **Order Holding**: Using order status mapping
### What's Next?
- [Send a test verification](/help/docs/getting-started/test-mode) to yourself
- [Review an ID check](/help/docs/bigcommerce/viewing-ids) in the dashboard
- Explore [additional rules](/help/docs/rules/face-match) like biometric face matching
---
// File: getting-started/_steps/_order-holding-shopify
# Order Holding in Shopify
With the after-checkout flow, customers complete their purchase before verifying their ID. You'll want to hold orders until verification completes to avoid shipping to unverified customers.
## Why Hold Orders?
- **Fraud prevention** - Don't ship until identity is confirmed
- **Age compliance** - Ensure customers are legal age before fulfillment
- **Chargeback protection** - Verified orders have evidence if disputed
## Automatic Order Holding
Real ID tags orders with their verification status. Use these tags to control fulfillment:
### Manual Workflow
1. Create a saved order view showing only verified orders:
- Filter: Tagged with `ID check completed`
2. Only fulfill orders from this view
### Using Shopify Flow
Automate order holding with Shopify Flow:
**Hold orders until verified:**
```
Trigger: Order created
Condition: Order triggers contain "ID verification"
Action: Add tag "Hold for ID verification"
```
**Release orders when verified:**
```
Trigger: Order tag added (ID check completed)
Action: Remove tag "Hold for ID verification"
```
**Auto-cancel unverified orders:**
```
Trigger: Order created
Wait: 48 hours
Condition: Order tags don't contain "ID check completed"
Action: Cancel order
```
[Set up Shopify Flow →](/help/docs/shopify/flow)
## Fulfillment Apps
If you use a fulfillment app or 3PL, configure it to:
1. Only process orders tagged `ID check completed`
2. Or exclude orders tagged `ID check pending`
Most fulfillment integrations support tag-based filtering.
## Payment Capture
If you use manual payment capture:
1. Configure Shopify to authorize (not capture) at checkout
2. Set up a Flow to capture payment when `ID check completed` tag is added
3. Void authorization if verification fails
## Staff Training
Ensure your team knows to:
1. Check for the `ID check completed` tag before packing orders
2. Review orders in Real ID before manual approval
3. Contact customers whose verification failed
## Handling Failed Verifications
When a customer fails verification:
1. The order is tagged `ID verification failed`
2. Review the submission in Real ID
3. Options:
- **Approve manually** if the failure was a technical error
- **Contact the customer** to retry verification
- **Refund and cancel** if you can't verify
## Automatic Reminders
If customers don't complete verification, Real ID can send automatic reminders:
1. Go to **Settings** → **Notifications**
2. Enable **Automatic reminders**
3. Configure reminder timing (e.g., 2 hours, 24 hours after checkout)
[Learn more about automatic reminders →](/help/docs/for-merchants/automatic-id-check-reminders)
## Setup Complete!
You've configured Real ID for your Shopify store. Here's a summary:
- **Platform**: Shopify
- **Flow**: After Checkout
- **Triggers**: Configured based on your needs
- **Branding**: Customized with your logo and colors
- **Feedback**: Tags and metafields syncing
- **Order Holding**: Using tags and/or Flow
### What's Next?
- [Send a test verification](/help/docs/getting-started/test-mode) to yourself
- [Review an ID check](/help/docs/for-merchants/viewing-id-checks) in the dashboard
- Explore [additional rules](/help/docs/rules/face-match) like biometric face matching
---
// File: getting-started/_steps/_order-holding-woocommerce
# Order Holding in WooCommerce
With the after-checkout flow, customers complete their purchase before verifying their ID. Configure WooCommerce to hold orders until verification completes.
## Why Hold Orders?
- **Fraud prevention** - Don't ship until identity is confirmed
- **Age compliance** - Ensure customers are legal age before fulfillment
- **Chargeback protection** - Verified orders have evidence if disputed
## Order Status Workflow
The recommended workflow uses WooCommerce order statuses:
| Order Status | When Used |
|--------------|-----------|
| **On Hold** | Order placed, awaiting ID verification |
| **Processing** | ID verification passed, ready to fulfill |
| **Cancelled** | ID verification failed (optional) |
### Configure Automatic Status Changes
1. Go to **Real ID** → **Settings** → **Order Statuses**
2. Set up the mapping:
**When verification is requested:**
- Set order status to: `On Hold`
**When verification passes:**
- Set order status to: `Processing`
**When verification fails:**
- Set order status to: `On Hold` (for manual review)
- Or: `Cancelled` (auto-cancel failed orders)

## Custom Order Status
For clearer order management, create a custom status:
### Add "Awaiting ID Verification" Status
Add this code to your theme's `functions.php`:
```php
// Register custom order status
function register_awaiting_verification_order_status() {
register_post_status('wc-awaiting-id', array(
'label' => 'Awaiting ID Verification',
'public' => true,
'exclude_from_search' => false,
'show_in_admin_all_list' => true,
'show_in_admin_status_list' => true,
'label_count' => _n_noop('Awaiting ID (%s)', 'Awaiting ID (%s)')
));
}
add_action('init', 'register_awaiting_verification_order_status');
// Add to order status list
function add_awaiting_verification_to_order_statuses($order_statuses) {
$new_statuses = array();
foreach ($order_statuses as $key => $status) {
$new_statuses[$key] = $status;
if ($key === 'wc-on-hold') {
$new_statuses['wc-awaiting-id'] = 'Awaiting ID Verification';
}
}
return $new_statuses;
}
add_filter('wc_order_statuses', 'add_awaiting_verification_to_order_statuses');
```
Then select this status in Real ID settings.
## Shipping Integration
If you use a shipping plugin or fulfillment service:
1. Configure it to only process orders with status `Processing`
2. Or exclude orders with status `On Hold` or `Awaiting ID Verification`
## Handling Failed Verifications
When a customer fails verification:
1. The order status changes based on your settings
2. Review the submission in Real ID
3. Options:
- **Approve manually** if the failure was a technical error
- **Contact the customer** to retry verification
- **Refund and cancel** if you can't verify
### Automatic Notifications
Set up email notifications for failed verifications:
```php
// Notify admin when verification fails
add_action('realid_check_failed', function($check_id, $order_id) {
$order = wc_get_order($order_id);
$admin_email = get_option('admin_email');
wp_mail(
$admin_email,
'ID Verification Failed - Order #' . $order->get_order_number(),
'Order #' . $order->get_order_number() . ' failed ID verification. Please review in Real ID.'
);
}, 10, 2);
```
## Automatic Reminders
If customers don't complete verification, Real ID can send automatic reminders:
1. Go to **Settings** → **Notifications** in Real ID
2. Enable **Automatic reminders**
3. Configure reminder timing (e.g., 2 hours, 24 hours after checkout)
[Learn more about automatic reminders →](/help/docs/for-merchants/automatic-id-check-reminders)
## Setup Complete!
You've configured Real ID for your WooCommerce store. Here's a summary:
- **Platform**: WooCommerce
- **Flow**: After Checkout
- **Triggers**: Configured based on your needs
- **Branding**: Customized with your logo and colors
- **Feedback**: Order metadata and status syncing
- **Order Holding**: Using order status mapping
### What's Next?
- [Send a test verification](/help/docs/getting-started/test-mode) to yourself
- [Review an ID check](/help/docs/for-merchants/viewing-id-checks) in the dashboard
- Explore [additional rules](/help/docs/rules/face-match) like biometric face matching
---
// File: getting-started/_steps/_store-gate-custom
# Set Up Store Gate
The "Before Viewing Store" flow requires visitors to verify their identity before they can reach your content at all — not just before checkout. This is what you want for age-restricted landing pages, product promotion, or exclusive membership areas.
## How It Works
1. A visitor arrives and Real ID checks whether they already have a passed ID check
2. If not, the verification flow is shown and your content stays hidden
3. Once they pass, the content is revealed
4. Returning visitors are recognized automatically, so they only verify once
:::danger Client-side gates are cosmetic
Hiding an element with JavaScript keeps it out of view, but the markup is still in the page source and your URLs are still reachable directly. If the gate has to actually hold — age-restricted goods, regulated content, anything with a compliance obligation — enforce it on the server using [Option 2](#option-2-server-side-enforcement). Use the client-side gate for presentation, not for protection.
:::
## Option 1: JavaScript SDK (client-side)
Ask Real ID for the visitor's status first, and only mount the verification flow if they actually need it.
```html
Please verify your age to continue
```
:::tip Reading the status later
`RealID.getCheck()` returns the current check — or `null` if none has loaded yet — at any point after the SDK starts. Use it in code that runs after verification has already happened.
:::
### Hiding individual elements instead
If you only need to hide part of a page — a promotional block, product imagery, a price — and don't want to gate the whole route, add the `hidden-until-verified` class to those elements. Real ID hides them until the visitor has a passed check and reveals them afterward:
```html
This product is only available to customers with a verified ID.
```
This is the lighter-touch option when forcing every visitor through a full-page gate would cost you too much traffic. The same caveat applies — it's presentation, not enforcement.
## Option 2: Server-Side Enforcement
For a gate that actually holds, keep the check ID in the visitor's session and confirm its status with the REST API before rendering protected routes.
```javascript
// Middleware example (Express.js)
async function requireVerification(req, res, next) {
const checkId = req.session.realIdCheckId;
if (checkId) {
const response = await fetch(
`https://real-id.getverdict.com/api/v1/checks/${checkId}`,
{ headers: { Authorization: `Bearer ${process.env.REAL_ID_API_TOKEN}` } }
);
const { check } = await response.json();
if (check.step === "completed") {
return next(); // Allow access
}
}
// Redirect to verification page
res.redirect("/verify");
}
// Apply to protected routes
app.use("/shop", requireVerification);
app.use("/products", requireVerification);
```
A check reaches `step: "completed"` when the customer passes your rules **or** when a staff member [manually approves it](/help/docs/for-merchants/overridding-results).
### Verification Page
Create a dedicated route that creates the check and hands the visitor to the hosted flow:
```javascript
// /verify route — create the check server-side, then redirect
app.get("/verify", async (req, res) => {
const response = await fetch("https://real-id.getverdict.com/api/v1/checks", {
method: "POST",
headers: {
Authorization: `Bearer ${process.env.REAL_ID_API_TOKEN}`,
"Content-Type": "application/json",
},
body: JSON.stringify({ customer: { email: req.query.email } }),
});
const { check } = await response.json();
req.session.realIdCheckId = check.id;
res.redirect(`https://verify.getverdict.com/${check.id}`);
});
```
You can also embed the flow on your own `/verify` page with `RealID.createFlow()` and pass the `checkId`, rather than redirecting off-site.
### Reacting to the result
Use a [webhook](/help/docs/api/webhooks) so your app learns the outcome immediately:
```javascript
app.post("/webhooks/realid", (req, res) => {
const { event, check } = req.body;
if (event === "check.completed") {
// Mark this check as verified in your database — the visitor can now
// access protected content on their next request.
markVerified(check.id);
}
res.sendStatus(200);
});
```
Always [verify the `X-Real-ID-Signature` header](/help/docs/api/webhooks#verifying-webhooks) before trusting a webhook payload.
## Remembering Verified Visitors
Real ID already tracks returning customers for you — by browser cookie, by logged-in account, and by email address (with a 6-digit confirmation code). See [Remember verified customers](/help/docs/flows/remember-repeat-customers) for how each method behaves and how to turn the confirmation code off.
If you're enforcing server-side, store the outcome yourself as well:
```javascript
// Store on the user record for logged-in visitors
await db.users.update({
where: { id: userId },
data: {
idVerified: true,
idVerifiedAt: new Date(),
realIdCheckId: checkId,
},
});
```
:::note IDs expire
A driver's licence that's valid today may be expired next year. Real ID invalidates checks once the document's expiry date passes, so re-read the check status rather than caching "verified" forever.
:::
## Excluding Pages
Let visitors reach your policy, contact and verification pages without being gated:
```javascript
const publicPaths = ["/privacy", "/terms", "/contact", "/verify"];
function requireVerification(req, res, next) {
if (publicPaths.includes(req.path)) {
return next(); // Skip verification
}
// ... verification logic
}
```
## Verification Rules
Since there's no order involved, verification is based on the visitor alone:
- **Age verification** — require a minimum age
- **Face match** — require a selfie matching the ID photo
- **Document types** — specify accepted ID types
Configure these in your Real ID dashboard under **Settings → Rules**.
## Testing
1. Clear your cookies or use an incognito window
2. Visit a protected page
3. Complete verification using [test mode](/help/docs/getting-started/test-mode)
4. Confirm you can now access the protected content
5. Refresh to confirm the verification is remembered
:::tip See it running first
The [SDK Playground store gate demo](/help/sdk-playground?scenario=store-gate) runs this exact pattern against a mock landing page, so you can watch the reveal happen before building it. That link opens the scenario directly — handy for sharing.
:::
[View full JS SDK documentation →](/help/docs/js)
---
// File: getting-started/_steps/_store-gate-shopify
# Set Up Store Gate
The "Before Viewing Store" flow requires all visitors to verify their identity before they can browse your products. This is ideal for age-restricted stores or exclusive membership sites.
## How It Works
1. When a visitor arrives at your store, they see a verification prompt instead of your products
2. The visitor completes ID verification
3. Once verified, they can browse and shop normally
4. Verified visitors are remembered and won't be prompted again
## Enable the Store Gate
1. Open the Real ID app in your Shopify admin
2. Go to **Settings** → **Automations**
3. Enable **Automated ID checks**
4. Select **Before viewing store** as the flow
## Add the Theme Block
For the store gate to work, you need to add the Real ID block to your theme:
1. Go to **Online Store** → **Themes** in Shopify admin
2. Click **Customize** on your active theme
3. In the theme editor, go to **App embeds** (or **Theme settings**)
4. Enable the **Real ID Store Gate** embed
5. Click **Save**
:::tip
The store gate uses a full-page overlay that covers your store content until the visitor is verified.
:::
## Customize the Gate
You can customize what visitors see on the verification gate:
1. Go to **Settings** → **Appearance** in Real ID
2. Edit the **Welcome message** to explain why verification is required
3. Upload your logo so visitors recognize your brand
4. Choose colors that match your store theme
## Verification Rules
Since there's no order at this point, verification is based on the customer only:
- **Age verification** - Check if the visitor meets your minimum age requirement
- **Face match** - Require a selfie to match the ID photo
- **Document types** - Choose which ID types to accept
:::note
Location-based age rules will use the address on the customer's ID document, since there's no shipping address available.
:::
## Remembering Verified Visitors
Once a visitor completes verification:
- A cookie remembers them on that device/browser
- If they create an account, verification is linked to their customer profile
- They won't need to verify again unless they clear cookies or use a new device
## Testing
To test the store gate:
1. Open your store in an incognito/private browser window
2. You should see the verification prompt
3. Complete verification using [test mode](/help/docs/getting-started/test-mode)
4. After verification, you should be able to browse the store
[Learn more about the Before Viewing Store flow →](/help/docs/flows/before-viewing-store)
---
// File: getting-started/_steps/_store-gate-woocommerce
# Set Up Store Gate
The "Before Viewing Store" flow requires all visitors to verify their identity before they can browse your products. This is ideal for age-restricted stores or exclusive membership sites.
## How It Works
1. When a visitor arrives at your store, they see a verification prompt instead of your products
2. The visitor completes ID verification
3. Once verified, they can browse and shop normally
4. Verified visitors are remembered and won't be prompted again
## Enable the Store Gate
1. Go to **Real ID** → **Settings** in your WordPress admin
2. Navigate to the **Automations** tab
3. Enable **Automated ID checks**
4. Select **Before viewing store** as the flow
5. Click **Save**
## How the Gate Displays
Real ID automatically adds a full-page overlay to your site that:
- Covers all store content until verification is complete
- Shows your logo and custom welcome message
- Provides the verification flow inline
The gate is injected via JavaScript, so no theme modifications are required.
## Customize the Gate
You can customize what visitors see on the verification gate:
1. Go to **Real ID** → **Settings** → **Appearance**
2. Edit the **Welcome message** to explain why verification is required
3. Upload your logo so visitors recognize your brand
4. Choose colors that match your store theme
## Exclude Specific Pages
You may want to allow access to certain pages without verification (like your privacy policy or contact page):
1. Go to **Real ID** → **Settings** → **Automations**
2. Find the **Excluded pages** setting
3. Add the page slugs or IDs you want to exclude
Common pages to exclude:
- `/privacy-policy/`
- `/terms-of-service/`
- `/contact/`
## Verification Rules
Since there's no order at this point, verification is based on the customer only:
- **Age verification** - Check if the visitor meets your minimum age requirement
- **Face match** - Require a selfie to match the ID photo
- **Document types** - Choose which ID types to accept
:::note
Location-based age rules will use the address on the customer's ID document, since there's no shipping address available.
:::
## Remembering Verified Visitors
Once a visitor completes verification:
- A cookie remembers them on that device/browser
- If they're logged in, verification is linked to their WordPress user account
- They won't need to verify again unless they clear cookies or use a new device
## Testing
To test the store gate:
1. Log out of WordPress (or use incognito mode)
2. Visit your store's homepage
3. You should see the verification prompt
4. Complete verification using [test mode](/help/docs/getting-started/test-mode)
5. After verification, you should be able to browse the store
[Learn more about the Before Viewing Store flow →](/help/docs/flows/before-viewing-store)
---
// File: getting-started/_steps/_triggers-bigcommerce
# Configure Verification Triggers
Triggers determine which orders require ID verification. You can enable multiple triggers - if any trigger matches, the customer will be prompted to verify their ID.
## Access Trigger Settings
1. Log in to your Real ID dashboard
2. Navigate to **Settings** → **Automations**
3. Ensure **Enable automated ID checks** is turned on
## Available Triggers
### All Orders
Enable this to verify every customer who places an order. Best for:
- Age-restricted product stores
- High-security requirements
- Compliance mandates
### High Value Orders
Verify orders above a specified total amount. Great for:
- Reducing fraud on expensive items
- Protecting against chargebacks
Set your threshold (e.g., orders over $200) in the settings.
### Specific Products
Verify only when certain products are in the cart:
1. Go to the **Filters** section in settings
2. Select the products that require verification
3. Orders containing those products will trigger verification
### Shipping Location
Verify orders shipping to specific regions:
- All U.S. orders
- Specific U.S. states
- Useful for location-based age requirements
## Order Status Syncing
BigCommerce orders can be automatically updated based on verification status:
1. Go to **Settings** → **Order Statuses**
2. Configure which BigCommerce status to use for:
- Orders pending verification
- Orders that passed verification
- Orders that failed verification
[Learn more about order status syncing →](/help/docs/bigcommerce/order-statuses)
## Exceptions
You can exclude orders from verification based on:
- **Already verified customers** - Don't re-verify repeat customers
- **Specific shipping methods** - Exclude certain delivery types
## Custom Trigger Scripts
For advanced trigger logic, BigCommerce supports custom scripts. See our [BigCommerce custom trigger documentation](/help/docs/bigcommerce/after-checkout#custom-trigger-scripts) for examples.
## Next Steps
After setting up triggers, we'll customize how the verification appears to your customers.
---
// File: getting-started/_steps/_triggers-custom
# Triggering ID Verification
With a custom integration you decide when verification is required. There are two places to make that decision: on your server with the REST API, or in the browser with the JS SDK.
## Creating an ID Check (server-side)
Use the REST API when your own backend already knows the order or customer should be verified:
```javascript
// Server-side example (Node.js)
const response = await fetch("https://real-id.getverdict.com/api/v1/checks", {
method: "POST",
headers: {
Authorization: `Bearer ${process.env.REAL_ID_API_TOKEN}`,
"Content-Type": "application/json",
},
body: JSON.stringify({
customer: {
first_name: customer.firstName,
last_name: customer.lastName,
email: customer.email,
phone: customer.phone, // enables SMS delivery
},
order: {
name: order.number, // human-readable order reference
},
}),
});
const { check } = await response.json();
console.log("Created ID check:", check.id);
```
Real ID delivers the check to the customer by email and/or SMS using your notification templates. You can also hand them the link directly:
```
https://verify.getverdict.com/{checkId}
```
:::note Only `customer.email` or `customer.phone` is required
Everything else is optional — but the more you send, the better Real ID can personalize the notification and run [cross-checking rules](/help/docs/rules/cross-checking-orders) against the ID.
:::
## Common Trigger Patterns
Because you own the condition, any signal in your system can gate verification.
### Order-Based Triggers
```javascript
// Trigger based on order value
if (order.total > 200) {
await createIdCheck(customer, order);
}
// Trigger based on products
const requiresId = order.items.some((item) =>
item.categories.includes("age-restricted")
);
if (requiresId) {
await createIdCheck(customer, order);
}
// Trigger based on customer history
if (customer.orderCount === 1) {
// First-time customer
await createIdCheck(customer, order);
}
```
### Risk-Based Triggers
```javascript
// Trigger based on fraud score (from your fraud detection system)
if (order.fraudScore > 0.7) {
await createIdCheck(customer, order);
}
// Trigger based on address mismatch
if (order.billingAddress.country !== order.shippingAddress.country) {
await createIdCheck(customer, order);
}
```
### Location-Based Triggers
```javascript
// Trigger based on shipping state (for age verification)
const ageRestrictedStates = ["CA", "NY", "TX"];
if (ageRestrictedStates.includes(order.shippingAddress.state)) {
await createIdCheck(customer, order);
}
```
## Triggering from the browser
If the decision happens client-side — a cart that just picked up a restricted item, for example — mount the SDK instead of calling your backend.
### Gate a button with `mode: "modal"`
`modal` mode replaces the target element until the customer passes, then restores it:
```javascript
if (cartContainsAgeRestrictedItem()) {
RealID.createFlow({
target: "#checkout-button",
mode: "modal",
publicKey: "pk_your-public-key-here",
email: customerEmail,
});
}
```
Listen for the verification events on `window` to run your own logic:
```javascript
window.addEventListener("real-id-check-passed", (event) => {
const { check } = event.detail;
console.log("ID check passed", check.id);
enableCheckoutButton();
});
window.addEventListener("real-id-check-failed", (event) => {
const { check } = event.detail;
console.log("ID check failed", check.id, "step:", check.step);
showVerificationRequired();
});
```
### Decide without rendering anything
`RealID.createCheck()` creates the check and returns a status without mounting any UI — useful when you want to own the button and the redirect:
```javascript
const result = await RealID.createCheck({
publicKey: "pk_your-public-key-here",
email: customerEmail,
});
switch (result.status) {
case "already_verified":
case "not_required":
proceedToCheckout();
break;
case "verification_required":
window.open(result.url, "_top"); // hosted flow URL for this check
break;
case "requires_2fa":
// returning customer matched by email — send them to result.url to confirm
break;
case "error":
console.error("Real ID:", result.code, result.message);
break;
}
```
:::info `createCheck` never throws for a known outcome
It always resolves to a result object — switch on `result.status`. See the [full status table](/help/docs/js#responses).
:::
## Next Steps
After implementing triggers, we'll customize how the verification appears to your customers.
---
// File: getting-started/_steps/_triggers-shopify-after-checkout
# Configure After Checkout Verification
You've selected the **After Checkout** flow. Let's configure when and how ID verification appears to your customers.
## Step 1: Enable After Checkout Flow
1. Open the Real ID app in your Shopify admin
2. Navigate to **Settings** → **Automations**
3. Enable **Automated ID checks**
4. Select **After Checkout** as your verification flow
5. Click **Save**

## Step 2: Add Checkout Extensions (Recommended)
For the best customer experience, add the Real ID checkout extensions to display verification directly on the Thank You and Order Status pages:
1. In Shopify admin, go to **Settings** → **Checkout**
2. Click **Customize** next to your checkout
3. Navigate to the **Thank you** page
4. Click **Add app block** and select **Real ID**
5. Repeat for the **Order status** page
6. Click **Save**
:::tip
Without checkout extensions, Real ID will still work by sending verification links via email and SMS. The extensions provide an inline experience that increases completion rates.
:::
[Learn more about Checkout Extensions →](/help/docs/flows/during-checkout)
## Step 3: Configure Triggers
Triggers determine which orders require ID verification. You can enable multiple triggers - if any trigger matches, the customer will be prompted to verify their ID.
## Available Triggers
### All Orders
Enable this to verify every customer who places an order. Best for:
- Age-restricted product stores
- High-security requirements
- Compliance mandates
### High Value Orders
Verify orders above a specified total amount. Great for:
- Reducing fraud on expensive items
- Protecting against chargebacks
Set your threshold (e.g., orders over $200) in the settings.
### High Risk Orders
Automatically verify orders flagged as medium or high risk by Shopify's fraud analysis. This works with:
- Shopify's built-in fraud detection
- Third-party fraud prevention apps
### Specific Products or Collections
Verify only when certain products are in the cart:
1. Create a collection for products requiring verification
2. In Real ID settings, select that collection
3. Orders containing those products will trigger verification
:::tip
Create a hidden collection called "ID Required" to easily manage which products need verification.
:::
### Mismatching Billing/Shipping
Verify when the billing name or address doesn't match the shipping address. Helps catch potential fraud.
### Shipping Location
Verify orders shipping to specific regions:
- All U.S. orders
- Specific U.S. states
- Useful for location-based age requirements
## Exceptions
You can exclude orders from verification based on:
- **Already verified customers** - Don't re-verify repeat customers
- **In-store pickup** - Skip verification for pickup orders
- **Specific shipping methods** - Exclude certain delivery types
- **Payment gateways** - Skip orders paid via PayPal, etc.
- **Sales channels** - Exclude marketplace orders (Amazon, Walmart)
## Advanced: Shopify Flow
For complex trigger logic, use [Shopify Flow integration](/help/docs/shopify/flow) to create custom conditions.
## Next Steps
After setting up triggers, we'll customize how the verification appears to your customers.
---
// File: getting-started/_steps/_triggers-shopify-after-registration
# Configure After Registration Verification
You've selected the **After Registration** flow. This flow verifies customers when they create an account on your store, rather than during the checkout process.
## Step 1: Enable After Registration Flow
1. Open the Real ID app in your Shopify admin
2. Navigate to **Settings** → **Automations**
3. Enable **Automated ID checks**
4. Select **After Registration** as your verification flow
5. Click **Save**
## Step 2: How It Works
When a customer creates an account on your store:
1. They complete Shopify's standard account registration
2. Real ID sends them a verification request via email
3. The customer completes ID verification
4. Their account is marked as verified with a customer tag
## Step 3: Configure Customer Tags
Real ID uses Shopify customer tags to track verification status:
1. In Real ID settings, go to **Tags & Feedback**
2. Configure the tags for:
- **Verified customers** - Tag applied when verification passes
- **Pending verification** - Tag applied when awaiting verification
- **Failed verification** - Tag applied when verification fails
You can use these tags in Shopify to:
- Grant access to exclusive content or products
- Apply special pricing or discounts
- Filter customers in your admin
[Learn more about customer tags →](/help/docs/shopify/tags)
## Available Triggers
For After Registration, triggers work differently than order-based flows:
### All Registrations
Verify every new customer account created on your store. Best for:
- Age-gated stores requiring verified customers
- Membership sites
- B2B stores requiring identity verification
### Specific Customer Groups
You can configure verification based on:
- Customer location (shipping address country/state)
- Email domain filtering
- Custom conditions via Shopify Flow
## Exceptions
You can exclude accounts from verification based on:
- **Previously verified** - Skip customers already verified from orders
- **Specific email domains** - Allow certain domains without verification
## Integration with Checkout
If you also want to verify at checkout:
- After Registration ensures all account holders are verified
- You can combine with After Checkout for guest purchases
- Verified customers skip checkout verification automatically
[Learn more about the After Registration flow →](/help/docs/flows/after-registration)
## Next Steps
After setting up triggers, we'll customize how the verification appears to your customers.
---
// File: getting-started/_steps/_triggers-shopify-before-checkout
# Configure Before Checkout Verification
You've selected the **Before Checkout** flow. Let's configure when and how ID verification appears to your customers.
## Step 1: Enable Before Checkout Flow
1. Open the Real ID app in your Shopify admin
2. Navigate to **Settings** → **Automations**
3. Enable **Automated ID checks**
4. Select **Before Checkout** as your verification flow
5. Click **Save**
## Step 2: Add Checkout Extensions (Required)
Before Checkout verification uses Shopify's checkout extensions to display the verification form during checkout. This is required for the Before Checkout flow to work:
1. In Shopify admin, go to **Settings** → **Checkout**
2. Click **Customize** next to your checkout
3. In the checkout editor, click **Add app block**
4. Select **Real ID** from the list
5. Position the block where you want verification to appear (typically in the contact or shipping section)
6. Click **Save**
:::warning
The Before Checkout flow requires checkout extensions to be enabled. Without this, customers won't see the verification form during checkout.
:::
[Learn more about Checkout Extensions →](/help/docs/flows/during-checkout)
## Step 3: Configure Triggers
Triggers determine which checkouts require ID verification. You can enable multiple triggers - if any trigger matches, the customer will be prompted to verify their ID before completing checkout.
## Available Triggers
### All Orders
Enable this to verify every customer at checkout. Best for:
- Age-restricted product stores
- High-security requirements
- Compliance mandates
### High Value Orders
Verify checkouts above a specified total amount. Great for:
- Reducing fraud on expensive items
- Protecting against chargebacks
Set your threshold (e.g., orders over $200) in the settings.
### Specific Products or Collections
Verify only when certain products are in the cart:
1. Create a collection for products requiring verification
2. In Real ID settings, select that collection
3. Checkouts containing those products will trigger verification
:::tip
Create a hidden collection called "ID Required" to easily manage which products need verification.
:::
### Shipping Location
Verify checkouts shipping to specific regions:
- All U.S. orders
- Specific U.S. states
- Useful for location-based age requirements
## Exceptions
You can exclude checkouts from verification based on:
- **Already verified customers** - Don't re-verify repeat customers
- **In-store pickup** - Skip verification for pickup orders
- **Specific shipping methods** - Exclude certain delivery types
## Checkout Experience
With Before Checkout verification:
- Customers verify their ID during the checkout process
- Verification is completed before payment is processed
- Orders are only created for verified customers
- No need to hold or cancel orders post-purchase
[Learn more about the Before Checkout flow →](/help/docs/flows/before-checkout)
## Next Steps
After setting up triggers, we'll customize how the verification appears to your customers.
---
// File: getting-started/_steps/_triggers-woocommerce
# Configure Verification Triggers
Triggers determine which orders require ID verification. You can enable multiple triggers - if any trigger matches, the customer will be prompted to verify their ID.
## Access Trigger Settings
1. In your WordPress admin, go to **Real ID** → **Settings**
2. Navigate to the **Automations** tab
3. Ensure **Enable automated ID checks** is turned on
## Available Triggers
### All Orders
Enable this to verify every customer who places an order. Best for:
- Age-restricted product stores
- High-security requirements
- Compliance mandates
### High Value Orders
Verify orders above a specified total amount. Great for:
- Reducing fraud on expensive items
- Protecting against chargebacks
Set your threshold (e.g., orders over $200) in the settings.
### Specific Product Categories
Verify only when products from certain categories are in the cart:
1. Go to the **Filters** section in Automations settings
2. Enable the **Categories** filter
3. Select the categories that require verification
:::tip
Create a category called "Age Restricted" or "ID Required" to easily manage which products need verification.
:::
### Specific Products
You can also select individual products that require verification, independent of their category.
### Mismatching Billing/Shipping
Verify when the billing name or address doesn't match the shipping address. Helps catch potential fraud.
### Shipping Location
Verify orders shipping to specific regions:
- All U.S. orders
- Specific U.S. states
- Useful for location-based age requirements
## Order Status Integration
WooCommerce orders can be automatically held or updated based on verification status:
1. Go to **Real ID** → **Settings** → **Order Statuses**
2. Configure which WooCommerce status to use for:
- Orders pending verification
- Orders that passed verification
- Orders that failed verification
[Learn more about order status syncing →](/help/docs/woocommerce/order-statuses)
## Exceptions
You can exclude orders from verification based on:
- **Already verified customers** - Don't re-verify repeat customers
- **Specific shipping methods** - Exclude certain delivery types
- **Payment gateways** - Skip orders paid via PayPal, etc.
## Next Steps
After setting up triggers, we'll customize how the verification appears to your customers.
---
// File: getting-started/test-mode
# Test Mode
When you first install Real ID to your store, the app is in **Test Mode**.
In test mode, you're granted all features for free and can also send test ID checks at no charge.
This gives you the opportunity to sample all of Real ID's features and verify it works correct with your store and theme before choosing a plan.
If the app is in test mode, you'll see this banner at the top of each page:
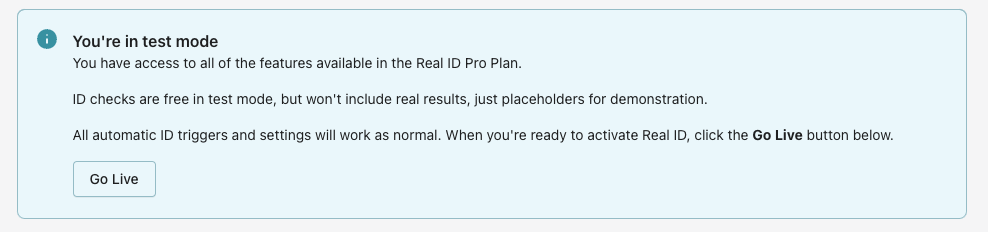
:::tip
Real ID is free to install on any Shopify store, including [Development Stores](https://help.shopify.com/en/partners/dashboard/managing-stores/development-stores).
Test mode will still activate triggers like [ID verification on specific types or orders](./../flows/after-checkout.mdx), or flows like [ID verification before checkout](./../flows/before-checkout.mdx).
We recommend you install Real ID on a development store first in order to trial these features before applying it to your live store.
:::
## Restrictions
In test mode, you'll be able to use all **Pro** level features as well as send ID checks.
However, there are a few restrictions:
* All ID checks sent in test mode will have mock fake data and will always pass
* Enterprise features are not included in test mode
:::info
ID checks sent during test mode will have mock data that represents what the app could read.
The images of the ID and headshot will also be blurred.
:::
## Notifications in Test Mode
In test mode, **no emails or SMS messages are sent to your customers**. Instead, notification emails are redirected to your store's [contact email](/help/docs/for-merchants/id-check-notifications) with a **[TEST]** prefix in the subject line.
This means you can:
* Safely create test ID checks using real customer order data without worrying about customers receiving unexpected messages
* Preview exactly what the customer email looks like in your own inbox
* Easily identify test emails by the **[TEST]** tag in the subject line
:::note
SMS notifications are skipped entirely in test mode since they cannot be redirected. Only email notifications are sent (to the merchant contact email).
Automatic reminders are also not scheduled for test mode checks.
:::
## Going live
After you've had a chance to try out the features and decide which plan fits best for your needs, click the **Go Live** button on the left hand side menu:
After picking a plan, you'll be able to send real ID checks with actual results and unblurred photos.
:::note
You're only able to go into test mode once. But you can downgrade or upgrade your plan at any time.
:::
---
// File: id-check-process
# ID check process
Real ID uses the latest computer vision and A.I. technologies to quickly verify and extract details from ID documents like Driver's Licenses, Passports and Residence Cards.
It can be set up to verify IDs before checkout, after checkout or even before being allowed to view your store. Additionally, you can have it set up to only trigger ID verification on specific high risk triggers like total order value or Shopify Fraud Analysis flags.
You also can require additional documentation like a corresponding live headshot photo, Proof of Address, and eSignature.
The entire process can be completed in as little as a few minutes, and it's entirely automated. But staff can override the automatic results at any time.
## How it works
The way a customer is presented with their ID check depends on which flow you choose. But the process is roughly the same for each.
First, the customer opens their unique ID check associated with their account. Then they're guided through capturing the photos required according to your rules.
Computer vision techniques during the process help guide the customer to take the best photo possible for the best results. Then, the customer will be either automatically approved, or placed into review.
:::tip
These are not the exhaustive list of methods Real ID uses to verify identity, but a general overview of the various technologies and techniques in place.
:::
## Autocapturing ID photos and headshots
Real ID uses A.I. during the capturing of ID photos and headshots to help guide the user to take the best possible photo to optimize for their chance of passing ID verification.
This A.I. running on the customer's phone during the ID verification process helps guide them to place their ID within the camera frame at the correct position.
It will help guide customers by giving them feedback to show the ID, move it closer or further way from the camera for focus.
This helps vastly improve photo quality and helps guide customers to take the best possible photo of their ID
A similar A.I. model is used to help guide customers to take a headshot, if required by your rules.
:::note
The ID autocapture will allow customers to manually capture a photo of their ID after a certain period of time.
This is to help customers in extraordinary circumstances still submit photos of their IDs. Then you'll be able to take the final judgement and approve or reject these submissions manually.
The Real ID dashboard will show you if a submission was manually captured instead of automatically captured.
:::
## How is an ID accepted or rejected?
During verification, an ID is accepted when all required fields such as name, address, date of birth, and date of expiration can be read with high confidence and meet your additional rules such as [cross checking order details](./rules/cross-checking-orders.md), [biometric verification](#face-match), and [age verification](./rules/age-verification.md).
Real ID uses multiple A.I. models to determine the validity and liveness of the photos as
well as models to extract the fields from the ID into a standard format.
But this confidence is customizable, you can lower or raise the threshold of confidence required for an accepted ID.
Additionally, you can manually override the results at any time, even if the system is unable to automatically verify it.
:::note Hard rules
Some rules don't rely on confidence alone, such as detecting expired ID documents. Adjusting the confidence threshold for your ID checks won't affect the expiration date checks for example.
:::
## Maximum soft retries
During the ID check process, customers are given 3 attempts per stage to take a high quality, readable and usable photo.
For example, if the ID check requires both the ID photo and a portrait photo to face match against, then customers are given 3 tries to take a good quality photo of their ID as well as 3 photos of their face.
These "soft" retries do not incur extra charges. Customers can use all 3 attempts per stage, and you'll only be charged once for the entire check.
If customers fail all soft retries in a particular stage, then they'll allowed to move onto the next stage.
This allows customers to still continue through the flow in case they have a document that isn't supported like a temporary issued Drivers License, or damaged ID, and gives you a chance to [override the failed ID checks](./for-merchants/overridding-results.md).
If you still want to allow customers to try again with a "hard" retry, where customers can try again with a new fresh ID check, [please see this article](./for-merchants/retrying-id-checks.md).
## Allowed captured methods
By default Real ID allows customers to both capture photos using their device's camera only.
This is the most secure option, since it requires customers to take a live photo of their ID document, as well as take a live selfie photo.
[However you can enable manual photo uploading](./rules/control-capture-methods.md). This allows customers to upload photos from their camera roll if they don't have their ID phyiscally available because it's lost or stolen.
However, manual file uploads bypass the ID and headshot photo Autocapture feature, which may lead to bad quality photos or a higher chance of failing the ID check.
Additionally, disabling the manual file uploads helps increase security because it helps narrow down the possibility of a bad actor using a stolen images.
:::tip
The Real ID dashboard will show if photos from the ID check were uploaded via a file or captured from the user's camera.
In general, photos captured in real time from the camera are more trustworthy than file uploads.
:::
## Face Match
If you enable the headshot requirement, Real ID will also verify the headshot matches the headshot physically printed on the ID document.
You'll be able to see the similiarity confidence of the captured headshot against the headshot on the ID document from 0% to 100% within the ID check details in the dashboard.
If the ID check passes, yet the headshot cannot be confidently matched, then the entire ID check is rejected.
:::tip
Even if a ID check is rejected to a mismatching photo, you'll be able to override the results in the dashboard.
:::
## Text Extraction
Real ID uses modern computer vision techniques to read text fields on the verified ID photo.
Real ID can read text fields from Driver's Licenses, Passports, etc like:
- `First Name`
- `Middle Name`
- `Last Name`
- `Document Number`
- `Address`
- `Date of Birth`
- `Date of Expiration`
- `Endorsements`
- `Classes`
These fields are especially useful for applying a minimum age verification to your products, or rejecting expired ID documents, or verifying that the shipping or payment details match up with the customer's ID.
:::note
Some fields like the `First Name` and `Last Name` fields are required in order for the ID check to pass automatically.
If an ID check fails because one or more required fields are covered, missing or are inlegible, then you'll see that reason within the ID check details in the dashboard.
:::
## Completed
When the customer submits their required information, their photos will undergo additional processing with A.I. models running in Real ID's private cloud.
Then Real ID will use the combination verdicts from these models and the results of the [enabled additional rules](./rules/cross-checking-orders.md) to determine if the ID check passes or fails.
If the customer fails, they're shown feedback that their ID wasn't able to be automatically passed.
If the customer passes, they're shown a call to action to return to the order status page, or return to the cart to checkout, or to notify them they can browse and checkout within your store. Each depends on which ID verification flow you've choosen.
:::tip
By default Real ID does _not_ cancel or modify the order in any way, even if the ID check failed.
Real ID will update metadata, tags and metafields on the orders with ID checks - regardless if the ID check passed or failed.
:::
## What happens after automatic verification
Once a customer submits their photos, every ID check ends up in one of a few outcomes. The diagram below shows how a check moves from submission to a final result, and where your staff can step in.
```mermaid
flowchart TD
A[Customer submits photos] --> B{Automatic verification}
B -->|Passes rules & confidence| C([Verified])
B -->|Low confidence, missing fields, expired ID or other failure| D([In Review])
C -.->|Verified email sent| C1[Customer told they're approved]
D -.->|In Review email sent unless disabled| D1[Customer told it's under review]
D --> E{Staff review in dashboard}
E -->|Approve Check| F([Manually Approved])
E -->|Reject Check| G([Manually Rejected])
F -.->|Verified email sent| F1[Customer told they're approved]
G -.->|Failed email sent| G1[Customer told it failed]
style C fill:#dcfce7,stroke:#16a34a,color:#14532d
style F fill:#dcfce7,stroke:#16a34a,color:#14532d
style D fill:#fef9c3,stroke:#ca8a04,color:#713f12
style G fill:#fee2e2,stroke:#dc2626,color:#7f1d1d
```
An **In Review** check is never a dead end — it simply waits for your team to make the final call. You can [override the results at any time](./for-merchants/overridding-results.md).
### Verified (automatic)
The ID passed all of your required fields, [additional rules](./rules/cross-checking-orders.md) and the confidence threshold automatically, with no staff action needed.
* **Merchant options:** none required. You can still manually reject it later if something looks wrong.
* **Customer notification:** the `Verified` email is sent automatically. The customer is shown a call to action to continue (return to the order status page, back to the cart, or continue browsing) depending on your [flow](./flows/before-checkout.mdx).
### In Review
The ID could not be automatically verified — because of low image quality, missing or unreadable fields, an expired document, a [face match](#face-match) mismatch, a failed [cross-check](./rules/cross-checking-orders.md), or any other rule. The check is held for your team and appears under the **In Review** filter in the dashboard. Orders are **not** cancelled or modified — you decide what happens next.
* **Merchant options:** open the check in the Real ID dashboard and either [**Approve Check** or **Reject Check**](./for-merchants/overridding-results.md). If you'd like to give the customer a fresh attempt instead, you can send a [hard retry](./for-merchants/retrying-id-checks.md).
* **Customer notification:** the `In Review` email is sent, telling the customer their verification needs review and that you'll follow up. This email [can be disabled](./theming/customize-content.md#disabling-customer-emails) — if it is, the customer receives nothing at this stage. Your team is also notified so you can review before fulfilling.
### Manually approved
A staff member reviewed an in-review check and clicked **Approve Check**. The check is now treated as passed everywhere in Real ID — including tags, metafields and notes, and any [before-checkout](./flows/before-checkout.mdx) or [before-viewing-store](./flows/before-viewing-store.md) gates.
* **Merchant options:** you can still reject the check later if needed.
* **Customer notification:** the same `Verified` email is sent, so from the customer's perspective a manual approval looks identical to an automatic pass.
### Manually rejected
A staff member opened the **More actions** menu and selected **Reject Check**. The check is now treated as failed everywhere in Real ID.
* **Merchant options:** you can re-approve the check at any time, or send the customer a [hard retry](./for-merchants/retrying-id-checks.md) to try again with a new ID check.
* **Customer notification:** the `Failed` email is sent. This email is **only** ever sent on a manual rejection — an automatic failure alone (In Review) never triggers it.
---
// File: integrations/brightpearl
# BrightPearl Integration
Real ID can automatically sync ID checks on your orders with BrightPearl and update their corresponding **order status** when customer's complete ID checks.
That way you can automate a holding process, where a high risk order is automatically held until the customer completes ID verification successfully.
## How does it work?
Real ID integrates with Brightpearl as a custom private app. Once you enter in the Brightpearl privateapp credentials in Real ID, then pick **order statuses** that should be applied to when the customer completes or requires ID verification from your ID triggers.
## Creating a BrightPearl App
First, create a Brightpearl staff app in your BrightPearl dashboard.
* Log into your Brightpearl account
* Go to **App Store > Private apps**
* Click **“Add private app”**
* Select **“staff app” **to ensure you are capturing detailed information about who performs any actions on your account. **“System”** apps are being sunsetted and should not be used anymore.
* Enter **"[account_ID]_real-id"** as the name. The `[account_ID]` portion should be your unique account name in Brightpearl.
* Save
After saving, you'll be shown the password to authenticate with this app. Copy down both the private app name and this password for the next step.
## Integrating the Brightpearl App with Real ID
Now that you have a custom Brightpearl app, let's connect it to Real ID.
Open the Real ID **Settings > DevTools** and scroll to the **Brightpearl Integration **setttings.
Then enter in the **"[account_ID]_real-id"** app name you defined in the Brightpearl custom app, and then paste in the staff password that should have been created when you as well.
As you enter in your credentials, Real ID will test the connection. If the credentials are correct, you'll see a **"Connected"** message in the bottom of the form.
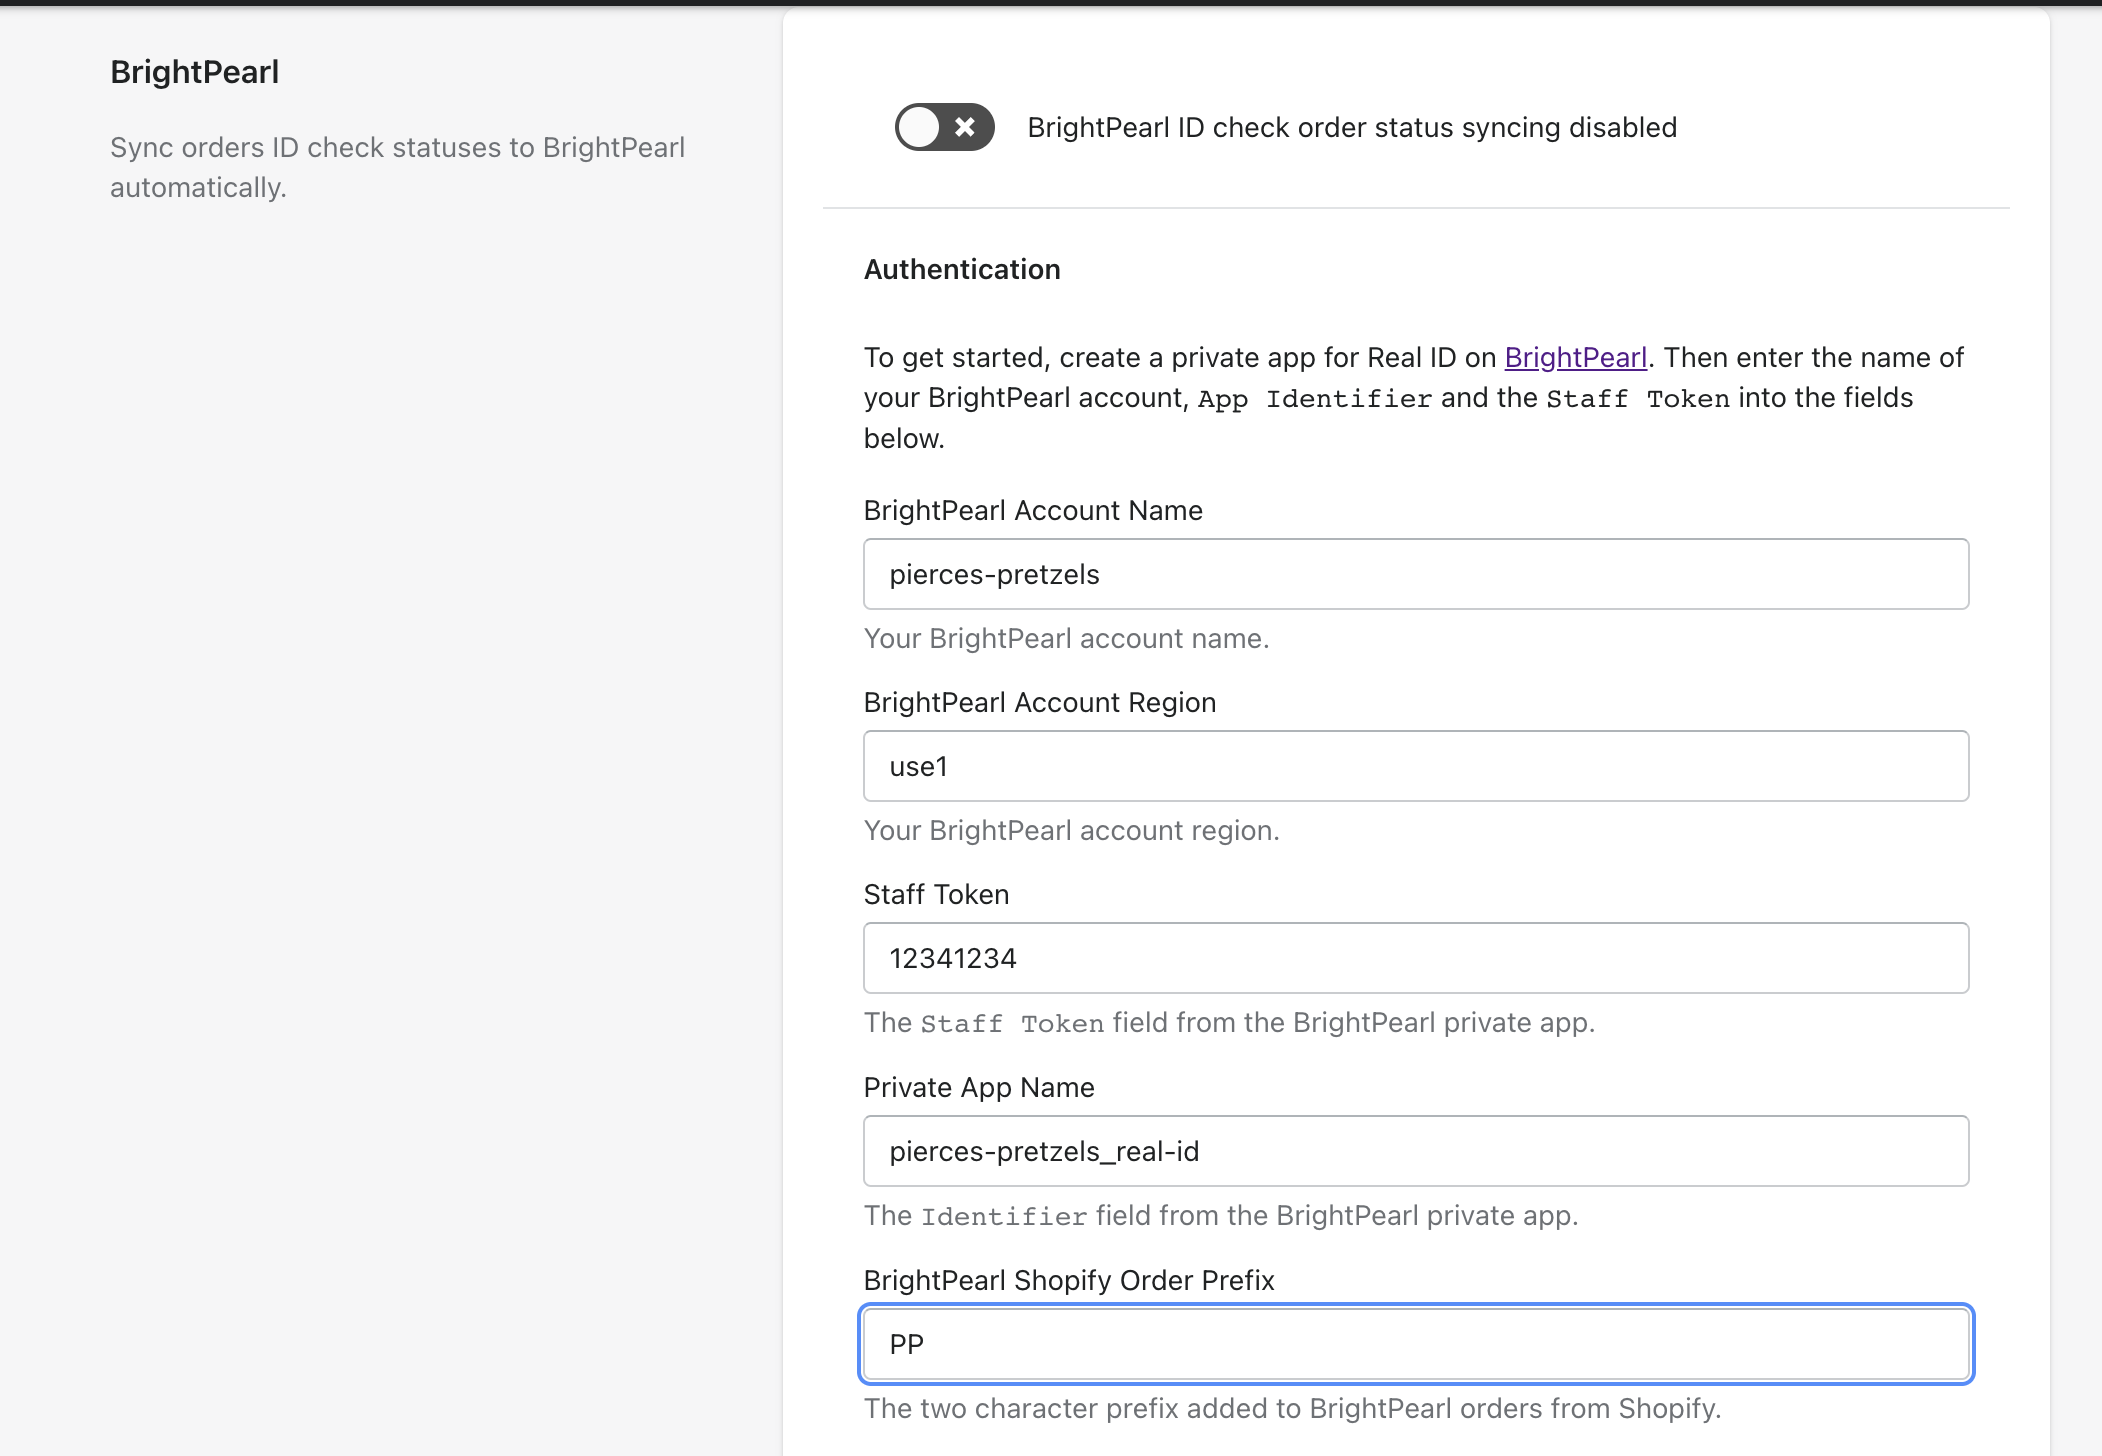
## Choosing Brightpearl Order Statuses
After setting up the integration and successfully connecting, you can now choose which order statuses should be applied during ID check events.
Once connected, open the dropdowns for the order statuses that should apply to each ID check event.
Then when you've made your selection, enable the integration by clicking the toggle at the top of the form and saving your settings.

## Frequently Asked Questions
### The Brightpearl order status we were using was deleted, how do I fix the integration?
Real ID uses references to the Brightpearl order status options in your account. The dropdowns in the Real ID settings for Brightpearl will refresh in real time, so simply select a different status to fix the integration.
### I've connected the app, and selected order statuses but they aren't updated.
Make sure that there isn't an order prefix added to your orders in Brightpearl. They are usually a 2 letter code. Make sure you enter in this prefix into the settings in Real ID so that it can find your orders in Brightpearl.
---
// File: integrations/customer-fields
# Helium Customer Fields
Real ID integrates into [Helium's Customer Fields](https://apps.shopify.com/customr?utm_source=real_id&utm_campaign=docs) so you can add modern ID verification to your wholesale or customer registration forms.
:::info
This guide assumes you have Customer Fields and Real ID installed on your Shopify store.
- [Install Helium Customer Fields](https://apps.shopify.com/customr)
- [Install Real ID](https://apps.shopify.com/real-id)
:::
## Getting Started
First, open the Customer Fields app and open the form that you'd like to add ID verification to.
Then in the Form Editor add a custom HTML block:
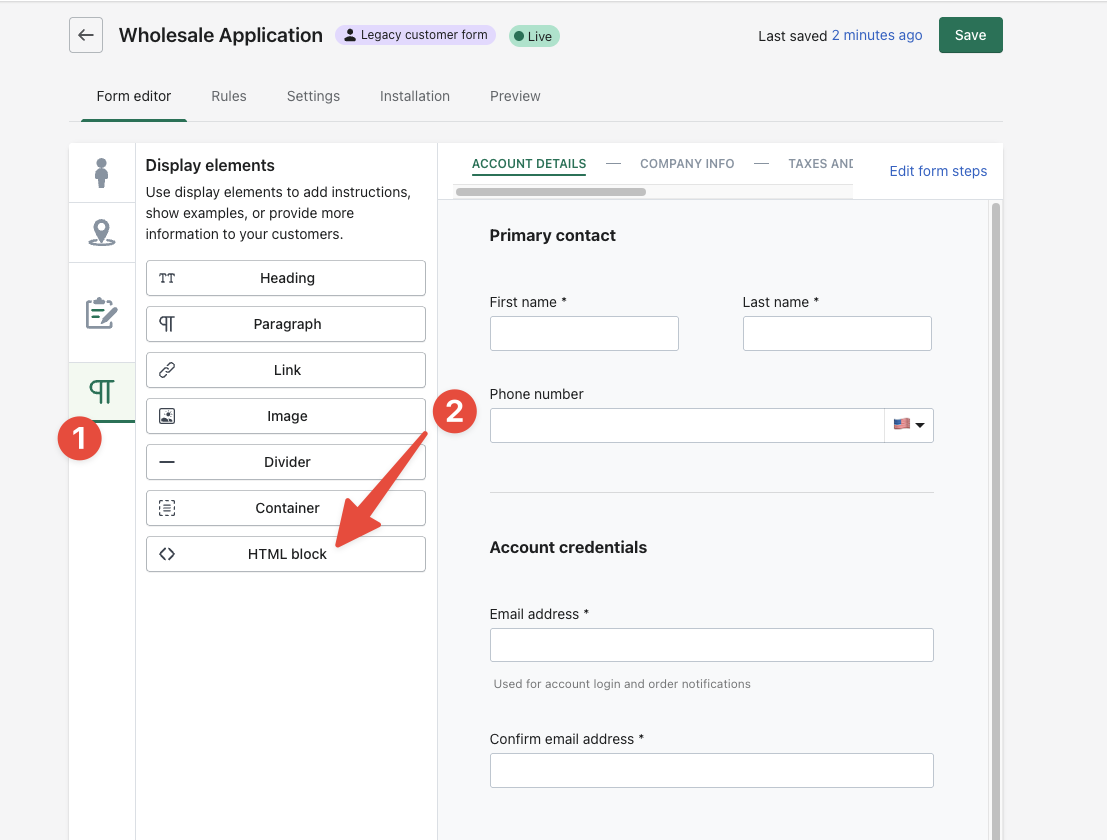
After dragging and dropping the custom HTML block into your form, click on the new field, you should see a the HTML block's editor appear on the left hand side:
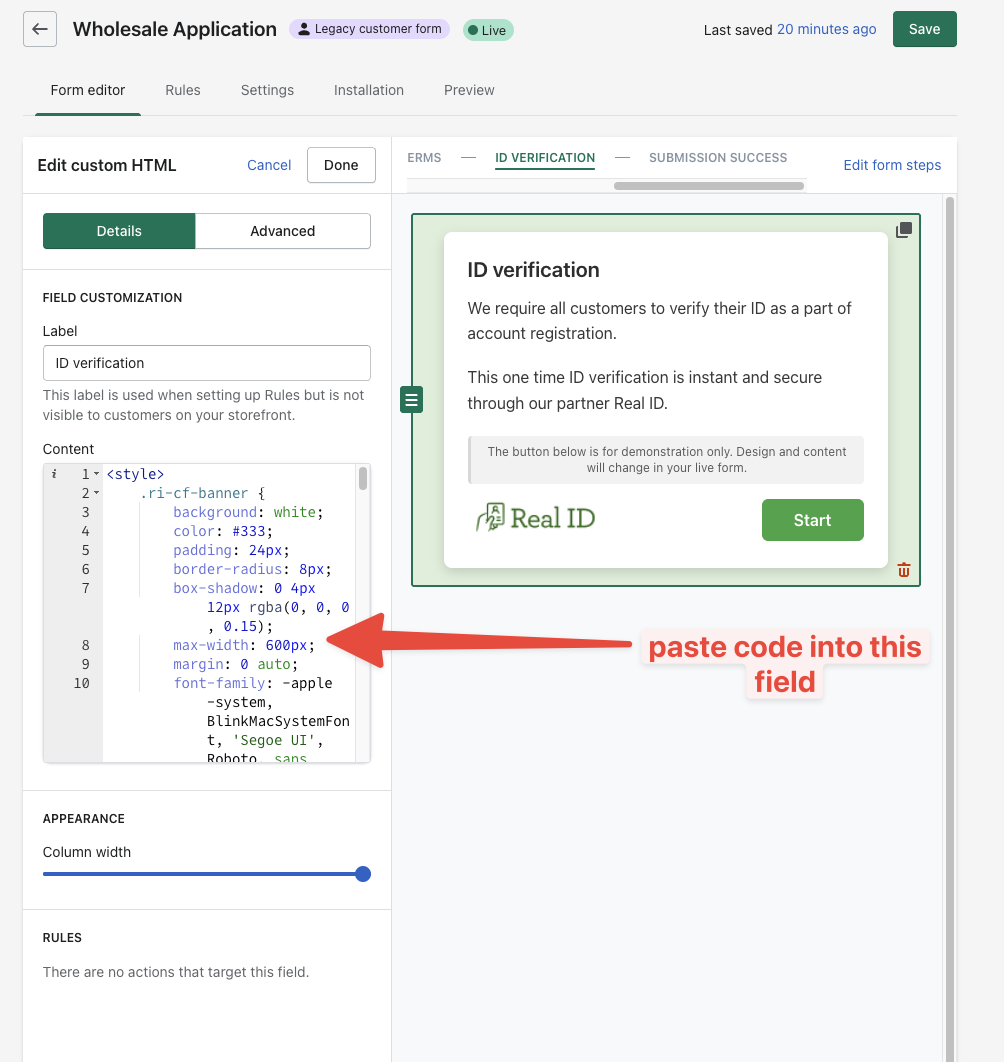
Copy the code below and paste it into this **Content** field for your HTML custom block:
```html
ID verification
We require all customers to verify their ID as a part of account
registration.
This one time ID verification is instant and secure through our partner Real
ID.
The button below is for demonstration only. Design and content will change
in your live form.
Start
```
You should now see a place holder for the ID verification prompt appear in your form. Your [same theme, content and branding](../theming/branding.md) appear in the live version of your form.
:::info
The **Start** button in this ID verification placeholder isn't functional within the Customer Fields Form Editor.
However, on the live version of your form it will function properly.
:::
Finally, don't forget to click **Save** in the top right corner of the Form Editor to make sure these changes have been saved.
## Frequently Asked Questions
### Is the Customer Fields integration available on all Real ID plans?
Yes, this integration is available on all Real ID plans.
### I have an approval step before Customer Fields creates the customer record, will this still work?
Yes, Real ID can still verify your customer's ID, then you can view the ID verification results in the Real ID app before you approve their account.
### I'm having issues setting this up, can you help me?
Of course, happy to help. [Please contact us](https://getverdict.com/contact) so we can help you get ID verification embedded into your Customer Fields Form.
---
// File: integrations/semble
# Semble Integration
Real ID can automatically sync ID verification status to patient records in Semble, a Patient CRM system used by healthcare providers.
This integration allows healthcare providers to see verification status directly on patient records as labels, making it easy to track which patients have completed identity verification.
## How does it work?
Real ID integrates with Semble using their GraphQL API. When a customer completes (or starts) an ID check, Real ID automatically:
1. Searches for the patient in Semble using their email address
2. Removes any existing ID check label from the patient
3. Adds the appropriate label based on the current verification status
This happens in real-time as the verification status changes, keeping your patient records always up to date.
## Patient Labels
The following verification statuses are synced as patient labels in Semble:
| Label | Description |
|-------|-------------|
| **ID check in progress** | Customer has started but not completed verification |
| **ID check in review** | Verification is being manually reviewed |
| **ID check approved** | Customer successfully verified their identity |
| **ID check failed** | Verification was unsuccessful |
| **ID check manually approved** | Merchant manually approved the verification |
| **ID check manually rejected** | Merchant manually rejected the verification |
Labels are created automatically in Semble when needed. You don't need to create them manually.
## Setting Up the Integration
### Step 1: Get Your Semble API Key
First, you'll need to generate an API key in your Semble account:
1. Log into your Semble account
2. Navigate to **Settings > API Access**
3. Generate a new API key
4. Copy the API key for the next step
### Step 2: Connect Real ID to Semble
Open the Real ID **Settings > WooCommerce** tab and scroll to the **Semble Patient Label Syncing** settings.
1. Toggle **Enable Semble Integration** to on
2. Enter your **API Key** from Semble
3. Click **Test Connection** to verify the credentials work
4. Click **Save** in the top right corner
Once connected, Real ID will automatically sync verification statuses to patient records.
## Patient Matching
Real ID matches patients in Semble using the **email address** from the ID check. For syncing to work:
- The patient must already exist in Semble
- The patient's email in Semble must match the email used for the ID check
- Email matching is case-insensitive
If a patient isn't found in Semble, the sync is skipped and you'll see this noted in the ID check events.
## Synced Patient Data
In addition to labels, Real ID can also sync verified data from the ID document to the patient record:
- **Date of Birth**: When verification completes successfully, the date of birth extracted from the ID document is synced to the patient record in Semble
This helps ensure patient records have accurate, verified information.
## Viewing Sync Events
Each Semble sync action is logged as an event on the ID check. To view these events:
1. Open the ID check details in your WooCommerce admin
2. Scroll to the Events section
3. Look for events related to Semble syncing
Events will show whether the sync succeeded, was skipped (patient not found), or encountered an error.
## Frequently Asked Questions
### Why isn't the patient label updating?
Check the following:
1. **Integration enabled**: Verify the Semble integration is enabled in settings
2. **API key valid**: Use the "Test Connection" button to verify your credentials
3. **Patient exists**: The patient must already exist in Semble with a matching email
4. **Email matches**: The email on the ID check must match the patient's email in Semble
### What happens if the patient doesn't exist in Semble yet?
If Real ID can't find a patient with a matching email in Semble, the sync is skipped. The system includes automatic retry logic to handle cases where patients are being imported to Semble with a slight delay.
### Can I sync historical ID checks?
Yes, contact support to request a bulk sync of historical ID checks to Semble. This is useful when first setting up the integration.
### How quickly do labels update?
Labels are updated in real-time as verification status changes. You should see the label appear on the patient record within seconds of the status change.
### Can I customize the label names?
The label names are standardized to ensure consistency. All labels are prefixed with "ID check" followed by the status, making them easy to identify and filter in Semble.
### What if a patient has multiple ID checks?
Each time an ID check status changes, the previous ID check label is removed and replaced with the new one. A patient will only ever have one ID check label at a time, reflecting their most recent verification status.
---
// File: integrations/shipstation
import Tabs from "@theme/Tabs";
import TabItem from "@theme/TabItem";
# ShipStation Integration
Real ID can automatically sync ID checks on your orders with ShipStation and update their corresponding **order status** when customers complete ID checks.
That way you can automate a holding process, where a high risk order is automatically held until the customer verifies their ID.
## How does it work?
Real ID integrates with ShipStation using their REST API. Once you enter your ShipStation API credentials in Real ID, then pick **order statuses** that should be applied when the customer completes or requires ID verification from your ID triggers.
Orders are searched in ShipStation using the Shopify order name (e.g. `#1001`) as the external reference, with optional prefix support for merchants who use prefixes in their ShipStation setup.
Orders are searched in ShipStation using the WooCommerce order ID as the external reference, with optional prefix support for merchants who use prefixes in their ShipStation setup.
## Creating ShipStation API Credentials
First, generate API credentials in your ShipStation account:
- Log into your [ShipStation API account](https://shipstation.auth0.com/login)
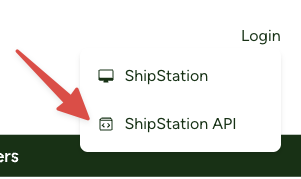
- Go to **Settings > API Settings**
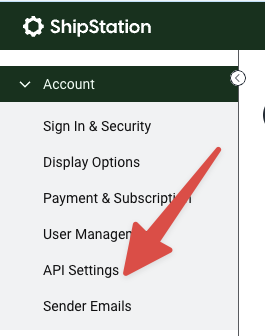
- Click **"Generate API Keys"**, make sure to select the `v1 ShipStation API` key option
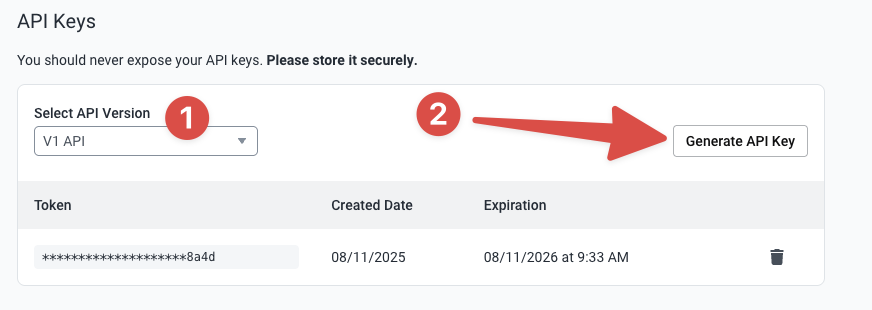
- Copy both the **API Key** and **API Secret** for the next step
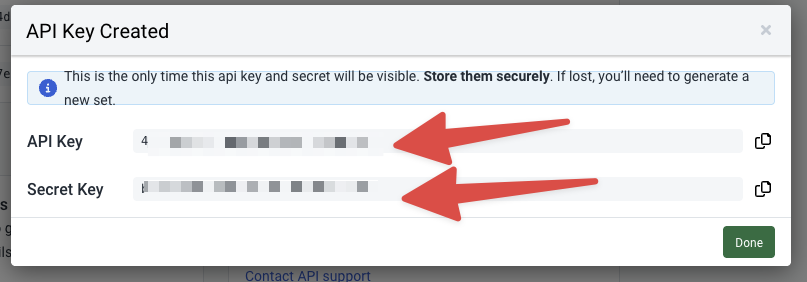
## Integrating ShipStation with Real ID
Now that you have ShipStation API credentials, let's connect them to Real ID.
Open the Real ID app in your Shopify admin and navigate to **Settings > Developer Tools**. Scroll to the **ShipStation** section.
Enter your **API Key** and **API Secret** that you generated in ShipStation.
If your Shopify orders appear in ShipStation with a prefix (e.g. `SHOP-#1001` instead of just `#1001`), enter that prefix in the **Order Prefix** field. Otherwise, leave it blank.
Click **Test Connection** to verify the connection. If the credentials are correct, you'll see a success message.
Don't forget to click **Save** so these changes are saved.
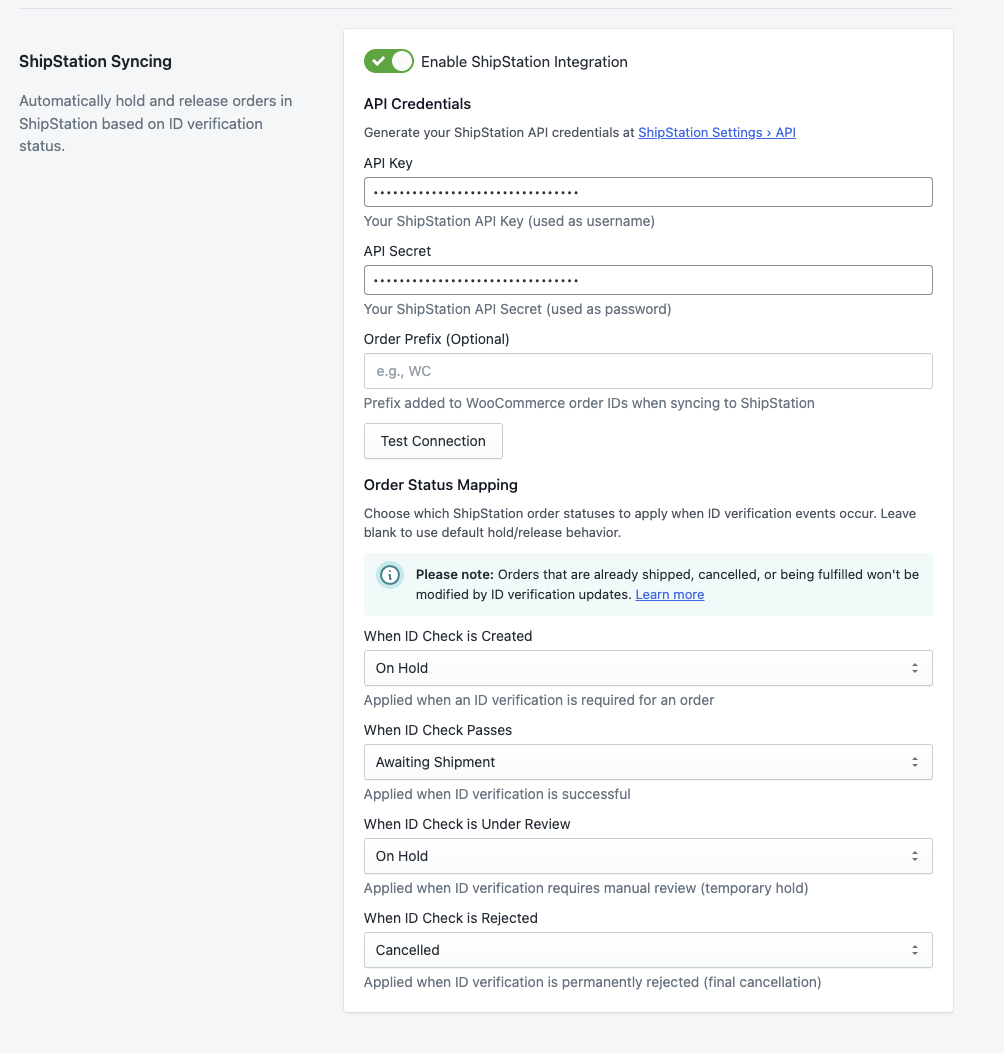
Open the Real ID **Settings > WooCommerce** tab and scroll to the **ShipStation Integration** settings.
Then enter your **API Key** and **API Secret** that you generated in ShipStation:
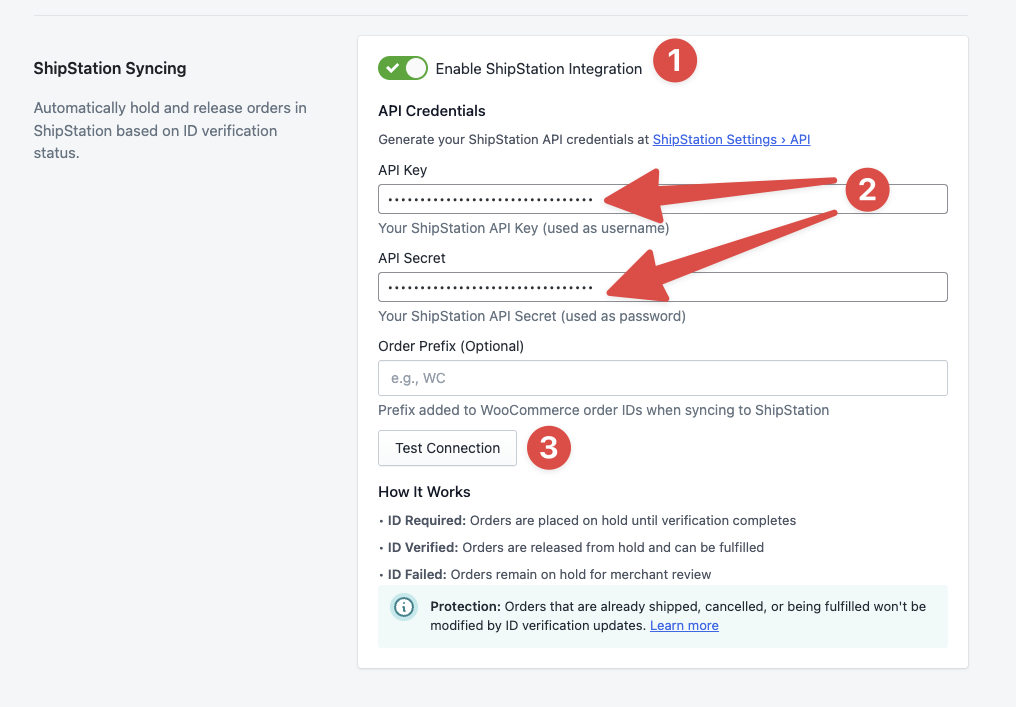
If your WooCommerce orders appear in ShipStation with a prefix (like "WC-1234" instead of just "1234"), enter that prefix in the **Order Prefix** field. Otherwise, leave it blank.
As you enter your credentials, click **Test Connection** to verify the connection. If the credentials are correct, you'll see a **"Connected"** message.
Don't forget to click **Save** in the top right hand corner so these changes are saved.
## ShipStation Order Statuses syncing
After setting up the integration and successfully connecting, Real ID will automatically handle fulfillment statuses in ShipStation:
- **When ID Check is Created**: On Hold (prevents shipping until verified)
- **When ID Check Passes**: Awaiting Shipment (ready to fulfill)
- **When ID Check Fails**: Cancelled (prevents fulfillment)
## Order Processing Flow
### When ID Verification is Required
When an order requires ID verification:
- First checks if the order is already shipped, cancelled, or in fulfillment (skips if true)
- Updates ShipStation order to your chosen "On Check Created" status (default: On Hold)
- Adds an internal note: "ID verification required"
- Prevents the order from shipping until verification completes
### When ID Verification Passes
When the customer successfully completes verification:
- First checks if the order is already shipped or cancelled (skips if true)
- Updates ShipStation order to your chosen "On Check Passed" status (default: Awaiting Shipment)
- Adds an internal note: "ID verification passed"
- The order can now be fulfilled normally
### When ID Verification Fails
When verification fails:
- First checks if the order is already shipped or cancelled (skips if true)
- Updates ShipStation order to your chosen "On Check Failed" status (default: Cancelled)
- Adds an internal note: "ID verification failed"
- The merchant can decide how to proceed
### Edge Cases Handled
**Late ID Verification**: If a customer completes ID verification after their order has already been cancelled or shipped, the integration will skip the update and log this event. You'll see a note in the ID check events explaining what happened.
**Orders Already Being Packed**: If an order is already in "Awaiting Shipment" status when an ID check is created, it won't be reverted back to "On Hold". This prevents disrupting your warehouse operations.
## Order Status Protection
The ShipStation integration includes comprehensive safeguards to ensure ID verification never disrupts your fulfillment operations. Understanding these protections helps you confidently use the integration without worrying about interference with your shipping workflow.
### Protected Order States
The integration will **automatically skip updates** for orders in these states:
#### 1. Shipped Orders (Status ID: 4)
- **Why it's protected**: Once an order is marked as shipped in ShipStation, it represents a completed fulfillment transaction
- **What happens**: If ID verification completes after shipping, no update occurs
- **Event logged**: "Order [ID] is in a final state (Shipped) and will not be updated"
- **Use case**: Prevents confusion when customers complete verification after receiving their order
#### 2. Cancelled Orders (Status ID: 5)
- **Why it's protected**: Cancelled orders represent a business decision that shouldn't be reversed automatically
- **What happens**: ID verification results won't change cancelled status
- **Event logged**: "Order [ID] is in a final state (Cancelled) and will not be updated. Note: ID verification passed but order was already cancelled."
- **Use case**: Maintains order history integrity and prevents resurrection of cancelled transactions
#### 3. Orders Being Fulfilled (Status ID: 2 - Awaiting Shipment)
- **Why it's protected**: Orders in active fulfillment shouldn't be disrupted
- **What happens**: New ID checks won't revert these orders back to "On Hold"
- **Event logged**: "Order [ID] is already in fulfillment and will not be reverted to hold"
- **Use case**: Prevents warehouse confusion when packing is already underway
### How Protection Works
When any ID verification event occurs, the integration follows this decision flow:
1. **Fetch Current Status**: Retrieves the order's current status from ShipStation
2. **Check Protection Rules**: Determines if the order is in a protected state
3. **Skip or Proceed**:
- Protected states: Logs the skip reason and takes no action
- Non-protected states: Proceeds with the configured status update
### Viewing Protected Order Events
All protection decisions are transparently logged in the ID check's event timeline:
1. Navigate to the ID check details in your Shopify admin
2. Scroll to the Events section
3. Look for events with type "shipstation-order-sync-skipped"
4. These events explain why an update was skipped
1. Navigate to the ID check details in your WooCommerce admin
2. Scroll to the Events section
3. Look for events with type "shipstation-order-sync-skipped"
4. These events explain why an update was skipped
### Common Scenarios
**Scenario 1: Late Verification**
- Customer places order requiring ID verification
- Merchant manually ships order before verification completes
- Customer later completes ID verification
- Result: Order remains "Shipped", skip event is logged
**Scenario 2: Quick Cancellation**
- Order requires ID verification
- Customer requests cancellation
- Merchant cancels in ShipStation
- Customer attempts ID verification
- Result: Order remains "Cancelled", skip event is logged
**Scenario 3: Fast Fulfillment**
- Order initially doesn't require ID (under threshold)
- Merchant begins fulfillment (Awaiting Shipment)
- Manual ID check is created later
- Result: Order remains "Awaiting Shipment", not reverted to hold
### Customizing Protection Behavior
While the core protections cannot be disabled (by design), you can:
1. **Adjust Status Mappings**: Configure which statuses are applied for non-protected orders
2. **Use Manual Overrides**: Manually update orders in ShipStation when needed
3. **Monitor Skip Events**: Use the event log to identify patterns and adjust your workflow
## Frequently Asked Questions
### How are orders matched between my store and ShipStation?
Real ID searches for orders in ShipStation using the Shopify order name (e.g. `#1001`) as the external reference. If you've configured an order prefix, it will be prepended to the order name during the search.
Real ID searches for orders in ShipStation using the WooCommerce order ID as the external reference. If you've configured an order prefix, it will be prepended to the order ID during the search.
### What happens if an order isn't found in ShipStation?
A new order won't be updated until it has imported into ShipStation. If Real ID runs a sync before the order appears, it **doesn't give up** — it automatically waits and retries until the order shows up, then applies the status update. No action is needed on your part.
Shopify orders usually appear in ShipStation within a few minutes. Real ID retries over roughly the next hour and a half, so even a brief import delay is handled automatically.
The WooCommerce → ShipStation connector imports orders on a schedule (commonly hourly), so a brand-new order may not appear in ShipStation for up to about an hour. Real ID accounts for this: it starts a little later and retries with increasing spacing over a longer window of a few hours, so the status update lands once the order finishes importing.
If a status update seems to be taking a while for a fresh WooCommerce order, this import delay is the usual cause — the update will apply on its own once ShipStation receives the order.
### Can I disable certain status updates?
Yes, you can leave any status mapping blank in the settings to disable that particular update. For example, if you don't want to automatically cancel failed orders, leave the "When ID Check Fails" field empty.
### How do I know if the integration is working?
Each ShipStation action is logged as an event on the ID check. You can view these events in the check details to see exactly what happened with the ShipStation integration.
### The ShipStation order status isn't updating, what should I check?
1. Verify the integration is enabled in Settings > Developer Tools
2. Check that your API credentials are correct using the "Test Connection" button
3. Ensure the order exists in ShipStation with the correct external reference
4. Check if you're using an order prefix and have it configured correctly
5. Review the events on the ID check for any error messages
6. Make sure there aren't multiple ShipStation orders for a single corresponding Shopify order
7. Review the order's status in ShipStation — if it's in a final state such as `cancelled` or `shipped`, then Real ID cannot update it
1. Verify the integration is enabled in settings
2. Check that your API credentials are correct using the "Test Connection" button
3. Ensure the order exists in ShipStation with the correct external reference
4. Check if you're using an order prefix and have it configured correctly
5. Review the events on the ID check for any error messages
6. Make sure there aren't multiple ShipStation orders for a single corresponding WooCommerce order
7. Review the order's status in ShipStation — if it's in a final state such as `cancelled` or `shipped`, then Real ID cannot update it
---
// File: js
import Tabs from "@theme/Tabs";
import TabItem from "@theme/TabItem";
# JavaScript SDK
You can use the Real ID JavaScript SDK for advanced custom use cases to trigger ID checks without relying on the built-in triggers available in the [before checkout flow](./flows/before-checkout.mdx).
The JS SDK lets you to programmatically require ID verification gates at any time on the frontend of your site. This includes using it as an alternative to platform-specific checkout extensions for implementing ID verification during checkout on any platform — use `mode: "modal"` to gate a checkout button until the customer has verified their identity.
## Getting Started
If you have the [before checkout flow enabled](./flows/before-checkout.mdx) and are working with an Online Storefront page in Shopify or WooCommerce, then SDK will be included automatically.
But if you have no automatic verification enabled or are working on a custom page outside of the online store, then you'll need to install the SDK on your site. Include the script tag to install it:
```html
```
Then this script tag will load the `RealID` object into your browser window.
Pasting into a Shopify theme instead? See [installing on a Shopify theme with Liquid](#installing-on-a-shopify-theme-with-liquid) for the snippet form, including how to pass logged-in customer data through Liquid.
:::tip
You'll need to use an HTTPS server for a secure connection in order to properly load the assets for the SDK as well as access the customers camera during verification.
:::
### Authentication
On **Shopify**, **WooCommerce**, and **BigCommerce** storefronts, the SDK automatically identifies your store — no additional authentication is needed.
For **custom websites** or any page where the SDK can't auto-detect your store, pass your `publicKey` to authenticate:
```javascript
RealID.createFlow({
target: "#real-id-mount",
mode: "full",
publicKey: "pk_your-public-key-here",
});
```
The `publicKey` is a client-safe key that identifies your Real ID account. You can find it in your Real ID dashboard under **Settings > DevTools**.
:::warning Keep your keys separate
The `publicKey` is safe to include in frontend code — it can only be used to create and load ID checks for your account. Your **API token** (used for the [REST API](./api/authentication.md)) is a secret and should never be exposed in client-side code.
:::
### Creating an ID verification gate
Real ID supports two separate modes for prompting ID verification from your customers.
You can simply display the ID check as an element, or you can either override a button or element that requires ID verification, such as a checkout or form submission button.
- `full` mode - embed the entire ID verification prompt directly in the current page
- `modal` mode - replace the target element with an ID verification button, then after the customer is verified or manually approved, show the original element such as a checkout or form submission button again.
### `full` Mode Example
```javascript
// Create a new ID verification wizard
RealID.createFlow({
// this will display the ID verification wizard immediately on the target.
target: "#real-id-mount",
mode: "full",
});
```
### `modal` Mode Example
You can initialize a new ID verification prompt by using the `RealID.createFlow` method. This method accepts a `target` which will be used to replace the target with the ID verification prompt.
After the customer verifies their ID, then they'll be able to see the `target` element again.
```javascript
// Create a new ID verification gate
RealID.createFlow({
// override the Checkout button until the customer is verified
target: ".checkout-btn",
mode: "modal",
});
```
Real ID will automatically replace all elements with an ID verification prompt.
:::info Works on any platform
The JS SDK works on any website — including Shopify, WooCommerce, BigCommerce, and custom-built sites.
:::
### Removing the ID verification gate
You can also remove the ID verification gate by calling `RealID.unmount()`.
This will unmount all Real ID flow instances on your frontend immediately, and will restore the `target` elements.
```javascript
// immediately remove the ID gates from the page and restore any hidden elements
RealID.unmount();
```
## Installing on a Shopify theme with Liquid
On Shopify you have two ways to get the SDK onto a storefront page, and they answer different needs:
| | Use this when |
| --- | --- |
| **Real ID app embed** — no code | You want the standard [before checkout flow](./flows/before-checkout.mdx): Real ID finds your checkout buttons and gates them for you. |
| **A Liquid snippet** — this section | You need the flow somewhere the embed doesn't reach, or with options the settings page doesn't expose — a specific element, a registration form, your own `theme` overrides. |
They coexist. If the app embed is already on, the SDK is on the page and your snippet only needs the `createFlow()` call.
### The snippet
Save this as `snippets/real-id-verification.liquid`:
```liquid
{% doc %}
Renders the Real ID verification flow.
@example
{% render 'real-id-verification' %}
{% enddoc %}
```
Then render it wherever you want verification to appear — from a section, a template, or another snippet:
```liquid
{% render 'real-id-verification' %}
```
To gate the cart's checkout button instead of embedding the flow inline, render it from your cart section (`sections/main-cart-footer.liquid` in Dawn) and switch to `modal` mode against the button your theme already renders:
```liquid
RealID.createFlow({
target: 'button[name="checkout"]',
mode: "modal"
});
```
In `modal` mode the `target` element stays hidden until the customer passes, so point it at an element that already exists on the page — not at an empty mount `
`.
:::tip Build it in the playground
The [SDK Playground](/help/sdk-playground?lang=liquid) has a **Shopify Liquid** tab on its code panel. Set your options against a mock storefront page, then copy the finished snippet — including where to save it and which section to render it from.
Both the scenario and the snippet language are linkable, so you can point someone straight at the version they need:
| Link | Opens |
| --- | --- |
| `/help/sdk-playground?lang=liquid` | the Liquid snippet for the default scenario |
| `/help/sdk-playground?scenario=store-gate&lang=liquid` | the Liquid snippet for the store gate |
| `/help/sdk-playground?scenario=registration` | the JavaScript snippet for the registration form |
`lang` accepts `js` (the default) or `liquid`. The **Copy link** button in the playground builds one of these for whatever you're looking at.
:::
### Pass Liquid values through `json`
Always pipe a Liquid value into the `json` filter instead of wrapping it in quotes:
```liquid
email: {{ customer.email | json }}
```
The filter supplies the quotes and escapes the contents, so a customer named `O'Brien` can't break out of the string and take your script with it. It also renders `null` for a logged-out visitor, which the SDK treats the same as leaving the option out — so one snippet works for both logged-in and anonymous visitors with no `{% if customer %}` branching.
### You don't need a public key
The SDK identifies your store from the storefront page itself, so a Liquid snippet never has to carry a `publicKey`. Only pass one on a page the SDK can't auto-detect — a custom site outside your Shopify storefront.
### Where Liquid can't reach
Two surfaces aren't themeable with Liquid, so a snippet can't put the flow on them:
- **Checkout** — `checkout.liquid` is unsupported for the Information, Shipping and Payment steps. Use the [during checkout flow](./flows/during-checkout.md) instead, which runs as a Checkout Extension inside checkout itself.
- **Thank you and Order status** — Shopify sunset `checkout.liquid` and additional scripts on these pages on **August 28, 2025**. Script tags still run there for non-Plus stores until **August 26, 2026**, which is also when Real ID's automatic injection into the classic order status page stops working. Use the Real ID checkout app block described in the [after checkout flow](./flows/after-checkout.mdx).
:::caution A theme snippet gates presentation, not access
Like the before checkout flow, a Liquid snippet changes what renders in the customer's browser. The page's markup is still in the source and direct URLs still resolve. For an age-restricted catalogue or anything carrying a compliance obligation, enforce the gate server-side with the [REST API](./api/checks.mdx).
:::
## Loading in a specific check
:::info Only for advanced use cases
Real ID JS SDK will automatically create the ID check and associate it with the currently logged in user for you. You typically do not need to use the REST API to create an ID check manually and pass it to the JS SDK.
Passing an ID check manually overrides this behavior, and it's only recommended for advanced use cases like invalidating past approved ID checks on a custom schedule.
:::
By default, the Real ID JS SDK will create an ID check on behalf of the customer. If the customer is logged in, it will automatically pull in their customer ID and will automatically populate their email address and name into the ID check.
Then if the customer returns to this page later, their ID check will be automatically retrieved based on their browser cookies or account details. [Find more details about this process here](./flows/remember-repeat-customers.mdx#before-checkout-flow). This helps by making sure the customer only has a single ID check by default.
However, if you need more control - such as expiring IDs or requiring customers to verify again before a specific event, then you can pass a `checkId` parameter to load a specific ID check.
You can use our [REST API to create a check programmatically](./api/checks.mdx), which will return the `checkId` that you can use to pass to the JS SDK options like so:
```javascript
RealID.createFlow({
target: "#real-id-mount",
mode: "full",
// always load this specific ID check
checkId: `abc123`,
});
```
:::tip Create checks from the browser
You can also create a check client-side with
[`RealID.createCheck()`](#creating-a-check-without-ui-createcheck) — it returns the
`checkId` without rendering any UI, so you can pass it to `createFlow` or redirect the
customer to the hosted flow yourself.
:::
:::info Fallback behavior
If `checkId` is null or an empty string, then the SDK will fallback to the normal behavior of looking up or creating a new ID check based on the currently logged in customer's information.
However, if the `checkId` is invalid, then a new ID check will not be created and the customer will be prompted to enter in their email address to load their ID check.
For best results, please be certain that the `checkId` is a valid ID check token or you safely provide a `null` or empty string.
:::
### Loading the customer's current ID check
If you are passing the customer's ID to the [create ID check REST API endpoint](./api/checks.mdx), then you can use [WooCommerce meta](./woocommerce/metadata.md) or [Shopify metafields](./shopify/metafields.md) to load the customer's check ID:
Use the `check_id` [stored by Real ID](./shopify/metafields.md#real_idcheck_id-metafield) on your customers accounts.
```liquid
```
The `json` filter supplies its own quotes and escapes the value — so don't add quotes of your own. For a visitor with no saved check it renders `null`, which the SDK treats the same as leaving `checkId` out. See [installing on a Shopify theme with Liquid](#installing-on-a-shopify-theme-with-liquid).
Use the `real_id_check_id` stored in the [current user's meta by Real ID](./woocommerce/metadata.md#accessing-the-current-users-metadata-in-php).
```javascript
// in a PHP template
RealID.createFlow({
target: "#real-id-mount",
mode: "full",
// always load this specific ID check
checkId:
"",
});
```
Use the `realid.check_id` [metafield](./bigcommerce/metadata.md#realidcheck_id-metafield) stored on the customer profile.
```javascript
// Fetch the check ID from BigCommerce customer metafields via your server
RealID.createFlow({
target: "#real-id-mount",
mode: "full",
// load the customer's existing ID check
checkId: customerCheckId, // retrieved from the BigCommerce Metafields API
});
```
Retrieve the check ID you [stored in your database](./api/checks.mdx#finding-the-check-id-for-a-customer-or-order) when the check was created via the REST API.
```javascript
// Pass the check ID you stored when creating the check
RealID.createFlow({
target: "#real-id-mount",
mode: "full",
// load the customer's existing ID check
checkId: customerCheckId, // retrieved from your database
});
```
:::tip External database supported
If you store customer accounts on a database outside of Shopify or WooCommerce, then you can use this method to retrieve the customer's ID check token and render their ID check on your site.
:::
## Prepopulate customer details
You can prepopulate customer information to reduce friction during the verification process. When provided, these fields will be automatically filled in for the customer.
### Available Fields
| Parameter | Type | Description |
| ----------- | -------- | ------------------------ |
| `email` | `string` | Customer's email address |
| `firstName` | `string` | Customer's first name |
| `lastName` | `string` | Customer's last name |
| `phone` | `string` | Customer's phone number |
### Basic Example
```javascript
RealID.createFlow({
target: "#real-id-mount",
mode: "full",
email: "customer@example.com",
firstName: "John",
lastName: "Doe",
phone: "+1-555-0123",
});
```
### Platform-Specific Examples
Use Liquid variables to pass customer data from logged-in accounts:
```liquid
```
Pipe every Liquid value through `json` rather than wrapping it in quotes — it escapes the contents, so a name containing an apostrophe can't break your script. For a logged-out visitor each field renders `null` and the SDK falls back to asking the customer for their details.
Use PHP to retrieve customer data from the current user:
```javascript
RealID.createFlow({
target: "#real-id-mount",
mode: "full",
email: "user_email; ?>",
firstName:
"",
lastName:
"",
phone:
"",
});
```
Use Handlebars or Stencil helpers to pass customer data:
```javascript
RealID.createFlow({
target: "#real-id-mount",
mode: "full",
email: "{{customer.email}}",
firstName: "{{customer.name}}".split(" ")[0],
lastName: "{{customer.name}}".split(" ").slice(1).join(" "),
phone: "{{customer.phone}}",
});
```
Pass customer data from your own application or templating engine:
```javascript
RealID.createFlow({
target: "#real-id-mount",
mode: "full",
email: currentUser.email,
firstName: currentUser.firstName,
lastName: currentUser.lastName,
phone: currentUser.phone,
});
```
:::tip Automatic Detection
On **Shopify**, if you're using [Customer Fields by Helium](https://apps.shopify.com/customr), customer data is automatically extracted without any configuration needed.
On **WooCommerce**, logged-in customer data is automatically detected from the current user session.
SDK-provided values always take priority over auto-detected values.
:::
## Cross-checking addresses
You can provide billing and shipping address data to enable [cross-checking rules](./rules/cross-checking-orders.md) that compare the verified ID against order information.
:::info
For Canadian based merchants, the **Shipping Address** is also considered for age verification. The shipping province (a.k.a `state`) and `country` fields are used to determine which age restrictions are used.
If no shipping address is provided, the issuing province of the verified ID is used.
:::
### Available Address Fields
| Parameter | Type | Description |
| ----------- | -------- | -------------------------------------------- |
| `firstName` | `string` | First name on the address |
| `lastName` | `string` | Last name on the address |
| `address1` | `string` | Street address line 1 |
| `address2` | `string` | Street address line 2 (optional) |
| `city` | `string` | City |
| `state` | `string` | State/province code (e.g., "CA", "NY") |
| `country` | `string` | 2-letter ISO country code (e.g., "US", "CA") |
### Example
```javascript
RealID.createFlow({
target: "#real-id-mount",
mode: "full",
email: "customer@example.com",
firstName: "John",
lastName: "Doe",
billingAddress: {
firstName: "John",
lastName: "Doe",
address1: "123 Main St",
city: "Los Angeles",
state: "CA",
country: "US",
},
shippingAddress: {
firstName: "John",
lastName: "Doe",
address1: "456 Oak Ave",
city: "San Francisco",
state: "CA",
country: "US",
},
});
```
### Supported Cross-Checking Rules
When address data is provided, the following cross-checking rules can be applied after ID verification:
| Rule | Required Fields |
| ---------------------- | ------------------------------------------------------- |
| Billing Name Match | `billingAddress.firstName`, `billingAddress.lastName` |
| Shipping Name Match | `shippingAddress.firstName`, `shippingAddress.lastName` |
| Billing Address Match | `billingAddress.address1`, `city`, `state`, `country` |
| Shipping Address Match | `shippingAddress.address1`, `city`, `state`, `country` |
:::info Cross-checking is optional
Both `billingAddress` and `shippingAddress` are optional. You can provide one, both, or neither. Cross-checking rules will only run if the corresponding address data is available and the rule is enabled in your shop settings.
:::
## Rules
The `rules` parameter lets you control verification behavior directly from the SDK. These options override the default server-side behavior for the current flow instance.
### Available Rules
| Parameter | Type | Default | Description |
| ------------- | --------- | ------- | --------------------------------------------------------------------------- |
| `emailLookup` | `boolean` | `true` | Whether to look up prior ID checks by email and prompt 2FA for repeat customers |
### `rules.emailLookup`
By default, when a customer starts an ID verification flow, Real ID checks if there's already a completed or in-progress ID check associated with their email address. If one is found, the customer is prompted to confirm their identity via a 2FA code sent to their email — rather than creating a new check.
Setting `emailLookup: false` disables this behavior, so every `createFlow()` call creates a fresh ID check regardless of whether the customer has verified before.
**When to use this:**
- You're using the SDK to trigger verification for a specific event (e.g., a high-value purchase) and always want a new check
- You manage check lifecycle yourself via the REST API and `checkId`
- You don't want returning customers to be prompted with a 2FA email challenge
```javascript
RealID.createFlow({
target: "#real-id-mount",
mode: "full",
email: "customer@example.com",
rules: {
emailLookup: false, // always create a new check, never return a prior one
},
});
```
:::info Default behavior preserved
When `rules` is omitted or `emailLookup` is `true`, the SDK behaves exactly as before — repeat customers are detected by email and prompted to confirm via 2FA. The [remember repeat customers](./flows/remember-repeat-customers.mdx) flow is unaffected.
:::
:::tip Other lookup methods are unaffected
`emailLookup: false` only skips the email-based duplicate check lookup. If a `checkId` is passed, that check is still loaded directly. Customer ID lookups (for logged-in Shopify/WooCommerce users) and checkout session lookups are also unaffected.
:::
## Theming
The JS SDK supports theme customization through the `theme` parameter, allowing you to override default behaviors and content.
### Theme Configuration
```javascript
RealID.createFlow({
target: "#real-id-mount",
mode: "modal",
// Changing the verified button to redirect to a specific URL
theme: {
verified: {
button: {
content: "Continue to Checkout",
url: "https://yourstore.com/checkout",
},
},
// disabling desktop users from using their desktop camera, and forcing a cross device exchange via a QR code
camera: {
desktop: {
enabled: false,
},
},
},
});
```
### Available Theme Options
#### `theme.verified.button`
Controls the call-to-action button displayed after successful ID verification.
- **`content`** (string, required): The text displayed on the button
- **`url`** (string, required): The URL to redirect to when the button is clicked
**Example:**
```javascript
theme: {
verified: {
button: {
content: "Checkout",
url: "https://mystore.com/checkout"
}
}
}
```
**Default Behavior:**
- If not specified, the button will show platform-specific default text (e.g., "Continue to Checkout" for pre-checkout flows)
- Without a custom URL, users are redirected to platform-specific default locations (checkout page, order status, etc.)
#### `theme.camera.desktop`
Controls the availability of desktop webcam option during ID verification.
- **`enabled`** (boolean, optional, default: `true`): Whether to show using a webcam as an option on desktop devices
**Example:**
```javascript
theme: {
camera: {
desktop: {
enabled: false; // Hide desktop webcam option, force mobile QR scan
}
}
}
```
**Use Cases:**
- **Security-conscious environments**: Disable desktop cameras for compliance
- **Mobile-first experience**: Encourage better photo quality through mobile capture
- **Technical limitations**: When desktop webcam quality is insufficient
**Behavior:**
- When `enabled: true` (default): Desktop users see QR code scan, desktop webcam, and manual upload options
- When `enabled: false`: Desktop users only see QR code scan and manual upload options
- Mobile devices are unaffected by this setting
#### `theme.autoScroll`
Controls whether the SDK automatically scrolls to the verification widget on initial load and between steps.
- **`disabled`** (boolean, optional, default: `false`): Set to `true` to prevent all auto-scrolling
**Example:**
```javascript
theme: {
autoScroll: {
disabled: true // Prevent auto-scrolling to the widget
}
}
```
**Use Cases:**
- **Custom scroll behavior**: You manage scroll position yourself after mounting the widget
- **Single-page applications**: Avoid unexpected scroll jumps in SPA layouts
- **Inline embeds**: The widget is already visible and scrolling would be disorienting
**Behavior:**
- When `disabled: false` (default): The page scrolls to the widget on load and after each verification step
- When `disabled: true`: No automatic scrolling occurs — the widget renders in place without affecting scroll position
### Theme Priority
Theme settings follow this priority order (highest to lowest):
1. **JS SDK theme parameter** - Passed directly to `createFlow()`
2. **Shop settings theme** - Configured in the Real ID app dashboard
3. **Default platform behavior** - Built-in fallbacks
This means JS SDK theme options will always override shop-level theme settings.
### Complete Example
```javascript
RealID.createFlow({
target: ".checkout-button",
mode: "modal",
theme: {
// Customize the success button
verified: {
button: {
content: "Complete Your Purchase",
url: "https://mystore.com/checkout?verified=true",
},
},
// Disable desktop webcam for security
camera: {
desktop: {
enabled: false,
},
},
// Disable auto-scrolling to the widget
autoScroll: {
disabled: true,
},
},
});
```
::: Additional customizations available
We can help add additional theme options and customizations. [Please contact us](https://getverdict.com/contact) if you need additional configuration or settings.
:::
## Events
The JS SDK dispatches custom events on `window` when an ID check completes. You can listen for these events to trigger your own logic — for example, enabling a checkout button, redirecting the customer, or sending events to your analytics platform.
### Available Events
| Event Name | When It Fires |
| ---------------------- | ---------------------------------------------------------------------------------------- |
| `real-id-check-loaded` | A check has been loaded or created and is now available — fired before the customer verifies |
| `real-id-check-passed` | The customer's ID check completed successfully and passed all rules |
| `real-id-check-failed` | The customer's ID check failed automated verification or was sent for manual review |
All events are standard [`CustomEvent`](https://developer.mozilla.org/en-US/docs/Web/API/CustomEvent) instances dispatched on the global `window` object.
### Listening for Events
Attach a listener to `window` to react to the verification lifecycle:
```javascript
window.addEventListener("real-id-check-loaded", (event) => {
const { check } = event.detail;
console.log("ID check available", check.id);
// e.g. record the check ID, populate hidden form fields, fetch related order data
});
window.addEventListener("real-id-check-passed", (event) => {
const { check } = event.detail;
console.log("ID check passed", check.id);
// e.g. enable a checkout button, redirect, or report to analytics
});
window.addEventListener("real-id-check-failed", (event) => {
const { check } = event.detail;
console.log("ID check failed", check.id, "step:", check.step);
// e.g. show a custom error message or route to your support flow
});
```
All event payloads use `snake_case` field names to match the [REST API response format](./api/checks.mdx#example-response).
### Event Payload
Each event delivers the same shape on `event.detail`, matching the [REST API `GET /api/v1/checks/:checkId`](./api/checks.mdx#example-response) envelope:
```javascript
{
check: {
id: "abc123",
step: "completed", // or "in_review"
shop_name: "my-store.myshopify.com",
platform: "shopify", // "shopify" | "wc" | "bc"
order: {
id: null, // Shopify admin GraphQL id or WC order id
name: null, // order display name / number
},
customer: {
first_name: "Jane",
last_name: "Smith",
email: "jane@example.com",
phone: null,
},
rules: {
testing: false, // true when the check is in sandbox mode
signature_required: false,
id_check_type: "idv", // "id" | "idv"
include_back_of_id: false,
selfie_liveness: "straight",
},
result: {
success: true, // false for failed checks, undefined before verification
},
}
}
```
:::info Private details are not available in the JS SDK
The customer's PII extracted from their ID (document number, date of birth, address, verification scores, photos) is not accessible through the client-side JS SDK. To retrieve this information, use the [REST API](./api/checks.mdx) over a secure server-to-server connection.
:::
### `real-id-check-loaded`
Fired as soon as the SDK has loaded or created an ID check for the customer. This happens before the customer has captured their ID — it's the earliest point at which a `check.id` is available.
This event also re-fires after a 2FA confirmation refreshes the check, or after the SDK retrieves the latest state from the API.
Use this event when you want to:
- Capture the `check.id` so you can correlate it with your own systems (orders, sessions, analytics)
- Pre-populate hidden form fields with the check token
- Detect whether the check is already in a terminal state (e.g., a returning verified customer)
```javascript
window.addEventListener("real-id-check-loaded", (event) => {
const { check } = event.detail;
// Store the check ID for later reference
document.getElementById("real-id-check-id-input").value = check.id;
// Returning customer who has already verified
if (check.step === "completed" && check.result?.success) {
console.log("Customer already verified");
}
});
```
### `real-id-check-passed`
Fired when **both** conditions are true:
- `check.step === "completed"`, and
- `check.job.result.success === true`
This is the canonical success signal — the ID was verified and any [cross-checking rules](./rules/cross-checking-orders.md) were satisfied.
:::info Modal mode unmounts before the event fires
In `mode: "modal"`, the SDK unmounts the flow and restores the original target element before dispatching `real-id-check-passed`. By the time your listener runs, the target (e.g., a checkout button) is already visible again.
:::
### `real-id-check-failed`
Fired when **either** condition is true:
- `check.step === "in_review"` (the check needs manual merchant review), or
- `check.job.result.success` is falsy (automated verification rejected the ID)
Inspect `check.step` to distinguish between a hard failure and a soft "pending review" state:
```javascript
window.addEventListener("real-id-check-failed", (event) => {
const { check } = event.detail;
if (check.step === "in_review") {
// Awaiting manual review by the merchant
showMessage("Thanks — your ID is being reviewed. We'll email you shortly.");
} else {
// Automated verification rejected the ID
showMessage("We couldn't verify your ID. Please try again or contact support.");
}
});
```
### Complete Example
Gate a custom checkout button until the customer passes verification:
```html
```
### Accessing the current check synchronously
If you need to read the current check outside of an event handler — for example, in code that runs after the customer has already verified, or to check state on demand — call `RealID.getCheck()`:
```javascript
const check = RealID.getCheck();
if (check) {
console.log("Current check:", check.id, "step:", check.step, "success:", check.result?.success);
} else {
console.log("No check has been loaded yet");
}
```
`RealID.getCheck()` returns the same public check object that's delivered in the events — or `null` if no check has been loaded in this session yet. It's updated whenever `real-id-check-loaded`, `real-id-check-passed`, or `real-id-check-failed` fires.
:::info Last-write-wins across multiple flows
If a page mounts more than one flow (for example, a "Buy it now" button and a side cart), `RealID.getCheck()` returns the most recently updated check. The completed check takes precedence over an in-progress one.
:::
:::tip Pair the accessor with the load event
For code that loads after the SDK has already started, listen for `real-id-check-loaded` to be notified of new checks, and use `RealID.getCheck()` to read state at any point afterward.
:::
## Creating a check without UI (`createCheck`)
`RealID.createCheck()` creates an ID check and returns it **without rendering any
verification UI**. Use it when you want to own the experience yourself — for example, on a
headless checkout, create the check and then send the customer to the dedicated hosted
flow with your own styled button.
```javascript
const result = await RealID.createCheck({
publicKey: "pk_your-public-key-here",
email: "customer@example.com",
});
if (result.status === "verification_required") {
// result.url is the ready-to-use hosted-flow URL for this check
window.open(result.url, "_top");
}
```
This is the SDK-native equivalent of how the Shopify during-checkout extension works: it
creates the check, then links the customer out to the hosted flow. See
[Responses](#responses) below for the full set of `result.status` values.
:::tip Authentication
On **Shopify**, **WooCommerce**, and **BigCommerce** storefronts the SDK auto-detects your
store. On **custom or headless** sites, pass your client-safe `publicKey` (see
[Authentication](#authentication)).
:::
### Options
| Parameter | Type | Description |
| ------------------- | --------- | ---------------------------------------------------------------------------------------------------------------------- |
| `publicKey` | `string` | Required on custom/headless sites to identify your Real ID account |
| `email` | `string` | Customer's email address |
| `firstName` | `string` | Customer's first name |
| `lastName` | `string` | Customer's last name |
| `phone` | `string` | Customer's phone number |
| `billingAddress` | `object` | Billing address for [cross-checking rules](#cross-checking-addresses) |
| `shippingAddress` | `object` | Shipping address for [cross-checking rules](#cross-checking-addresses) |
| `theme` | `object` | Flow theme (same shape as [`createFlow`](#theming)). Saved on the check and applied when the customer reaches the hosted flow at `result.url`. See the note below. |
| `rules.emailLookup` | `boolean` | Defaults to `false` for `createCheck` — always create a fresh check. Set `true` to look up returning customers (may require 2FA). |
:::info Setting `theme` on a headless check
`createCheck` renders no UI, so `theme` has no immediate effect on the call itself. It's saved on the check and applied when the customer reaches the hosted flow at `result.url` — where `theme.verified.button.url` becomes the return URL after verification and `theme.verified.button.content` sets the button label. See [Theming](#theming) for the full shape.
For your customers' security, only an `https://` return URL is honored — other URLs are ignored.
:::
### Responses
`createCheck()` **always resolves to a result object** — it never throws for a known
outcome. Switch on `result.status` to decide whether to let the customer continue to
checkout or send them to verify:
| `result.status` | Payload | What it means | Recommended action |
| ----------------------- | ------------------ | ------------------------------------------------------------------ | ------------------------------------------------------------------------------------------- |
| `verification_required` | `check`, `url` | A check was created, or an unfinished one already exists | Send the customer to `result.url` |
| `already_verified` | `check`, `url` | The customer has already completed and passed verification | **Allow checkout** |
| `not_required` | `reason?` | Your rules didn't require verification for this customer | **Allow checkout** |
| `requires_2fa` | `email` | A returning customer matched by email (only when `emailLookup: true`) | Send them to the hosted flow to confirm via 2FA, or re-call with `rules.emailLookup: false` |
| `error` | `code`, `message?` | Shop not found, a server error, or a network error | Block, or fail-open, per your policy |
The `check` payload uses the same shape as the [event payload](#event-payload) and
`RealID.getCheck()`. A successful `createCheck()` also updates `RealID.getCheck()` and
dispatches the [`real-id-check-loaded`](#real-id-check-loaded) event.
:::tip Use `result.url` instead of building the URL yourself
For the two check-bearing statuses, `result.url` is the ready-to-use hosted-flow URL for
that check. It automatically reflects your **custom Flow URL** (if your shop sets a
[white-label domain](./theming/white-label-domains.md)) and the current default flow domain
— so you never hardcode `verify.getverdict.com`.
:::
:::info Already verified vs. needs verification
`already_verified` is only returned when the existing check is **completed and passed**
(`check.step === "completed"` and `check.result.success === true`). Any other existing
check — in progress, in review, or failed — resolves as `verification_required`, so you can
send the customer back to finish or view their status.
:::
### Example
```javascript
const verifyBtn = document.querySelector("#verify-id-btn");
verifyBtn.addEventListener("click", async () => {
const result = await RealID.createCheck({
publicKey: "pk_your-public-key-here",
email: "customer@example.com",
firstName: "John",
lastName: "Doe",
});
switch (result.status) {
case "verification_required":
// hand the customer off to the hosted verification flow
window.open(result.url, "_top");
break;
case "already_verified":
case "not_required":
proceedToCheckout(); // let them through
break;
case "requires_2fa":
// returning customer — send them to the hosted flow to confirm, or re-call
// with rules.emailLookup: false to force a brand new check
break;
case "error":
console.error("Real ID:", result.code, result.message);
// block, or fail-open, depending on your risk tolerance
break;
}
});
```
```jsx
"use client";
export function VerifyIdButton({ customer }) {
async function startVerification() {
const result = await RealID.createCheck({
publicKey: process.env.NEXT_PUBLIC_REAL_ID_PUBLIC_KEY,
email: customer.email,
firstName: customer.firstName,
lastName: customer.lastName,
});
switch (result.status) {
case "verification_required":
window.location.href = result.url;
break;
case "already_verified":
case "not_required":
// continue your checkout flow
break;
case "requires_2fa":
// confirm via the hosted flow, or re-run with rules.emailLookup: false
break;
case "error":
console.error(result.code, result.message);
break;
}
}
return ;
}
```
:::info Prefer to create checks server-side?
If you'd rather keep check creation on your backend, use the secret-key
[REST API to create a check](./api/checks.mdx) (`POST /api/v1/checks`), return the `checkId`
to your frontend, and redirect to `https://verify.getverdict.com/{checkId}`. Use
`createCheck()` when you want a client-only integration with your public key.
:::
## Frequently Asked Questions
### How do I know if the Real ID JS SDK is available in the current page in Shopify?
Within your browser's JavaScript console, enter in `window.RealID`. If the result is `undefined`, then that means you need to install the JS SDK on that page.
### Will already verified repeat customers be verified automatically?
Yes, the SDK will automatically detect if the customer is logged in and has already verified their ID. Or if they are not logged in, then the SDK will find their prior ID check from the customer's email address when they start the flow.
The [same methods to remember repeat verified customers for the before checkout flow](./flows/before-checkout.mdx) are used for this SDK.
If you want to disable this behavior and always create a fresh check, use [`rules.emailLookup: false`](#rulesemaillookup).
### Will my theme and rules be applied?
Yes, the Real ID JS SDK will automatically apply the rules, content and theme you've set up in the settings page of the app.
### Can I use this on any website outside of Shopify & WooCommerce?
Yes! The JS SDK works on any website. You can use it to implement ID verification gates on BigCommerce, custom-built sites, or any other platform.
### Will this work within a Liquid Snippet in my Shopify Theme?
Yes. See [installing on a Shopify theme with Liquid](#installing-on-a-shopify-theme-with-liquid) for the full snippet, where to render it from, and how to pass customer data in safely. If the Real ID app embed is already on, the SDK is on the page and you can skip the `
```
Now save the page and this will result in the ID verification prompt to display on the page:
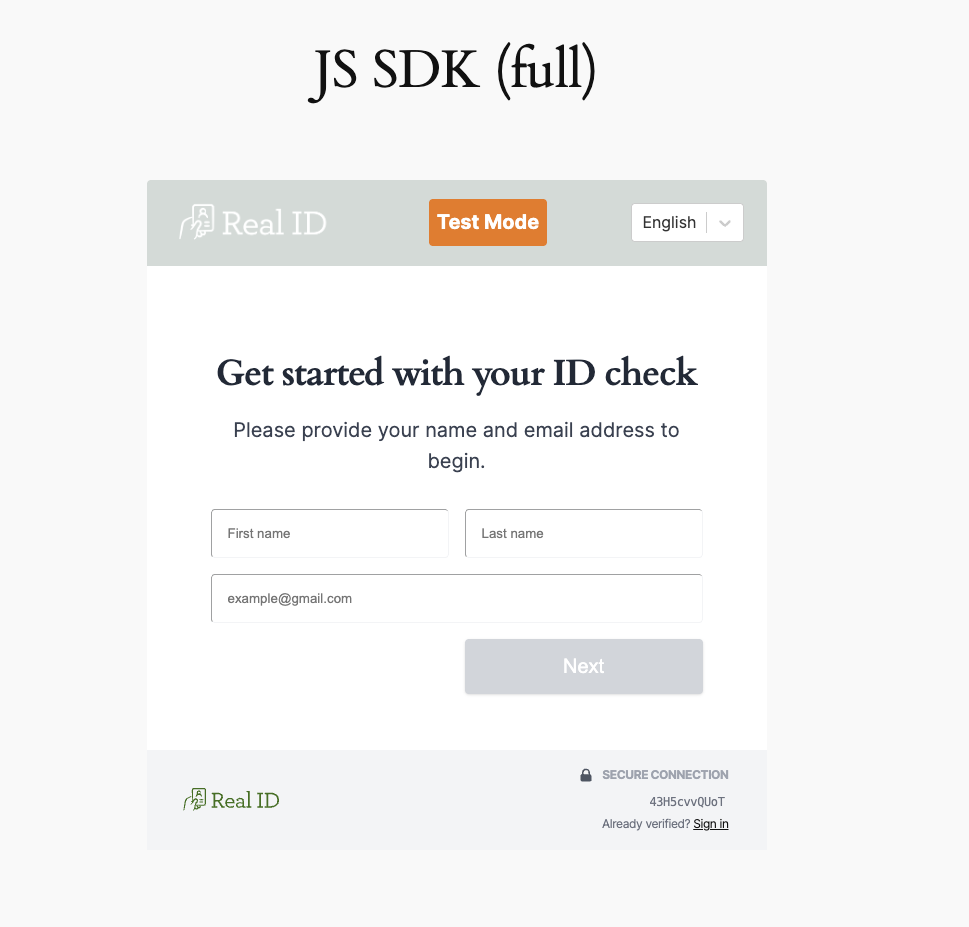
:::note ID gating specific buttons or forms
This example uses the `full` example. But you can also use the `modal` mode to gate a specific HTML element. More details on how to use [this mode here](../js.mdx).
:::
## Already verified customers
This JS SDK will remember already verified customers automatically. It will attempt to find the customer's past ID check based on their account and/or browser.
## Questions
If you have any questions about setting up this page, [please contact us](https://getverdict.com/contact).
---
// File: woocommerce/webhooks
# Set up WooCommerce Webhooks
Real ID relies on WooCommerce order hooks in order to send ID checks according to your triggers.
If you have issues with ID checks triggering late or not at all with the [after checkout](../flows/after-checkout.mdx) flow, then this guide will help you improve ID check deliverability by setting up a order created webhook.
:::tip
This guide only applies to merchants using the WooCommerce Real ID plugin with the [after checkout flow](../flows/after-checkout.mdx).
It won't apply to you if you're using the Real ID Shopify app, or are requiring ID verification [before checkout](../flows/before-checkout.mdx).
:::
## How it works
In WooCommerce you can set up webhooks, which are notifications sent to specific URLs when specific _events_ on your store happen.
Example of events include:
* `Order created` - fired when a new order is placed
* `Customer created` - fired when a new customer registers an account
* Etc.
In this guide we'll show you how to set up a WooCommerce Webhook that notifies Real ID whenever an new order is placed.
If you're using the default *Thank You* page, you most likely won't need to set up this webhook,
:::info
By default, Real ID integrates into your WooCommerce store's *Thank You* page. But if your store is using a custom URL for the *Thank You* page, it might break the order syncing with Real ID.
:::
## Getting started
First, login into WordPress and open the WooCommerce plugin settings.
Then select the *Advanced* tab, and then the *Webhooks* section.

You'll just need to fill out the fields with these values:
1. For the *Name* field, enter in `Real ID order syncing`.
2. For the *Status* field, set the webhook to `Active`.
3. For the *Topic* field, select the `Order created` topic.
4. For the *Delivery URL*, copy and paste this link: `https://real-id.getverdict.com/api/webhooks/wc/direct/orders`
5. For the *Secret*, enter in your Real ID License Key. You can find your License Key in the [Real ID dashboard](https://dashboard.getverdict.com), or within the Real ID plugin under the **Billing** section in the **Settings**.
6. For the *API Version*, select `WP REST API Integration v3`.
Then finally, click **Save** to create the webhook. You should see the webhook created with a success message.
Now on future orders, WooCommerce will automatically Real ID on new orders.
### Troubleshooting
If you see a `404` error when creating the webhook, make sure you have entered in the URL `https://real-id.getverdict.com/api/webhooks/wc/direct/orders` for the *Delivery URL* field.
If you see a `401` error, please make sure you're using the correct Real ID license key for the store you're setting this webhook.
If you see a or `405` or `500` error, [please contact us for support](https://getverdict.com/contact).
## Allowlisting Real ID's IP address
Real ID doesn't only receive order notifications from your store — it also sends requests **back** to your store to keep ID check results in sync. When a check completes, Real ID calls your store's WordPress REST API (`/wp-json/real-id/v1/webhooks/metadata`) to update the matching order and customer with their verification status.
Many managed WordPress hosts and security plugins protect that REST API with a firewall or bot challenge. If yours blocks these requests, order and customer statuses will stop updating and you may see repeated sync failures.
To prevent this, add Real ID's dedicated IP address to your host's allowlist:
```
100.51.45.70
```
Every request Real ID makes to your store comes from this single, static address.
:::tip SiteGround
SiteGround's anti-bot firewall is a common cause of blocked syncs. In **Site Tools → Security**, add `100.51.45.70` to the allowlist (and, if you use the SiteGround Security plugin, exclude it there too). Other hosts — Cloudflare, Sucuri, Wordfence, Kinsta — offer an equivalent IP allowlist under their firewall or security settings.
:::
If statuses still don't sync after allowlisting the address, [please contact us for support](https://getverdict.com/contact).
